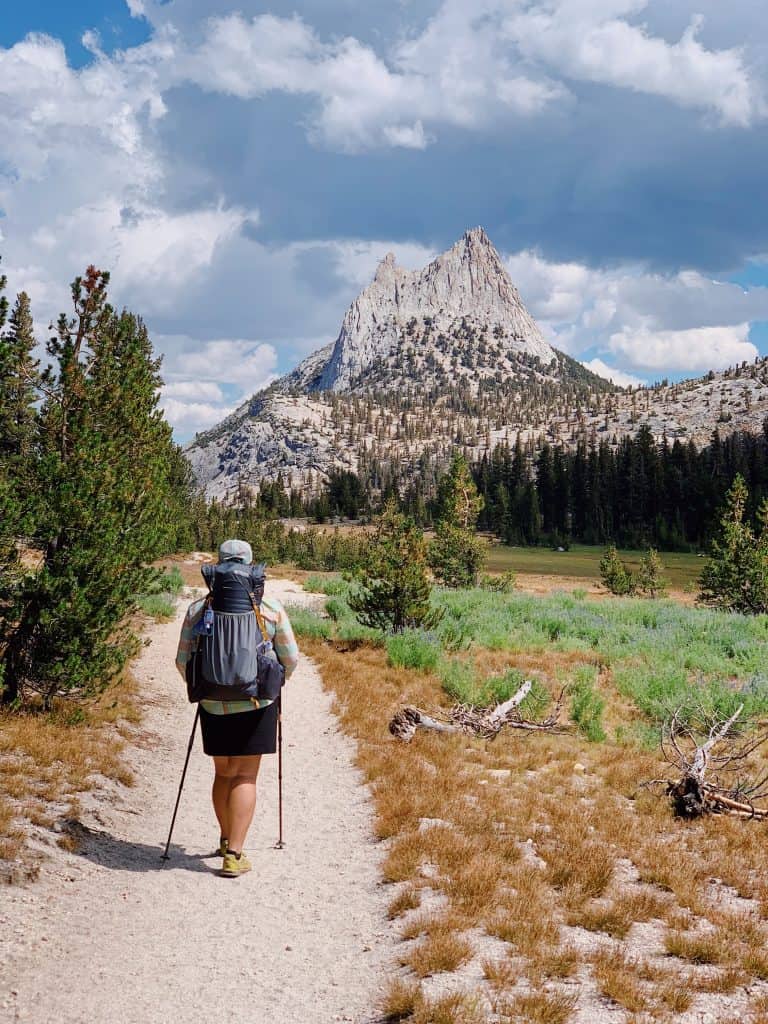
John Muir Trail Thru Hike Gear List (Lightweight for Women)
Planning your John Muir Trail gear list can feel overwhelming fast — especially if you’re trying to build a women’s backpacking setup that’s light enough for big Sierra passes but still warm, durable, and comfortable on trail.
Between the bear canister, long food carries, high-elevation weather, river crossings, endless granite, and the very real possibility of carrying way too much stuff, it’s hard to know what you actually need and what can stay at home.
I hiked the John Muir Trail with my mom after already logging thousands of miles on other long-distance trails, including the Pacific Crest Trail. Even with that experience, the JMT came with its own gear challenges — and there are definitely things I’d pack again, plus a few I’d rethink.
In this guide, I’m sharing everything I packed for the JMT, what worked well, what I’d change, and what I’d recommend for other backpackers planning their own hike. I’ll also cover women’s hiking clothing, layering, underwear, sleepwear, hygiene, and the small trail details that can make a big difference.
My goal isn’t to tell you to copy my exact setup. It’s to help you build a lighter, smarter, and more comfortable JMT packing list for your own hike.

Backcountry Emily contains affiliate links, and I may earn a commission—at no extra cost to you. Some gear in this post may have been gifted or part of a paid collaboration, but I never accept products or partnerships I wouldn’t personally recommend. All opinions are 100% my own. As an Amazon Associate, I earn from qualifying purchases. See my Privacy Policy for more information.
Backpacking Pack & Gear Storage
Backpack: Gossamer Gear Gorilla
The Gorilla 50 L pack is Gossamer Gear’s middle-of-the-road backpacking pack. It’s more streamlined than the larger Mariposa, but still has a good, supportive frame and plenty of space.
I actually own the older 40 liter version of this pack, so I can confidently say that the new 50 L version is plenty large enough for carrying a big bear canister – something you’ll need to do on the JMT!
My favorite parts of this pack are how easy both side water bottle pockets are to reach and how big the mesh stash pocket is!
Pack Accessories
- Clear Waterproof Pack Liner: I put this in my pack and stuff my important, must-stay-dry items into it. Much lighter than multiple waterproof stuff sacks!
- Thru. Summit Bum w/ the Comfy Strap: I used this fanny pack to hold my camera (the Sony a6000 w/ 24-105 f4 lens), my iPhone, and my earbuds. So basically it acted as an on-body tech bag. I think the comfy strap is definitely more comfortable, but the weight from the camera definitely stretched it out and I needed to adjust it a ton.
This is basically what I use for every backpacking trip. The Gorilla is my favorite backpacking pack and I also used it on the Colorado Trail when I hiked the following year. I still alternate with how I carry my camera gear while backpacking – fanny packs are my favorite but it’s not doable with full-frame flagship cameras, which is my current camera.
Camping Gear – Tent & Sleep System
Tent: Big Agnes Tiger Wall Platinum 3
The Tiger Wall is one of my favorite backpacking tents, and it’s the one I always choose when I want to keep weight down but also need space and don’t want to deal with a non-freestanding tent.
The Tiger Wall Platinum is lighter than the regular Tiger Wall since it uses more lightweight material and has more mesh vs. solid fabric.
Since I hiked the JMT with my mom, we split the weight of this tent. I carried the body and fly and she carried the poles, stakes, and groundsheet.
I also use this much lighter groundsheet instead of the very expensive, heavier one from Big Agnes.
You can read my full review of the Tiger Wall Platinum in this guide.
Sleeping Quilt: Enlightened Equipment Enigma 10°F
Temperatures can dip pretty low in the High Sierra, especially if you hike in the shoulder season, so I recommend having a sleep system rated at least 30°F.
I used this same Enlightened Equipment quilt on the entire Pacific Crest Trail so knew it would be great for the JMT.
I got the 10°F at the time because unisex quilts are often ~10°F too “cold” for women so it was really like a 20°F for me, and rumor had it that the quilts were under-filled (this was purchased in 2017, so things have changed)!
I love that you can customize your quilt with Enlightened Equipment. So if you need a special size or want to use lighter weight fabric – you can do that!

→ What I’d Do Differently: I still like this quilt, and actually it belongs to my mom now, so still getting plenty of use and going strong, but I do prefer my Katabatic Alsek quilt for the pad attachment straps and because the down doesn’t migrate as much in the quilt.
Sleeping Pad: Therm-a-rest NeoAir Uberlite
So Therm-a-rest doesn’t even make this sleeping pad anymore! For good reason: this was a great UL experiment but I found it to not be durable enough or warm enough for the JMT.
My favorite sleeping pad that I use for all of my backpacking now and it survived my PCT thru-hike is the classic NeoAir Xlite NXT.
It’s exactly what I’d recommend for the JMT as the R-value is 4.5, which is a good insulation rating. Ground insulation is just as important as body insulation from your quilt!

Pillow: Sea to Summit Aeros UL
Pillows can be finicky when backpacking, but this one, in the smaller size, has been my go-to. It’s way more comfortable than a stuff sack of smelly clothes or lumpy food – and only 2 oz! I like to slightly deflate mine for more comfort.

Cooking Gear, Water & Food You Need On the John Muir Trail
Stove: MSR PocketRocket Deluxe
This is my go-to cooking stove. It’s so much lighter compared to bulky Jetboils and boils water super fast. And it’s only 3 oz.!

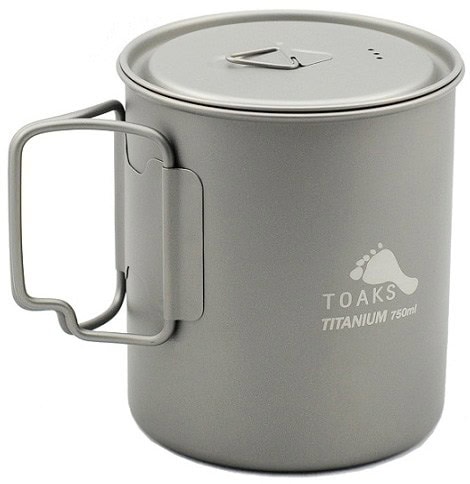
Pot: Toaks 750 ml
Again, it’s SO much lighter than a Jetboil set-up and holds the same amount of water – and it fits the Pocketrocket stove, 4 oz fuel canister, and lighter inside – the perfect little package!
Bear Canister: BearVault BV500 Journey
Bear canisters and dealing with food for 2 people on the JMT was definitely a stress point when planning. And we ended up overpacking food, like usual.
I carried the BV500 vertically in my pack, while my mom carried the Wild Ideas Bearikade Expedition, which we rented for this trip.
We did have to get creative at our Muir Trail Ranch resupply and ended up giving away a lot of our packed food, but we made it work and were able to fit 10 days of food for both of us between these 2 canisters.
You can read more about JMT food planning in this guide!

Cooking Accessories
- Utensil: Sea to Summit Frontier Ultralight Spoon
- Lighter: Bic Classic (I bring a back-up lighter in case the auto-ignite on my stove fails)
- Fuel: 4 oz canister (we both carried a 4 oz to split fuel weight vs. bringing a 8 oz canister)
- Pot Holder & Cleaner: bandana
Water Filtration
- Water Filter: Katadyn BeFree
- Water Bottles: Smartwater 1.0 L x2 → alternative reusable: CNOC ThruBottle
- Dirty Water Bag: Hydrapak Seeker 2L
→ What I’d Do Differently: I don’t really use the BeFree anymore because I do really love having the option to screw my water filter onto a water bottle and filter the water directly into my mouth, like I did on the PCT. I use the Sawyer Squeeze and CNOC combo the most, which is also what my mom used on the JMT.

Clothing & Footwear for the JMT
Hiking Clothes
- Hiking shirt: REI New Route Merino Wool Tank (discontinued) → alternative: Smartwool Active Tank
- Hiking shirt: Patagonia Long Sleeve Sun Shirt
- Hiking bottoms: Purple Rain Adventure Skirt
- Bra: Patagonia Barely (discontinued) → alternative: Brooks Chaser Bra
- Underwear: Icebreaker Men’s boxer merino blend
- Socks: Injinji Ultra Run No-Show x2
- Trail runners: Altra Lone Peak

The shirt combo worked really well. I loved being able to throw on the superlight sun shirt for protection, then take it off and relax in the tank top during breaks — or even hike in just the tank sometimes.
The merino tank seriously impressed me. It stayed way less smelly than my Patagonia synthetic sun shirt, even after over a week of sweating in it. By the last day, I had ditched the sun shirt completely and was still wearing the merino tank when I met back up with my sister: she genuinely thought I had already showered and changed into a clean shirt. Merino really is that magical.
The sun shirt still did exactly what I wanted it to do too. It was stretchy, comfortable, breathable, and never felt overly hot while hiking.
The Purple Rain skirt worked really well overall. I loved the stretchy waistband, pockets, easy bathroom access, and how simple it made layering wind pants or leggings. My only real complaint is that I wish it were a little shorter. I’m still searching for my perfect hiking bottoms, but these came pretty close.
The Icebreaker boxers definitely helped delay chafing, and I liked the longer length for coverage while wearing a skirt on trail. But as the trip went on, the inner thigh chafe still got worse — probably from never getting a proper shower. The biggest downside was durability: they ended up wearing holes near the crotch seams by the end of the hike.
→ What I’d Do Differently: I tested these socks vs. my normal midweight trail Injinji socks. They worked great, but I’d need to wear gaiters with them next time to prevent dirt and rocks from getting into the sock and rubbing against my heel.
→ Note on Trail Running Shoes: I use Altra trail running shoes for all of my hiking and backpacking. It’s what my feet love the most, what I’m used to, and my legs and ankles are adapted to this. You might need more support on your feet if you’re not used to backpacking in minimalist shoes. Danner boots are some of my favorite for wide-footed ladies like myself.
Warm & Waterproof Layers for the JMT
- Insulated Jacket: Enlightened Equipment Torrid Apex 7D Jacket (I made a custom jacket to get 7D fabric and no hood).
- Rain Jacket: Montbell Versalite
- Wind Pants: Enlightened Equipment Copperfield
The John Muir Trail is high up in the Sierra mountains – so having a warm layer is imperative. And because summer thunderstorms are a possibility in the mountains, you should definitely have rain gear. I got caught in a few afternoon rainstorms – some were crazy powerful – so it’s not something you should skimp on.
Overall, these layers worked very well – I liked having wind pants for the cooler August mornings.
→ What I’d Do Differently: I love wind pants in theory – they work great layering with shorts, skirts, and leggings, but I find them to be pretty fragile, they’re not stretchy, and I ripped a hole along the seam of these on the crotch. I did replace these after the trail and bought the custom 20 denier ones for more durability. I’d also bring a rain skirt. I thought I could get away with no rain bottoms on this hike, but I got caught in a couple of storms and wish I had it.

Sleeping Clothes
- Sleeping Top: Patagonia Capilene Lightweight
- Sleeping Bottoms: Patagonia Capilene Lightweight (discontinued) → alternative: REI Co-op Lightweight Tights
- Sleep Socks: Alpaca hand-knit from Peru → alternative: Arms of Andes Alpaca 300 sleep socks
This is my sleeping set-up for all of my summer backpacking trips, even in cooler conditions. It worked very well on the JMT because my sleeping quit & pad were so warm.
I personally like to bring a separate pair of “sacred” sleeping socks: I never wear these socks to hike in, they’re only for sleeping in and they always stay dry & not sweaty. It’s a safety item in case I get extremely cold.
Clothing Extras
- Neck Gaiter: Buff
- Sun Gloves: Outdoor Research ActiveIce
- Liner Gloves: Montbell Chameece (Japan only) → alternative: SKIDA Liner Gloves
- Balaclava: Montbell
- Camp Slides: Xero Genesis
- Sunglasses: Ray-Ban
- Hat: Patagonia LoPro Trucker
These accessories can really make or break a trip in my opinion. Sun protection was super important to me on this trip, and the sun gloves, buff, sunglasses, and hat were essential to this! Less time reapplying sunscreen on a dirt-caked body is always more attractive to me. The buff was also great for dunking in ice cold streams and then wearing as a balaclava to cool off my head and neck was so nice on the hot days.
Warm layers are also so important. I love wearing a balaclava when using a sleeping quilt to keep my face and head warm.

Electronics on the JMT
- Headlamp: Nitecore NU25
- Satellite Communications/ SOS: Garmin inReach Mini
- Phone: iPhone XS
- External Battery: Anker 20,000 PD – Updated Version
- Wall Plug: Anker PowerPort PD 2 – Updated Version
- GPS Watch: Garmin fenix 6 Sapphire – Updated Version
- Earbuds: Apple plug-in
- Camera: Sony a6000 + 24-105 f/4 G Lens + extra battery
- Charging Cords
- Maps: FarOut Guides and GaiaGPS Pro Mapping (on phone)
Battery was something I was worried about, especially leaving MTR, our longest stretch. The Anker Powercore II 20,000 mAh lasted nearly the whole time. I generally use ~50% of my phone battery (iPhone XS) every day (some days more, some less).
The battery lasted for 10 days with this amount of charging (only charging an iPhone, no other electronics). On the 11th day, it died after charging my mom’s phone (iPhone 11) from 40-100% and two headlamps. Because phone batteries have gotten larger, you might need more power today vs. back in 2020 when I hiked the trail.
You do need to bring a wall plug on the JMT because that’s how you’re going to charge your external battery at the resupply stops. You can’t rely on there being wall plugs with open USB ports for you to use. I’d make sure your powerbank and wall plug work seamlessly together and with the fastest charge time possible.

Bathroom & Hygiene
- Pee rag: Kula Cloth
- First Aid Kit: Ibuprofen, Benadryl, Immodium, Alcohol swab, Gauze squares, Neosporin, Leukotape
- Toothbrush – Travel size
- Toothpaste – Travel size
- Sunscreen: Sunbum face stick
- Lip balm: Sierra Stick – use code “backcountryemily” for 30% off!
- Bathroom Kit: Trowel & toilet paper & CuloClean bidet
- Wet wipes: Wilderness Wipes
- Monistat: for anti-chafe on my thighs
- Eyedrops: single vial (I have dry eye)
- Lotion: my all time favorite (Hempz) – I can’t stand having dry hands & feet, even while backpacking
- Snot rag: Bandana
- Mini nail clippers
- Mini tweezers
- Dry bag to hold 90% of the above items


My blog post about my toiletries and first aid kit goes way more in-depth on why I pack certain items, so I’ll let you dive in if you want more info. Toiletries are super personal, but on a longer trip like the JMT, I wanted to bring more items than what I usually bring on a backpacking trip – like tweezers in case I got a splinter (plus, eyebrows), and nail clippers to keep the toenails in check and healthy.
I also experimented with a CuloClean bidet on this trip because there’s so much water on the JMT. I only used filtered water to clean down there. Overall, I liked this experiment and I used so much less toilet paper and it kept my booty feeling more fresh, but I hated having to carry extra water with me to use it and keep track of water use while using, so I don’t really use it anymore.

Accessories & Miscellaneous Gear
- Trekking Poles: Gossamer Gear LT5
- Knife: Spyderco Ladybug
- Repair Kit: Needle, safety pin, Duct tape, sleeping pad repair, tenacious tape
- Wallet: Gossamer Gear w/ credit card, debit card, some cash
- Permit: You’ll have a paper permit either printed out or issued from Yosemite – carry it somewhere with easy access because rangers will ask for it!
I 100% recommend having trekking poles for the John Muir Trail. They will help so much will all the climbs and descents from the passes. I always use poles when I’m backpacking (especially because of my non-freestanding tent) and think they are so good for stabilizing yourself if you trip and helping your knees on descents.
Something I didn’t bring that I should have? A small lightweight microfiber towel. Would have come in handy for drying off after I took a shower on resupply stops and for the small condensation inside my tent.
Tips For Lightening Your Pack for the John Muir Trail
Only Pack the Essentials
As an ultralight thru-hiker, I have a different perspective than most backpackers. And on the John Muir Trail, this matters because your pack will probably feel heavy no matter what — especially after a resupply when your bear canister is stuffed with several days of food.
One of the easiest ways to save weight is by not packing extra clothing “just in case.” You do not need a fresh outfit for every day on the trail. I’d bring one set of hiking clothing and one set of sleep clothing, plus your necessary layers for warmth and weather.
Same with underwear. I know some people like bringing 5+ pairs, but that adds up fast. If you wear natural fibers like merino or alpaca, you can usually get away with fewer pairs (3 max, please!) and rinse/rotate as needed.
Obviously, you do you. But I hiked the entire Pacific Crest Trail — 5.5 months of hiking — in one set of clothing. You’ll be okay on the John Muir Trail with less than you think.
Be Smart About Your Layers
The John Muir Trail is not the place to skip layers just to save weight. You’ll be hiking at high elevation, sleeping in the mountains, and potentially dealing with cold mornings, afternoon thunderstorms, wind, hail, or even snow depending on the year and timing.
But you also don’t need a bunch of duplicate layers.
Instead of packing multiple fleece jackets, extra leggings, extra shirts, and “town clothes,” focus on a simple layering system: hiking clothes, sleep clothes, a warm layer, rain protection, and sun protection. The goal is to make every piece earn its spot.

Limit Stuff Sacks
Stuff sacks are one of those sneaky things that can add unnecessary weight. Instead of putting every category of gear in its own dry bag, line the inside of your pack with a waterproof pack liner or trash compactor bag. Put everything that absolutely needs to stay dry inside that liner — like your sleeping bag, sleep clothes, and puffy jacket — and that becomes your dry bag.
Some backpackers can save several ounces, or even close to half a pound, just by cutting down on extra dry bags and stuff sacks.
I still like using small bags where they actually help: toiletries, electronics, first aid, and small loose items. But your sleeping bag and clothes don’t necessarily need their own separate dry bags if they’re already protected inside your pack liner.
Repackage Toiletries
Don’t bring full-size toiletries from home. This is especially important on the John Muir Trail because everything scented has to fit inside your bear canister — and that space disappears fast.
Bring only what you need for the section between resupplies. Travel-size toothpaste, tiny sunscreen containers, mini soap, and small amounts of lotion or anti-chafe balm can save both weight and bear canister space.
A trick that works for some people is using contact lens cases for tiny amounts of sunscreen and soap. You can also use small plastic jars or dropper bottles. Just make sure anything scented is sealed well and goes in your bear canister at night.
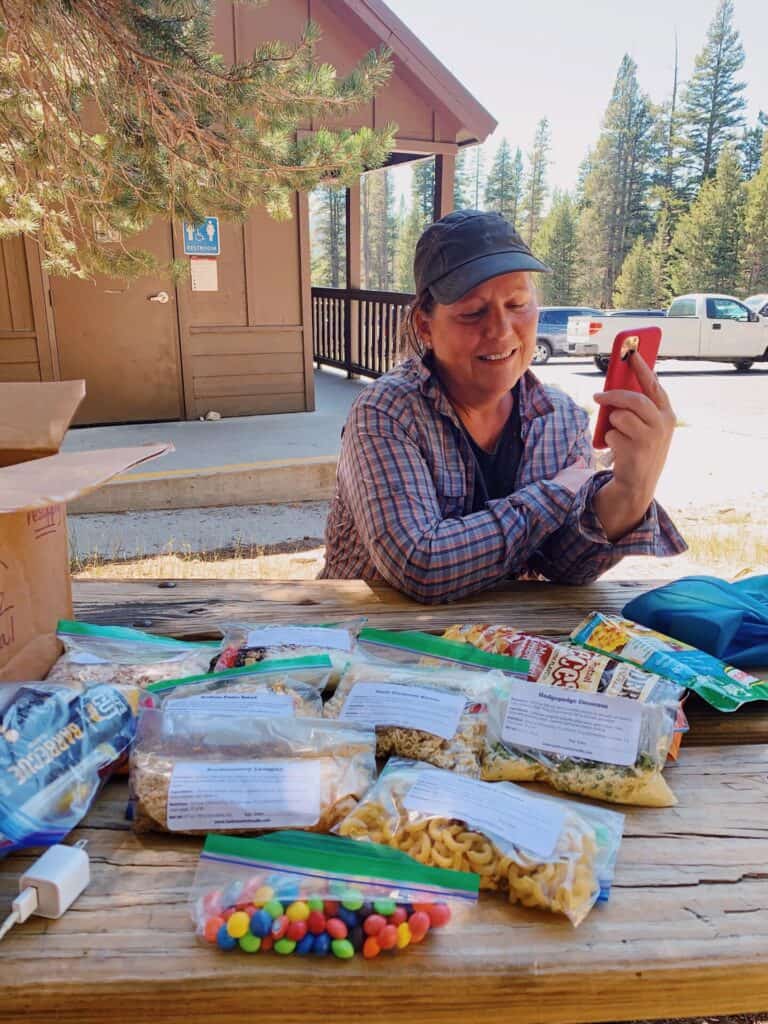
Reduce Packaging Before You Pack Your Bear Canister
Food is usually one of the heaviest parts of a John Muir Trail pack, and it also takes up the most space. Before each section, take food out of bulky packaging and repackage it into smaller bags.
This makes it easier to fit everything in your bear canister and helps you avoid carrying unnecessary wrappers, boxes, or air-filled packaging. Just don’t forget to label anything that might become mystery powder by day three.
Also, be realistic about how much food you actually eat. Packing too little is a problem, obviously, but packing way too much means carrying heavy food you may not even want at 11,000 feet.
Get Lighter Gear Where It Matters Most
The “Big 3” — your backpack, sleep system, and shelter — are usually the heaviest items in a backpacking setup. If you’re trying to lower your John Muir Trail pack weight, these are the first places I’d look.
That does not mean you need to buy the most expensive ultralight gear out there. But if your tent, sleeping bag, and backpack are all heavy, small upgrades here can make a big difference.
For the John Muir Trail, I’d prioritize a lightweight but warm sleep system, a shelter that can handle Sierra weather, and a backpack that carries comfortably with a bear canister and several days of food.
Don’t Cut the Wrong Things
There’s a difference between packing light and being underprepared. The John Muir Trail goes through remote, high-elevation terrain, and you still need to carry the essentials: navigation, layers, rain gear, sun protection, first aid, water treatment, and a bear canister.
The goal is not to have the lightest pack possible at all costs. The goal is to cut the unnecessary stuff so you can carry the important stuff more comfortably.

Packing Like a Pro on the John Muir Trail
This list is what worked for me after hiking the John Muir Trail and logging thousands of miles on other trails, including the Pacific Crest Trail, so every item has been put through its paces. The JMT is a unique trail because your gear has to handle long food carries, bear canister logistics, high-elevation weather, exposed passes, and plenty of Sierra sunshine.
Whether you’re trying to go ultralight, upgrading a few key pieces, or just figuring out what you actually need for your first big Sierra backpacking trip, I hope this gives you a solid starting point to plan with confidence.
Got questions about any of the gear or your own John Muir Trail prep? Drop them in the comments — I’m happy to help however I can.