15+ Best Winter Hikes in Yosemite National Park
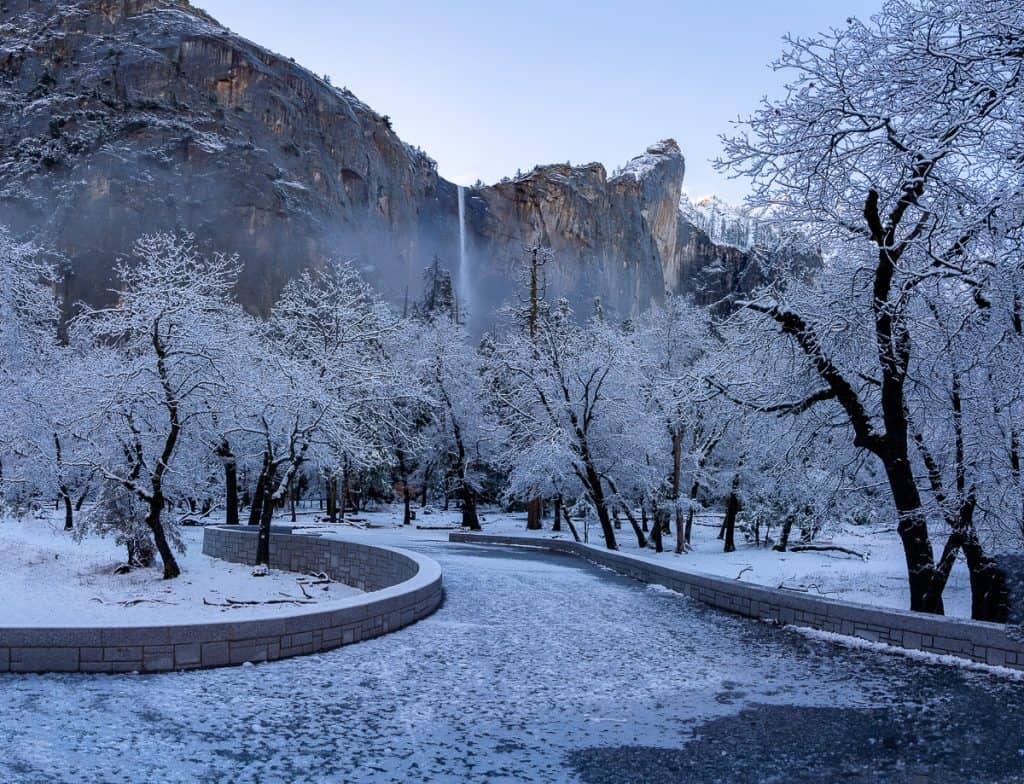
Visiting Yosemite National Park in the winter months is a really wonderful experience. There are fewer crowds, the park feels quiet, and there are activities you can’t do in the summer – like winter hiking and snowshoeing!
I’ve been visiting Yosemite 1-2 times each winter season for the past six years and I’ve done lots of hiking and snowshoeing in all weather conditions in the park, and I am going to share some things I’ve learned along the way, including some of the best winter hikes in Yosemite.
I’m also going to go over a little bit about Yosemite’s winter weather and what to expect in different parts of the park, winter hiking safety tips, and gear you should always bring with you on winter day hikes.
The great thing about day hiking in Yosemite in the winter is that while it may sound intimidating, there are actually trails for all levels of hiker: whether you’re looking for a bigger adventure, or just want to stroll in a winter paradise. After reading this guide, you’ll feel prepared to choose the right hikes for your activity level, and excited for your winter trip in Yosemite!
Backcountry Emily contains affiliate links and I may receive compensation - at no extra cost to you! As an Amazon Associate I earn from qualifying purchases. See my Privacy Policy for more information.
Can You Hike and Snowshoe in Yosemite in the Winter?
Yes! Many hiking trails in the park are open. In fact, there are only a few trails that are entirely closed in winter. But, even though most trails are open, not all of them are easily accessible.
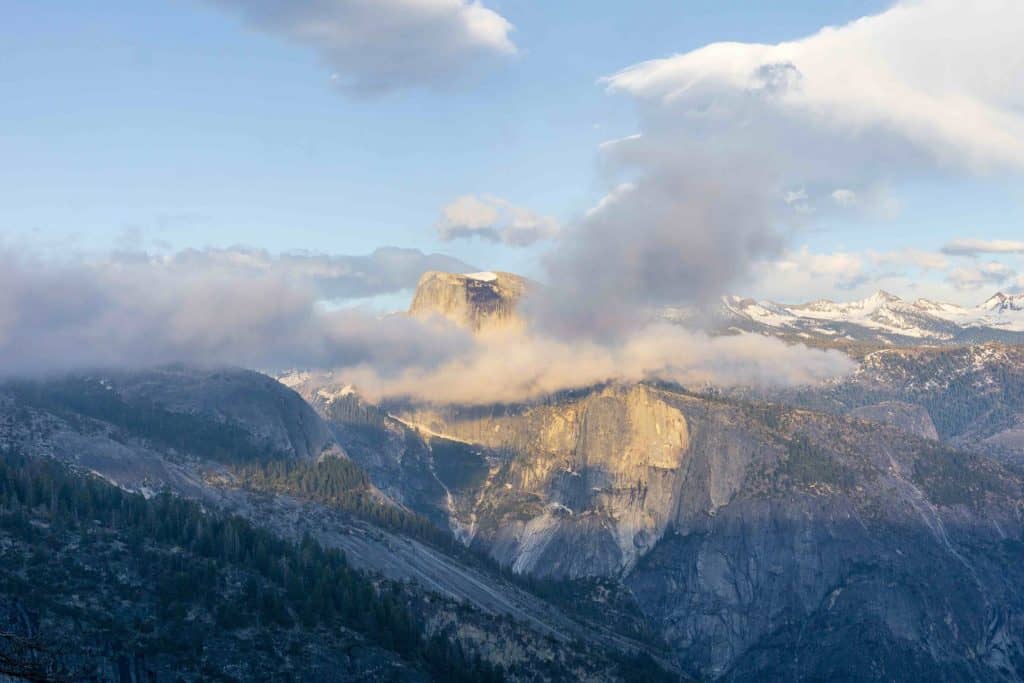
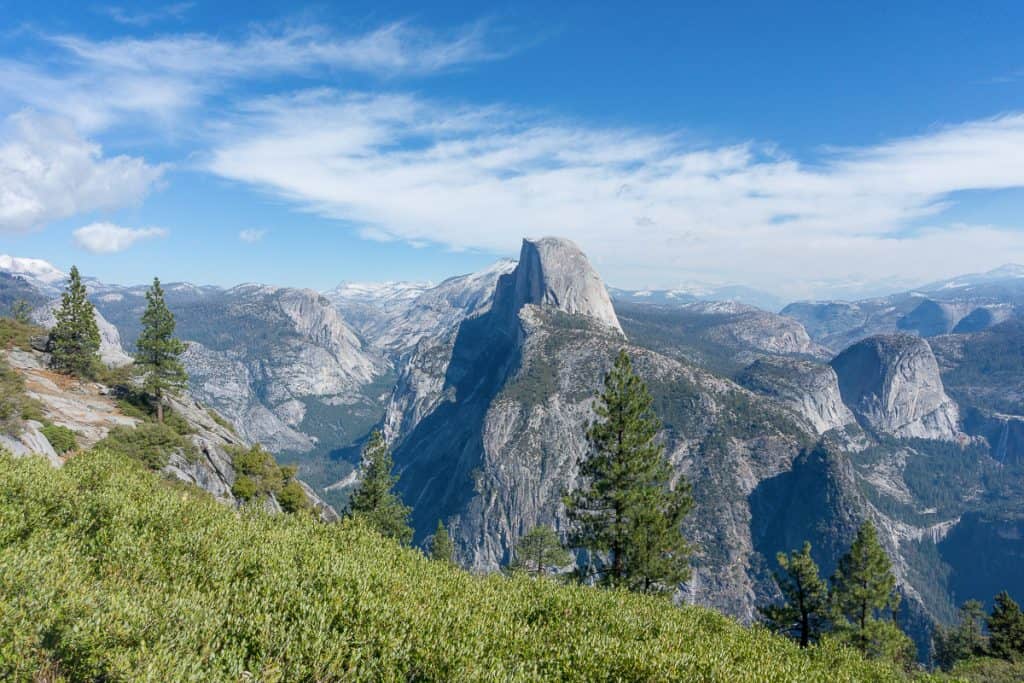
Certain trails are downright dangerous to attempt in the winter months, including the most popular Half Dome hike. Every year in October, rangers remove the poles and planks along the cable route to the summit of Half Dome, ending the hiking season for Half Dome.
Remember: Half Dome is a steep, nearly 45° angle slope, and is pure granite. Add in rain and snow and freezing temperatures, and the route becomes an icy death trap in winter. You should not attempt this hike from November – May.

The most popular trails, the Mist and John Muir Trail, may be partially closed in the winter months, depending on snow and ice. You can still hike to Nevada Fall though using open portions of both trails.
Sometimes the park needs to close the 4 Mile Trail at Union Point, which is a little over halfway to the top due to dangerous ice accumulation on the trail beyond that point.
And sadly, since Tioga Road closes after the first major snow storm, most of the trails starting from there (like Cathedral Lakes) are not accessible for hiking in the winter months.
The other thing to note is Glacier Point Road also closes after the first major storm, but the road to Badger Pass, which is the starting point for snowshoe adventures along Glacier Point Road, doesn’t open until there is sufficient snowfall – usually mid-December. So there’s usually a month where you can’t access Glacier Point Road at all. This happens in the spring too, when the park works to completely clear and repair the road for summer.
With all that said, all other trails in Yosemite are technically open for business in the winter! However, the conditions on those trails are going to be much different than what you’d experience in summer and fall, especially if they are located above 6,000 feet in elevation.
In Yosemite Valley, most trails will be a mixture of dry trail, wet trail, slush, ice, and sometimes snow. You will mostly be hiking on these trails. Outside of the Valley, there is much more snow, and you should expect to wear snowshoes on most hikes.

If you want to really go hiking deep into the wilderness during the winter, you will need to be prepared for lots of deep snow, and be trained in avalanche safety.
We’re going to focus on doable day hikes and snowshoeing routes in the winter in this post. If you’d like to venture further, you should check the National Park wilderness conditions page, and the Tuolumne Meadows winter ranger blog.
For the most accurate conditions in Yosemite National Park, you should always refer to the current park conditions webpage.

Winter Weather in Yosemite
Yosemite Valley is at 4,000 feet above sea level, and the Glacier Point area is about 7,000 feet above sea level. The average highs from November – March in Yosemite Valley are 40 – 60° F and overnight lows are regularly below freezing. Temperatures above 6,000-7,000 feet will usually be 10°F cooler – or more! – depending on the day.
The general weather in Yosemite and the greater Sierra can be really pleasant during the winter. Most of the days I’ve spent in Yosemite during the winter months have actually been full of sunshine. And that holds true for a lot of the winter!


But of course, winter storms come in to dump all that snow. Storms in Yosemite can be really short – a one night affair – or longer, multi-day, bomb cyclone events. Snow levels generally range from 3 – 10 feet of snow on the ground above 6,000 feet depending on the year and aspect (if the area is shaded during the day or not).
Yosemite Valley usually doesn’t have major snow accumulation, and if it does snow a lot, it will usually melt in a matter of days (sometimes it will last longer during especially cold and stormy winters).
But, it does rain, and when snow melts and it’s still cold, ice can form on trails, especially in shaded areas like along the Mist Trail. So even if it’s a nice day in the Valley, I would still be prepared for moderate winter conditions on trails to be on the safe side.
Read next: Learn all about visiting Yosemite National Park in the winter, including driving directions, non-hiking things to do, places to stay, and more!
Best Winter Hikes in Yosemite National Park
Please remember to respect our wild spaces and practice the 7 Principles of Leave No Trace while you are out hiking in Yosemite and everywhere you visit!
Mirror Lake Loop
- Round-trip distance: 5 miles
- Elevation gain: 300 feet
- Difficulty: Easy
- Closest shuttle stop: #17, Mirror Lake
- Bathrooms: Yes, at Mirror Lake
- Pets: Only allowed on first paved mile.

Mirror Lake isn’t really a lake – it’s a widening of Tenaya Creek – and if you see it in the dead of winter it might look like an iced-over pond or a snowy meadow! I love looking directly up the face of Half Dome from this trail – it’s such a surreal view and the only trail that brings you nearly right underneath the granite dome! There are also beautiful views of Basket Dome and Mt. Watkins. If you do the full lake loop, you’ll want to bring microspikes to wear on your shoes since a lot of the trail is shaded in the winter.
You can also opt to just hike the first mile of the trail to the “lake” and the interpretive signs. This is a great option if you want a more casual walk, and dogs are allowed on this paved portion of the hike only! To the lake and back is 2 miles round trip with 100 feet elevation gain.
Check out the trail:
Dewey Point Snowshoe
- Round-trip distance: 7.3 miles
- Elevation gain: 1,000 feet
- Difficulty: Moderate
- Closest shuttle stop: N/A, must drive & park
- Bathrooms: Yes, at trailhead.
- Pets: No

If you can only do one hike on your winter trip, make it this one! This is a half-day snowshoe hike from the Badger Pass ski area on Glacier Point Road to Dewey Point. You’ll snowshoe along Glacier Point Road for ~ 1 mile before turning into the forest on the special winter route to Dewey Point. There are two winter trails to the point. The one linked below is the easier Meadow route. You can also try the Ridge route for more elevation gain. The views of El Capitan and Yosemite Valley are stunning from the point (as long as the weather is clear)!
No snowshoes? No problem! Rent them from the Badger Pass Ski Area.
Check out the trail:
4 Mile Trail to Union Point
- Round-trip distance: 6.4 miles
- Elevation gain: 2,400 feet
- Difficulty: Hard
- Closest shuttle stop: #11, Four Mile Trailhead
- Bathrooms: No
- Pets: No

This trail is a Yosemite Valley classic. In the winter it switchbacks underneath oak trees up to Union Point, where it normally closes unless it is a drought year winter. This trail has awesome views of Yosemite Falls once you get above the trees, and you get a sweet view of Half Dome from Union Point. Be careful on this trail: it spends most of the day in the shade and can be icy. Make sure to bring microspikes with you.
Check out the trail:
Tuolumne Grove of Giant Sequoias
- Round-trip distance: 2.75 miles
- Elevation gain: 600 feet
- Difficulty: Moderate
- Closest shuttle stop: N/A, must drive & park
- Bathrooms: Yes, at trailhead.
- Pets: No

I love this winter hike because it’s not very well known! It seemed like we had the entire Sequoia grove all to ourselves when we visited, which was a super peaceful experience. Make sure you bring snowshoes for this hike: snow is deeper here than in Yosemite Valley and we noticed a lot of people struggling with the hike if they weren’t wearing them.
Check out the trail:
Valley Loop Trail
- Round-trip distance: 20 miles
- Elevation gain: 1,000 feet
- Difficulty: Moderate
- Closest shuttle stop: Any
- Bathrooms: Generally only when the trail is passing by other trailheads.
- Pets: No

The stats for this hike include the portion of the trail that is also the Mirror Lake Loop. If you choose not to do the Mirror Lake Loop portion, you can subtract 5 miles.
This trail is a really lovely stroll on the valley floor. I have yet to complete the entire loop because it is so long! I usually use the loop trail as a means to get places on the valley floor. But, there are some spots along this trail where you get views you literally can’t see anywhere else in the park! It’s like finding your own special secret spots in Yosemite.
You’ll probably be fine in just your hiking boots on this trail unless there is a lot of snow on the Valley Floor – then you might want snowshoes!
Check out the trail:
Lower Yosemite Falls Loop
- Round-trip distance: 1.2 miles
- Elevation gain: 55 feet
- Difficulty: Easy
- Closest shuttle stop: #6, Lower Yosemite Fall
- Bathrooms: Yes, at trailhead.
- Pets: Yes

I always recommend this hike to everyone who visits Yosemite because you get so much reward for so little effort! Lower Yosemite Fall is stunning and the paved path is great for beginners and kids. Part of the trail is also wheelchair-accessible. And, the whole loop is dog-friendly!
Just a head’s up that there is a steeper portion on the paved, western portion of the trail that can get very icy, so please be safe! It is also not wise to get on the rocks closer to the waterfall – they are not stable and in the winter are slick and can be very icy.
Check out the trail:
Washburn Trail to Mariposa Grove
- Round-trip distance: 4 miles
- Elevation gain: 550 feet
- Difficulty: Moderate
- Closest shuttle stop: N/A, must drive & park
- Bathrooms: Yes, at trailhead.
- Pets: No
This is the only way you can visit Mariposa Grove in the winter months! You can take the Washburn Trail, which parallels the road, or you can just walk the closed, paved road to Mariposa Grove. This road is NOT plowed or groomed in the winter, so be prepared to use microspikes or snowshoes to help walk.
There are more trails inside Mariposa Grove once you reach the entrance if you want to explore more.
Check out the trail:
Upper Yosemite Falls
- Round-trip distance: 7.2 miles
- Elevation gain: 3,300 feet
- Difficulty: Hard
- Closest shuttle stop: #7, Yosemite Valley Lodge
- Bathrooms: Yes, at Camp 4.
- Pets: No
This hike is one of the best hard trails to do during the winter months because it gets a lot of sun exposure during the day! There is still potential for the trail to be snowy and icy though, so make sure you are totally prepared for the conditions on the trail.
Check out the trail:
Pro tip: Looking for something a little shorter, but still has amazing views? Hike to Columbia Rock on the Upper Falls trail. This hike is only 2.5 miles with 1,000 feet of elevation gain. Check it out here.
Cook’s Meadow Loop
- Round-trip distance: 1 mile
- Elevation gain: none
- Difficulty: Easy
- Closest shuttle stop: #6, Lower Yosemite Fall
- Bathrooms: Yes, at Lower Yosemite Fall trailhead.
- Pets: Yes, on paved paths and boardwalks only.

This is another must-do every time you’re in Yosemite! It’s such a nice walk through the meadow and you can easily combine the Lower Yosemite Falls trail with it, and add on other nearby attractions like Swinging Bridge, the Chapel, Sentinel Meadow, and Sentinel Bridge.
You’ll have beautiful views of Half Dome, Yosemite Falls, and more! I recommend doing this hike in the late afternoon or at sunset time.
Dogs are also allowed on the pavement and boardwalks of this trail.
Check out the trail:
Snow Creek Trail
- Round-trip distance: 9.4 miles
- Elevation gain: 3,000 feet
- Difficulty: Hard
- Closest shuttle stop: #17, Mirror Lake
- Bathrooms: Yes, at trailhead.
- Pets: No

The Snow Creek Trail is a doozy and I only recommend it for the most experienced hikers! Even though the trail is on the northern valley walls, it stays more shaded during the winter months because it is deeper in Tenaya Canyon vs. the Upper Yosemite Falls Trail. So you’ll want to be prepared for snowy, icy conditions.
This hike is so rewarding though: you’ll get really unique views of Half Dome and be able to peek into Tenaya Canyon and the high country from higher up on the trail.
Check out the trail:
Pro tip: It might not seem like it based on the stats, but the Snow Creek Trail has the steepest climb out of Yosemite Valley. All of the 3,000 feet of gain happens in 2.5 miles.
Glacier Point Snowshoe
- Round-trip distance: 21 miles
- Elevation gain: 3,000 feet
- Difficulty: Hard
- Closest shuttle stop: N/A, must drive & park
- Bathrooms: Yes, at trailhead only.
- Pets: No
This snowshoe hike is only for the most physically fit and experienced snowshoers! It is a very, very long day, and even though you are staying on Glacier Point Road, snow travel is much more tiring than dry pavement.
You will 100% need your headlamp at some point on this hike: you’ll either be starting before the sunrise or ending after sunset to complete this as a day hike. In fact, most people who do this as a day hike will be on XC skis or backcountry skis, which is definitely the recommended travel method vs. snowshoes. But, I wanted to include it as an option for the especially ambitious adventurers!
Check out the trail:
Bridalveil Fall
- Round-trip distance: 0.8 miles
- Elevation gain: 100 feet
- Difficulty: Easy
- Closest shuttle stop: N/A, must drive & park
- Bathrooms: Yes, at trailhead.
- Pets: Yes
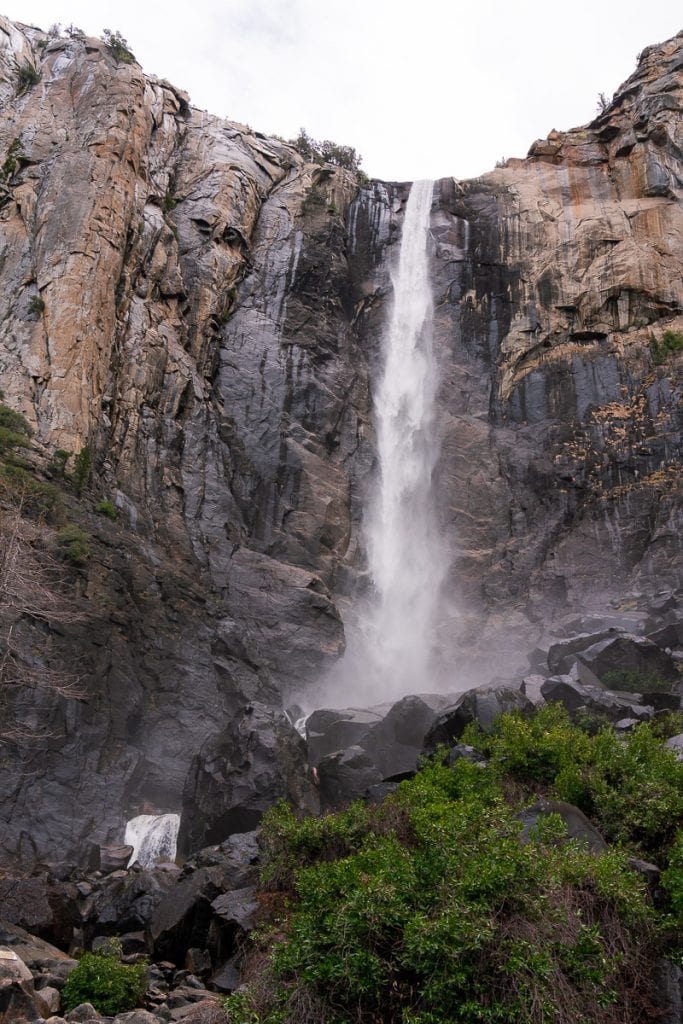
Bridalveil Fall is an easy, super short hike that brings you right underneath the waterfall! Make sure you wear your rain jacket: it’s almost impossible to stay dry on this one. And like Lower Yosemite Falls, its not wise to get on the rocks closer to the waterfall – they are not stable and in the winter are slick and can be very icy. Dogs are also allowed on this trail.
I do this short walk every time I’m in Yosemite because it’s super close to the Tunnel View viewpoint. Parking is pretty easy here too since it’s a big lot and people usually don’t spend tons of time here.
Check out the trail:
Vernal & Nevada Falls Loop
- Round-trip distance: 6.6 miles
- Elevation gain: 2,200 feet
- Difficulty: Hard
- Closest shuttle stop: #16, Happy Isles
- Bathrooms: Yes, at trailhead, Vernal Fall footbridge, top of Vernal Fall, and top of Nevada Fall.
- Pets: No
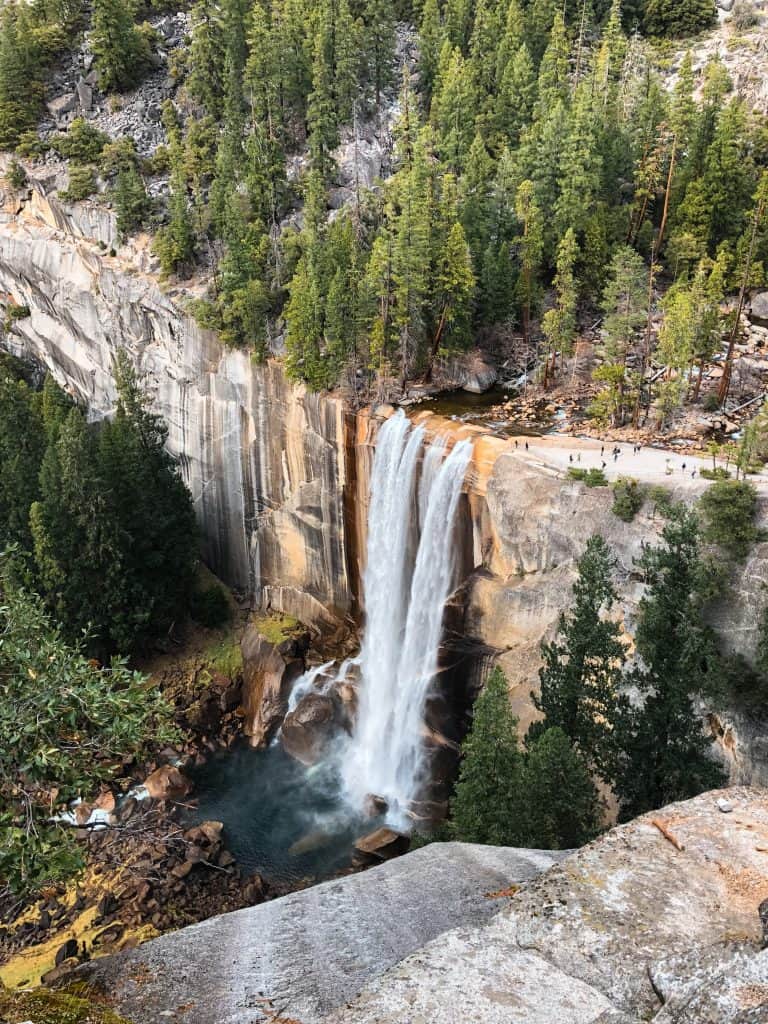
This hike is one of the must-dos for every hiker visiting Yosemite! Water may be slow flowing in the winter, but you’ll still get to see two beautiful waterfalls on this giant semi-loop hike on the two most famous trails in Yosemite: the Mist Trail and the John Muir Trail.
Please be careful on this hike in winter because the trail is very shaded and can be very icy. The park does close portions of both trails in the winter due to dangerous conditions, but you are still able to hike open sections of the trails to get to the top of Nevada Fall. I highly recommend bringing microspikes and trekking poles for this one!
Check out the trail:

Pro tip: Part of the Mist Trail between the Vernal Fall footbridge at the top of Vernal Fall may be closed. If so, just take the John Muir Trail and the Clark Point Trail to get back to the top of Vernal Fall, then continue on the Mist Trail to the top of Nevada Fall. You are not able to take the John Muir Trail all the way to Nevada Fall in the winter due to dangerously icy conditions on that trail.
Pohono Trail to Artist Point
- Round-trip distance: 2 miles
- Elevation gain: 750 feet
- Difficulty: Moderate
- Closest shuttle stop: N/A, must drive & park
- Bathrooms: No
- Pets: No

The Pohono Trail starts at the Tunnel View parking lot and goes all the way to Glacier Point, miles away! Most people take this trail to get to Artist Point, which is a viewpoint that is similar to the view at Tunnel View, but gives a slightly different perspective and allows you to escape the crowds of the viewpoint! This trail is mostly shaded, so be sure to have microspikes to deal with ice, at minimum.
Check out the trail:
Try AllTrails+
Download offline maps, preview trails in 3D, access National Park guides and more! Use code “backcountryemily30” to get 30% off of AllTrails+.
Chilnualna Falls Trail
- Round-trip distance: 7.75 miles
- Elevation gain: 2,200 feet
- Difficulty: Hard
- Closest shuttle stop: N/A, must drive & park
- Bathrooms: Yes, at trailhead.
- Pets: No
I still have not done this hike in summer or winter! (makes note to do it next time…) You are still able to hike to this waterfall in the southern part of the park, and it will be nearly desolate out there since most people stick to the Valley in the winter. Enjoy the solitude, but be sure to have snowshoes, microspikes, and check the avalanche forecast before embarking on your hike. Some of the slopes on this trail are above 30°.
Check out the trail:
Hetch Hetchy: Wapama Falls
- Round-trip distance: 4.7 miles
- Elevation gain: 1,000 feet
- Difficulty: Moderate
- Closest shuttle stop: N/A, must drive & park
- Bathrooms: Yes, at the backpacker’s camp above the dam.
- Pets: No

Hetch Hetchy is sometimes forgotten about in Yosemite! It’s a great option in the winter since this trail gets good sunlight, and you can see snow on taller rock features after storms. You may not be able to hike all the way to Wapama Falls since the trail does close sometimes, but the rest of the views are still worth it!
Check out the trail:
Read next: Learn about the best hotels to stay at when you’re visiting Yosemite in the winter months.
Gear You Need For Winter Hiking in Yosemite
You should bring everything you’d normally bring on a summer hike, but with a few important add-ons to stay safe and be comfortable in the winter. You’ll also want to dress for cold weather conditions and have a good winter layering system to stay safe, dry, and warm.
The 10 Essentials
Everyone should carry the 10 Essentials with them on every day hike, and they’re even more important during the cold winter months. So make sure these items have a place in your pack:

Winter-specific hiking gear
- Backpack: You’ll need something that can carry all of your layers! A 25 – 30 L pack is usually good for winter adventures! >This is my go-to day pack.
- Winter boots: When hiking in snow, I recommend wearing waterproof, insulated boots. 200g insulation is usually enough. >These are my favorite winter boots.
- Gaiters: These are useful when snowshoeing in deep snow to keep snow from getting down your boots. You wear them on top of your boots and pants. >Make sure you buy waterproof ones!
- Microspikes: These go on your boots and are helpful for traction on packed down, icy trails. >I swear by these spikes.
- Snowshoes: You’ll want to use snowshoes on soft snow so you don’t sink into it! Having a heel lift makes steeper climbs easier. >I recommend these ones.
- Trekking poles: Poles are really helpful in the snow and on slippery trails to have more points of contact. Get ones with snow baskets! >I use these.
- Hand warmers: These make such a difference on a cold day! >I buy these ones.
- Beanie: I feel so much better when I wear a beanie to cover my head and ears when I’m hiking in cold temperatures. >This is one of my favorites.
- Soft-shell pants: Soft shells are a little thicker than regular pants and have DWR applied to help shed snow and water, but they’re not totally waterproof. >These are the ones I use.
- Phone charger: Batteries die faster in cold weather! So make sure you keep your phone and an external battery in a pocket close to your body. >This is the external battery I use.
- Detailed topographic hiking trail map: Super important in winter! >This is the one I use for Yosemite National Park.
- Satellite device: Winter has unique challenges and if something does go wrong on your hike and you need rescuing, you need help FAST. I always recommend people carry the Garmin inReach in an accessible place on their packs. >Buy one here.
- A sit pad: Trust me, this is such a great gear item to have when hiking in the snow! It makes it possible for you to sit down without getting your butt wet and cold (& way better than sitting on an uninsulated jacket)! >This is the one I love.
Yosemite Winter Hiking Safety Tips
Hiking in snowy conditions is a lot of fun. It makes me feel like a kid again and I love it! It can really feel like you’re on another planet in snowy conditions – in a good way!
But, there are higher consequences to hiking and snowshoeing in the winter. Because if something goes wrong, it’s much harder to stay warm and can be harder to rescue you or self-evacuate. So being safe when hiking in the winter is super important!
- Leave your plans with a trusted person and make sure you check-in with them.
- Pack the right gear for winter adventures and think about the worst-case scenario and what you would do.
- Check the weather. Use websites like weather.gov and mountain-forecast.com for the most accurate weather. You can also ask rangers in the park.
- Check the avalanche forecast for the day if you will be on slopes 30° or higher, or will be beneath slopes of that degree. Most of the hikes in this guide are not in avalanche terrain, but this terrain does exist in the Yosemite backcountry.
- Check trail conditions! I like to ask rangers in person, or you can use recent trip reports from sites like AllTrails.
- Know your route. Having a detailed map and GPS device will be very helpful. Remember that not all tracks are ones you should follow! Be self-sufficient with navigation!
- Be aware of streams, ponds, and lakes beneath snow and stay away from iced-over water. You do NOT want to submerge yourself in icy water on a winter hike. Stay dry to avoid hypothermia!
- Always be ok with turning around if something doesn’t seem right or conditions change! Safety is always most important!
Final Thoughts
I hope this guide has prepared you for the realities of winter hiking in Yosemite National Park, and made you excited for hitting the trails on your next winter visit! Some years may be more snowy than others – it’s kind of luck of the draw nowadays with climate change!
Remember that it’s always best to be over-prepared when venturing out on winter hikes for safety reasons, and please practice Leave No Trace principles while adventuring in beautiful Yosemite National Park!
Have any questions, comments, or memories about winter hiking in Yosemite that you’d like to share? Let me know in the comments below!
Pin For Later

