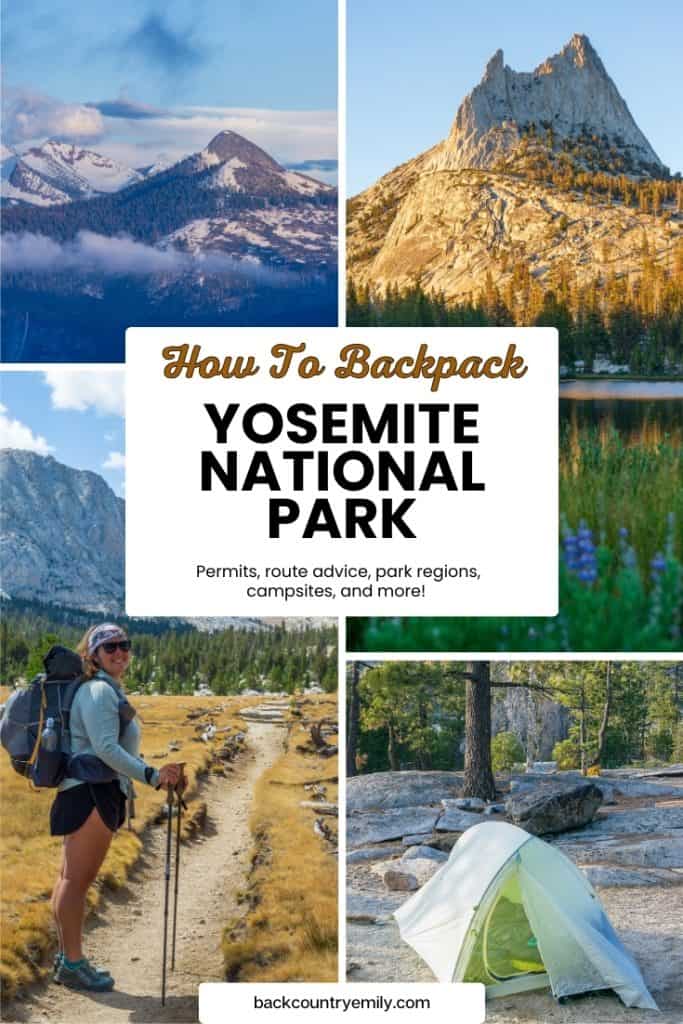
How To Backpack In Yosemite: Plan Your Wilderness Trip
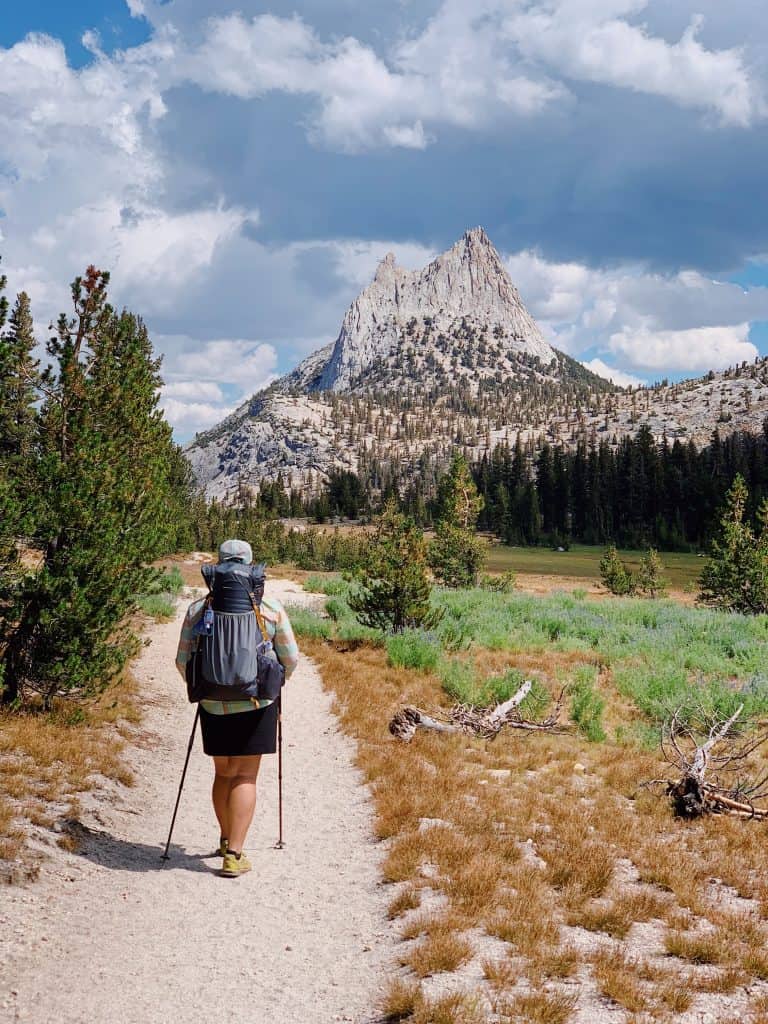
It’s hard to describe the magic of backpacking in Yosemite. The granite landscapes, ranging from jagged peaks to soft domes, dense pine forests that give way to wildflower-filled meadows split in half by rushing creeks, and of course, waterfalls cascading from alpine lakes and along powerful rivers. To me, it feels a little bit like home, like getting a warm hug from my grandma, because of how much backpacking I’ve done in this park.
In this Yosemite backpacking guide, I’m sharing everything I’ve learned in 10 years of hiking these trails, so you can have your own magical experiences in Yosemite’s backcountry, far from the crowds and cars. You’ll learn how to plan your trip, find backcountry campsites, locate water sources, understand Yosemite’s unique permit system, and follow some weird (but important) rules of the wilderness.

Backcountry Emily contains affiliate links and I may receive compensation - at no extra cost to you! As an Amazon Associate I earn from qualifying purchases. See my Privacy Policy for more information.
Why Go Backpacking Through Yosemite
Besides the “why wouldn’t you?” factor, backpacking in Yosemite allows you to experience a version of the park that only 1% of park visitors ever see. Instead of car camping in the front country campgrounds right on top of your neighbors, you can hike into the quiet wilderness and set up your tent next to the most serene alpine lake – no neighbors around.
My first ever real backpacking trip was in Yosemite. I hiked the Upper Yosemite Falls trail with my friend (wouldn’t recommend for beginners – learn from my mistakes) and even though I was scared by every twig snap I heard at night, I was hooked.
I was so proud of myself for backpacking that trail and amazed by my body. I loved watching the sun go down at Yosemite Point and watching all the day hikers leave. We had this place practically to ourselves!
That’s why I love backpacking. It allows you to escape the day trippers congregated at the most popular tourist attractions in the park and really feel immersed in nature. Day hiking in Yosemite is really fun, but backpacking is even more special.

Pre-Trip Planning: What You Need to Know Before Backcountry Camping
Requirements for Overnight Backpacking in Yosemite
There are only a few things you absolutely, 100% need in order to backpack in Yosemite:
- Wilderness permits
- Bear canisters (that have been approved by the park)
- A willingness to abide by Leave No Trace ethics & park rules
- Backpacking gear
All of these are super important, especially 1-3. We need to take care of our public lands and the wildlife that live in them, which is why it’s so important to follow Yosemite’s backcountry rules. And if you can’t, you shouldn’t be backpacking anywhere.

Choosing Your Route: Where to Go & How to Find Trails
Figuring out where to go backpacking in Yosemite can sometimes be challenging. Probably because once you see a few pictures, you’re going to end up wanting to backpack every single trail in the park to see it all!
Sadly, this is not very realistic for one trip!
I usually start by looking at Yosemite’s trailhead map. It’s the key to understanding where trips can begin, how trailheads are distributed across the park, how far you must camp on your first night, shows a basic overview of backcountry trails and named features, and lists the actual trailhead name, which is needed for booking your permit. This map is essential to have open while you research.
Once I’ve identified a few general areas, I use a combo of:
- GaiaGPS to explore topographic details
- AllTrails and trip reports to see common route ideas
- Google Earth for 3D visualizing the terrain (I especially do this for planning photography spots)
Then, because I love loop trails and really seeing amazing spots, I zoom out a bit and look at interconnecting trails, other interesting lakes, passes, etc. This is also where I start looking at actual mileage, elevation gain, if the route requires off-trail travel, etc.
🗺️ Get GaiaGPS, my favorite mapping software for planning backpacking routes.
Experience & Comfort with Backpacking
I’m not going to sugarcoat it: backpacking in Yosemite can be tough. But, I’m also the kind of gal who backpacked the Upper Yosemite Falls Trail as her very first backpacking trip… so I’m fully pro-doing hard things.
That said, there are a few things to keep in mind when deciding if a specific hike is right for your experience level:
- Trail Difficulty: The trails leaving Yosemite Valley are some of the most challenging and steep. They all gain 2,500+ feet in elevation in only 2.5 – 4.5 miles before you’re allowed to set up camp. Many trails have tall steps that have been blasted into the granite cliffs. Having lightweight gear and trekking poles will help you out, and starting from trailheads along Glacier Point and Tioga Roads can help with avoiding some brutal climbing.
- Elevation & Altitude Sickness: A lot of backpacking in Yosemite is at an elevation where altitude sickness is a possibility (~8,000 feet above sea level). Staying hydrated, acclimatizing properly, knowing the signs of AMS (Acute Mountain Sickness), and having a backup plan is a good idea.
- Remoteness & Navigation: Yosemite is huge, and while there are some really popular trails, some, especially in the far reaches of northern and southern Yosemite, don’t have high traffic, and you should even be prepared for faint trails and bushwacking. Make sure you’re confident in your navigation skills, especially for longer routes or early/late season trips where snow may obscure the trail, have GPS back-ups for your paper maps, and consider bringing a PLB/SOS device like the Garmin inReach mini.
- Stream Crossings: Most major rivers have footbridges over them, even in the backcountry. But that doesn’t mean an unbridged creek is safe in all seasons. You should be aware of creek crossings along your proposed route and learn safe creek crossing practices. You might even consider a different route if you want to backpack in late spring or early summer, and always have a back-up plan if you can’t safely ford a creek.
- Terrain & Campsites: Some camping areas are on granite, so staking down a tent can be hard or impossible! Learn how to use rocks to stabilize tent stakes.
- Off Trail Travel: If you are confident in your backcountry skills, Yosemite actually has lots of cross-country friendly terrain.
Don’t be worried though, there are actually tons of beginner-friendly backpacking trips in Yosemite that lead to amazingly beautiful places!

Best Time of Year For Backcountry Camping in Yosemite
June – October are the best months of the year for backpacking in Yosemite. And July – September are the months with the least chance of having to deal with snow or sub-freezing overnight temperatures.
This is when the temperatures are warm during the day, snow has mostly melted from all hiking trails, and creeks and rivers aren’t raging from active snowmelt (usually).
This is a pretty general statement, I have to admit. I’ve been backpacking in Yosemite after heavy snow winters where there is still snow on the ground and partially frozen lakes at the end of July!
It’s important to be aware of what the winter was like when you’re planning a trip to Yosemite. I use this resource and compare the current year to known high snow years (2016-2017, 2018-2019, 2022-2023) and years that I’ve done a lot of early season backpacking so I can get a good idea of what the snowpack and river crossings could potentially be like.
If you have no Sierra backpacking experience, feel free to use the year 2017-2018 as a low snow year comparison and know that I was in high snow conditions from 10,000 – 14,000 feet in elevation in early-mid June with swift, deep, and ice cold river crossings. Plan around that accordingly.
Fall is also a great time for backpacking in Yosemite. Just be aware that overnight parking on Tioga & Glacier Point roads ends on October 15th. But trails out of the Valley, Hetch Hetchy, and Wawona are great options. Just be aware of rain, sub-freezing temperatures, and the possibility of fresh snow after late-September.
Spring can be ok for backpacking too, but the weather is a little more variable. There’s still lots of snow on trails above 7,000 – 9,000+ feet in elevation and where the snow has melted, there’s mud, puddles, and even snow runoff flowing down the trail. Some locations in Yosemite are awesome for spring backpacking, but not the majority.
Nearly all backpacking trails in Yosemite are covered in snow during the winter, and you will need to use snowshoes or skis to travel and have extensive knowledge of avalanche dangers. I won’t be discussing winter backpacking in this guide.

Yosemite’s Terrain Explained & Regions of the Park to Hike In
Yosemite spans over 1,200 square miles, and while it’s all part of the Sierra Nevada, different areas feel distinct thanks to changes in elevation and ecosystems. The park’s elevation ranges from about 1,800 feet to over 13,000 feet, crossing through five different vegetation zones. That’s why Yosemite Valley feels completely different from the alpine environment of Tuolumne Meadows!
On a short backpacking trip, you’ll likely stay within one zone. But on multi-night trips, you can easily move through several, experiencing a wide range of landscapes and conditions.
Yosemite Valley
This iconic region covers Yosemite’s lower and mid-elevations. Even though you start around 4,000 feet, most backpacking trails climb up to about 7,000 feet.
Expect hot summer temperatures, limited water sources near campsites, and shady oak forests that transition into pines. Water here mostly comes from snowmelt and can dry up later in the season.

Southern Yosemite & Wawona
Located south of Glacier Point Road, this area starts at similar elevations to Yosemite Valley but climbs higher, with many trails reaching up to 10,000 feet.
You’ll find dense forests, meadows, and some burn zones with dead trees (important to be cautious around). Water tends to be more plentiful here due to a higher concentration of lakes.

Hetchy Hetchy & Northern Yosemite
Trails start near the hot, exposed Hetch Hetchy Reservoir (~4,000 feet) and rise to nearly 9,500 feet deeper into the backcountry.
This area is more open and exposed, with fewer trees and more river canyons and alpine lakes—many of them off-trail! Water is abundant, but mosquitoes are fierce in early summer, so bring bug spray.

Tuolumne Meadows & Eastern Yosemite
Trails here begin around 7,000 feet and can climb all the way to 13,000 feet in the high alpine.
The eastern part of the park is the most rugged and alpine, with wide-open meadows, granite peaks, and limited tree cover. You’ll probably be camping near a lake, but note that small streams may dry up by late summer when you’re planning your water carries.

Getting Wilderness Permits for Yosemite
All overnight backpacking requires a wilderness permit, and all trailheads have a certain quota – or number of people allowed – per day. This is so the park can regulate the amount of people in the backcountry to maintain the wilderness experience and so rangers can inform you of important park information before you begin your trip.
My post about Yosemite’s backpacking permit process goes into the nitty gritty details, but for a quick summary, you need to pre-book your wilderness reservation online before you can go on a trip, and they cost $6 + $5/person.
Yosemite releases permits weekly in a lottery during the winter, and also saves some last minute permits for all trailheads for the week before a trip start. I usually get my Yosemite permits last minute in the online week ahead release, and have had good luck getting permits I want!
Some trailheads are sooo popular though, so I recommend using Outdoor Status for availability alerts if you have your heart set on a super sought after trail.
Most Popular Yosemite Backpacking Trailheads
- Cathedral Lakes
- Glacier Point (all)
- Glen Aulin (all)
- Happy Isles (all)
- Lyell Canyon (all)
- Murphy Creek
- Rafferty Creek
- Sunrise Lakes
- Ten Lakes
- White Wolf → Pate Valley
- Young Lakes

Yosemite Transportation Logistics & Trailhead Parking
If you’re flying into the Yosemite area, Fresno, CA or Reno, NV are the most convenient. These airports are ideal because they connect to public transportation to Yosemite – YARTS and ESTA.
Most people are going to want to drive into Yosemite for their backpacking trips for maximum flexibility and being able to access all trailheads. Basically every wilderness trailhead has a parking lot attached to it or street parking around it, except for some in Yosemite Valley. Use this trailhead information page for trailhead amenities.
Even if you’re driving, knowing about the other transportation options in the park can expand your trip options and make your planning even easier!
Key alternative transportation options to help plan your trip:
- Yosemite Valley Shuttle System – Free, runs regularly daily
- Tuolumne Meadows Shuttle – Not operating in 2025
- Glacier Point One-Way Tour Bus – Paid, concessionaire-run
- Tuolumne Meadows Hiker Bus – Paid, concessionaire-run
- YARTS – Paid public transportation
Using these transportation options lets you plan point-to-point and thru-hikes in Yosemite with relative ease!
I’ll give you an example from one of my trips. One year I planned a high-country loop, but had to exit early into Yosemite Valley due to a deep creek crossing. I took YARTS back to Tuolumne Meadows to get my car – no problem!
You can even intentionally plan a one-way hike: take the Glacier Point One-Way Bus from the Valley, start your hike from Glacier Point, and follow the Merced Pass Trail down to the southern part of Yosemite before finishing in the Valley. By parking your car where you end, you don’t need to backtrack.
Backpacker Campgrounds are another fantastic planning tool. I usually drive 4+ hours from the Bay Area, so being able to stay in the backpacker campground the night before and after my trip helps me start early and avoid a late-night post-hike drive. It’s honestly so generous that Yosemite offers this option for backpackers!
If you’re traveling from further away, in the middle of longer term travel, or maybe need to store luggage while backpacking in Yosemite, you might want to book nights in hotels nearby before or after your backpacking trip.

Special Considerations for Certain Routes
Half Dome Add-On
Did you know you can bypass the day hike lottery and climb Half Dome with some wilderness permits? Of course, they’re some of the most sought-after trailheads, but it’s a cool way to experience one of the most popular parts of Yosemite!
Donohue Pass
There’s a ton of trails that exit the park over various passes. So why is Donohue Pass so talked-about? It’s because it’s the exit pass on the John Muir Trail. And since the JMT is one of the most famous trails in the world, and there is limited camping on the way to the pass, it has its own quota requirements.
Read next: Interested in thru-hiking the John Muir Trail? Check out my JMT permit guide for tips to securing your JMT itinerary.
Off Limits: Yosemite Valley
One of the biggest no-nos for backpacking in Yosemite is entering the Valley in the middle of your trip. Basically, you are not allowed to cross or enter the Valley on any wilderness trip. Once you enter Yosemite Valley, your trip is over.
You are allowed to cross Tioga and Glacier Point Roads as part of a wilderness permit, but you aren’t allowed to break your footpath by entering a vehicle to continue your trip – basically, you can cross the road if the trail you are hiking crosses the road and picks back up on the other side.
Designated Backcountry Campgrounds
The vast majority of camping in Yosemite’s backcountry is dispersed – meaning you can camp anywhere as long as you camp 100 feet away from trails & water and the minimum distance from roads.
However, there are a few camping areas in the backcountry where you must camp in designated campgrounds with pit toilets. These campgrounds are at Glen Aulin, May Lake, Sunrise Camp, Merced Lake, Vogelsang, and Little Yosemite Valley. All of these backcountry campgrounds – except for Little Yosemite – have a High Sierra Camp attached to them, but the backpacker campground is separate from the “glamping” camps.
These designated wilderness campsites can be a really nice way to ease into backpacking if you’re anxious about finding places to pitch your tent.
If you don’t want to camp at these locations, you must hike 1 mile away before you set up your dispersed camp.

At a Glance: Yosemite Backpacking Preparation
Before you hit the trail, make sure you have:
- Wilderness Permit: Required for all overnight trips – reserve online early!
- Bear Canister: Mandatory for food storage; rental available at the park.
- Mapping Tools: GaiaGPS and a paper map & compass recommended.
- Gear Check: Lightweight backpacking gear, including a good sleeping system for cold nights.
- Leave No Trace Knowledge: Know the basics to protect Yosemite’s backcountry.
- Back-up Plans: Expect stream crossings, snow patches (especially early season), and route changes.
- Best Seasons: July – September offer the most snow-free, beginner-friendly conditions.
👉 Pro Tip: If it’s your first time dispersed camping, practice setting up your tent and packing your bear canister before your trip – it’ll save you a lot of stress in the backcountry!
On-Trail Know-How: What to Expect in Yosemite’s Backcountry
Now that you know the basics about choosing and planning your backpacking trip, let’s talk about the specifics of Yosemite’s wilderness when you’re out on trail!
Designated vs. Dispersed Camping
I mentioned this briefly above, but the vast majority of Yosemite is dispersed camping vs. camping at designated backcountry sites.
Dispersed camping basically means there are no set sites that you must camp in, and there are no resources like a pit toilet or food lockers.
This means you can camp nearly anywhere you want in Yosemite’s backcountry, as long as you follow a few rules:
- Must camp at least 1 air mile (as the crow flies) from a road.
- Must camp 4 trail miles from Yosemite Valley, Tuolumne Meadows, Hetch Hetchy, Glacier Point, and Wawona.
- Must camp 100 feet (~40 medium-large steps) from any trail and water source.
- Must choose a Leave No Trace friendly campsite – don’t set up on live grasses or plants, choose a site that has been used before on dirt, sand, or rock.
Camping is prohibited at the following locations:
- Top of Half Dome
- Lost Lake
- Between Yosemite Valley and Little Yosemite Valley
- Parker Pass Creek watershed
- Dana Fork of the Tuolumne River watershed
- Gaylor Creek watershed
- Lukens Lake
- Budd Creek watershed
- Below the high water line at both Lake Eleanor and Hetch Hetchy
- Some trails have other specific restrictions which will be noted when you make your wilderness permit reservation.

Water Sources in the Yosemite Backcountry
Yosemite has plenty of creeks, rivers, and lakes to collect water from. I can’t think of any time on a backpacking trip in Yosemite where I was worried about not having access to water.
However, there are definitely some sections of trail where water is limited, and some camping areas where you will not have any access to water, so you’ll need to plan your water carrying capacity and campsites accordingly.
Water becomes less available during the late summer and fall when all of the snow has melted.
Your topographic maps should show seasonal streams in dashed lines and stable, year-round water sources in solid blue lines. In general, it’s ok to rely on the solid lines, but you should be cognizant about not being able to reach the water if the trail crosses the stream over a footbridge like at a waterfall.
I can recount a few times on my trips where I crossed a solid blue line but over a footbridge and couldn’t access the water. Echo Creek, Register Creek, Wapama Falls come to mind. Luckily I didn’t need water at those locations!
The water in Yosemite may look crystal clear (and it is), but it’s also teeming with bacteria and cryptosporidium that can make you sick (remember: the circle of life is happening out there. Animals die in snow which turns to water. Deer and bears poop near/ in water. Humans don’t practice proper hygiene or Leave No Trace principles and bathe in backcountry water). There are no viruses in Yosemite’s water, so you don’t need to purify it, but you should still filter it.
I use a Sawyer Squeeze for water filtering since it’s the most convenient as a solo backpacker. Some couples and small group may prefer a larger gravity filter. Whichever one you choose, make sure you know how to use it before your trip!

Weather in Yosemite National Park
The summer weather in Yosemite during backpacking season is generally pretty stable, with warm days and cool nights.
The biggest weather threat to be aware of is thunderstorms. They don’t happen every day, but they are common enough in summer afternoons that you need to be aware of them and prepared for them!
I personally have experienced a couple of thunderstorms while backpacking in Yosemite. One was overnight when I was only using a tarp for protection… that was not a restful night of sleep!
There are no truly safe places to be outside in a thunderstorm, but there are safer ones – like off of peaks and within a uniform stand of trees. Thunderstorms can be dry, or come with a rainstorm at the same time. Sometimes the storm can come with temperature drops – so having layers closer to the top of your pack and not buried at the bottom is a good idea. Storms can be so powerful and cold that they can bring snow to high elevations – even in summer!
I always check the weather on weather.gov right before my trips. I use the location of “Tuolumne Meadows” for a good high elevation weather forecast. And remember, a general rule of thumb is that the air temperature drops 5°F for every 1,000 feet of elevation gain.
Staying Safe While Backpacking in Yosemite
Backpacking in Yosemite is no more dangerous than backpacking in any other wilderness area. But, I would be irresponsible if I didn’t mention a few unique hazards in Yosemite and how you can feel confident on your trip if you come across them!
Bears
Yosemite is home to American black bears (Ursus americanus). There are no grizzly bears in Yosemite or California – they were hunted to extinction by the 1920s.
Black bears come in a variety of colors. In fact, I usually see blonde or brown bears in Yosemite – I don’t think I’ve ever seen one with black fur!
Black bears generally aren’t a threat to humans. If you see one, give it space, back away slowly, and talk or sing loudly so it knows you’re there. It will probably run off or ignore you. However, never let a bear out of your sight if it’s hanging around, and if you spot a cub or yearling without a mother nearby, do everything you can to identify her location – you don’t want to get between them.
Remember: bear canisters are required for backpacking in Yosemite. Store all food and scented items inside, and you shouldn’t have any issues.
I’ve been lucky enough to see several bears in Yosemite. My most memorable encounter? I was literally caught with my pants down on my first multi-night backpacking trip. I’d gone a ways from camp to dig a hole and mid-squat, I spotted a bear wandering nearby. My heart was pounding. I quickly finished and sprinted back to my mom at camp. She had seen the bear too but didn’t want to yell at it and scare me.
Moral of the story: the bear knew we were there, stuck to himself, and likely only checked out our camp after we left. Encounters are exciting, but usually uneventful if you stay smart.
Pro Tip: Bear spray is prohibited in Yosemite. And you don’t need it – no visitor has ever been killed or seriously injured by a bear in the park. Be smart, and you’ll be fine.
Other Wildlife
You can see all kinds of wild animals in Yosemite – it’s really exciting! Some are super rare too – like the Pacific Fisher or Red Fox. But you’re most likely to see deer, coyotes, bobcats, marmots, squirrels, chipmunks, pika, birds, and rattlesnakes (at lower elevations).
I can’t go over every animal and how to act around them, but same rules apply as to bears. Wild animals don’t want to interact with you, so don’t let them. Never, ever, intentionally approach a wild animal or attempt to feed one.

Mosquitos
Possibly the worst hazard of all: mosquitoes. And they can be ferocious, especially in early summer.
If you’re backpacking in June or July, I highly recommend:
- Treating your hiking clothes with permethrin before your trip
- Carrying picaridin spray or lotion
- Bringing a head net for your sanity

Altitude
If you’re hiking above 8,000 feet, know the signs of Acute Mountain Sickness (AMS): throbbing headache, fatigue or listlessness, shortness of breath, and insomnia.
The best prevention? Gradual acclimation.
- Avoid driving straight from sea level to 10,000 feet and heading out.
- Arrive a day early if possible.
- Hydrate well, with electrolytes.
If you start showing signs of AMS, don’t keep climbing. Stop, rest, hydrate, eat small snacks, and monitor your symptoms. If they persist, descend at least 2,000 feet immediately and reassess your trip. AMS can impact anyone – even the super fit – and if ignored, can escalate into life-threatening HAPE or HACE.
Rockfall
Rockfall might not be on your radar when planning a backpacking trip, but Yosemite is a granite kingdom, filled with towering cliffs.
Stay safe by:
- Avoiding camping beneath cliffs
- Staying alert when hiking near steep walls
When I backpacked the Grand Canyon of the Tuolumne, my group heard an enormous crash one evening in Pate Valley. A rockfall. The tumbling, grinding sound was unmistakable. Thankfully, no one was in the area, but it was a powerful reminder that nature is dynamic, and sometimes unpredictable.
Rivers & Swimming
Creek crossings are part of the Yosemite backpacking experience, and they can be intimidating when water levels are high.
Best practices for crossing creeks:
- Maintain three points of contact at all times (trekking poles help a lot)
- Avoid jumping across slippery stones
- Test rocks before committing your weight
- Unbuckle your backpack’s hipbelt before crossing rough water, so you can ditch it quickly if needed
Swimming is also a blast, but lakes and rivers can be cold and swift. If you’re going to dive, make sure you can see clearly into the water — never dive into murky areas. And never swim above waterfalls — currents can be deceptively strong.

Wildfires
Wildfires are an increasing reality in the Sierra Nevada. If you notice smoky air during a trip, it can be unsettling. You may not know where the fire is or how close it is. Communication is tough in the backcountry.
If you experience sky-filling smoke:
- Try to get updates via satellite messenger through an emergency contact
- Be ready to evacuate if needed
During a trip to Clouds Rest, I spotted a small fire to the west. Two nights later, the sky was orange. It burned fast and hot. Luckily, I knew the landscape well and knew we weren’t in immediate danger, but the experience was sobering, and I ended the trip early.

Hazard Trees
Because wildfires have been a common occurrence, you might hike through a burn area on your trip. Do everything you can to not camp in a burned forest area. Last thing you need is a tree falling on you.
Avoid camping near:
- Dead, burned trees (“snags”)
- Partially fallen trees
- Anywhere within falling distance of a dead tree
Even healthy-looking trees can fall — but burned ones are much riskier.
Sun & Exposure
Yosemite offers plenty of shaded forest trails, but also long stretches of fully exposed alpine terrain.
Sun protection is critical.
- Wear UPF-rated clothing and a hat
- Apply and reapply sunscreen throughout the day
- Stay hydrated, ideally with added electrolytes
I learned this lesson the hard way on my PCT thru-hike. After switching from a long sleeve to a short sleeve shirt and foregoing sunscreen, I ended up with severe sun poisoning: chills, dizziness, nausea, extreme sunburn that blistered, and a few years later, a basal cell carcinoma removed from my arm.
Take sun exposure seriously. A bad sunburn can turn a dream trip into a miserable (or dangerous) experience.
Leave No Trace & Backpacking: Best Practices in Yosemite
Leave No Trace is a set of wilderness ethics for humans to follow to keep our wild spaces in good condition. There are 7 principles, which you can read more about here. Yosemite is such an important place to me that I want everyone to experience responsibly and with respect.
Here are ways to be a good LNT steward in Yosemite:
1. Plan Ahead and Prepare
You’re doing this right now. Amazing! Additional steps to take:
- Review park regulations
- Get your wilderness permit
- Know your planned route, campsites, and bail out points
2. Travel & Camp on Durable Surfaces
This is pretty easy to do in Yosemite.
- Stay on designated trails, even in muddy or flooded meadows
- Camp in previously-impacted areas and on dirt, rock, sand, or snow
- Camp 100 feet away (40 steps) from trails and water. 200 feet is even better. Avoid setting up near other groups who might not want to be disturbed.

3. Dispose of Waste Properly
- You are required to pack out used toilet paper in Yosemite (do not bury it in your cathole)
- Dig a 6” cathole to poop in. Do this 100 feet from water, trails, and camping areas (200 feet is preferred).
- All trash needs to be packed out, including “organic trash” like banana or orange peels. These items do not occur naturally in Yosemite and it is irresponsible to leave them behind to “decompose”. They won’t in a timely matter. Don’t burn trash.
4. Leave What You Find
- Don’t construct shelters/ “bushcraft”. Never cut live trees to create furniture.
- You might find artifacts like arrowheads in Yosemite. Leave them where you find them. Taking them is illegal.
- Don’t pick flowers or other plants.
- Don’t create unnecessary cairns/ rock stacks, destroy your own routefinding cairns once you’re done with them
5. Minimize Campfire Impacts
Campfires are prohibited in Yosemite over 9,600 feet, and could be restricted below this elevation at any time.
- You can only have a fire in a pre-existing fire ring. You can’t build your own.
- Only use dead wood. It should be small and breakable with your hands (no logs).
- Always fully put out a fire. Drown it in water. You need to put your hand on it to make sure it is cold and completely out.
6. Respect Wildlife
- Always use your required bear canister correctly
- Never approach or attempt to feed a wild animal
- Pets are not allowed on trails in Yosemite
7. Be Considerate of Others
- Don’t be overly loud and rowdy – respect the peace of nature’s noises
- Yield correctly – downhill hikers yield to uphill, all hikers yield to horses and pack animals
- Respect others, be kind and welcoming but also respect space

Backpacking Gear You Need For Yosemite
My regular three-season backpacking gear doesn’t change when I go backpacking in Yosemite. I keep everything the same and always have the required bear canister.
You’re going to want the following items in your set-up, at minimum:
- Backpacking pack
- Backpacking tent
- Sleeping bag or quilt
- Sleeping pad
- Cooking stove & fuel
- Food
- Bear canister
- Eating utensil
- Water filter
- First Aid Kit
- Toiletries like sunscreen, bug spray, lip balm
- Trowel
- Wet wipes, toilet paper, or both
- Sweat wicking top, bottoms, and under garments
- Sweat wicking socks x2
- Insulated jacket
- Rain Jacket
- Sturdy hiking shoes
- Headlamp
- Trekking poles
- SOS device

Wilderness Backpacking in Yosemite FAQs
Can you backpack overnight in Yosemite?
Yes! Overnight hiking is a wonderful experience in Yosemite. Make sure you scroll back up and read this guide for all the details to have a successful trip!
Can dogs hike in Yosemite?
Dogs are not allowed on hiking trails in Yosemite. Only service animals (not ESAs) are allowed in the backcountry, in accordance with the ADA.
Is hiking in Yosemite safe?
For the most part, yes! There are some safety considerations you need to be aware of like thunderstorms, creek crossings, and high altitudes, but otherwise, Yosemite is just as safe as backpacking in other places.
Is Yosemite too crowded for backpacking in summer?
There are some really popular backpacking locations in Yosemite, like Glen Aulin, Cathedral Lakes, and Little Yosemite Valley. And those places might feel too crowded for people looking for solitude. Luckily, there’s hundreds of miles of trails in Yosemite and plenty of space to spread out and find solitude.
If you’re looking for that, try to backpack in the northern and southern parts of the park.
Do I need a reservation?
Yes! You need to reserve your wilderness permits ahead of time, at least 3 days before your trip if there is space. Sometimes there are day-of walk-up permits available, but it’s rare.
How do I find out if the water sources I need are flowing?
Yosemite’s wilderness rangers do a pretty good job at updating the wilderness conditions webpage, so check there first. If you can’t find the information you need, you can call +1 (209) 372-0826 Monday – Friday. You can also try asking on certain Reddit forums or Facebook groups to see if anyone has been on the trail you need info on recently.
How many nights should I plan for?
This will be so dependent on the trip you choose! In general, I think three nights is a really great amount of time for a backpacking trip. Yosemite has trip options starting at one night, but you could easily spend a week+ backpacking through the park.

Final Advice for Backpacking in Yosemite
We’ve gone over sooo much together in this guide, but I want to leave you with a final tip to backpacking in Yosemite: monitor the park’s wilderness conditions report before your trip. This is a report created by field ranger observations, and a great resource for checking on snow levels, water sources, and general conditions.
And lastly, remember to have fun! Backpacking is such a wonderful way to experience a part of Yosemite that 99% of visitors never get to see. And it’s some of the best part of the park! Let me know how it goes after your trip! I love hearing stories from backcountry adventures!
Pin For Later

This article provides a lot of information and is very helpful. Thank you.
You’re welcome! Hope you get out there in Yosemite next summer!
Great article! About the time I was about to toss in the towel on planning a trip! Now I just need to figure out how to connect trail heads for a multi day itinerary
Thank you.
Hey Alma!
I usually recommend people do out-and-backs and loops if you’re still getting the hang of planning backpacking trips, but Yosemite does have resources to start and end at different places in the park. Like the Glacier Point tour shuttle, YARTS, Tuolumne Meadows/ Tioga Road shuttle, and ESTA. Good luck + have fun and you can always book a call with me if you want some more guidance!