3 Days in Yosemite: Epic Itinerary for Adventure Seekers
Yosemite National Park is simply magical. There is so much to see and do in this huge park, so planning a trip there to see it all can feel super overwhelming. Trust me, I’ve been there.
Let me help you feel a little better: spending three days exploring around Yosemite will give you a really good taste of the park. And if you visit between June and October, you can experience every part of the park – from the popular valley to the quiet high country.
I’ve lost count of the number of times I’ve visited Yosemite, but I’ve been in every season, I’ve car camped, backpacked, and stayed in park lodging – so I’ve experienced the park in multiple ways.
So I’m sharing my go-to 3 day itinerary with you: the same one I give to friends and family when they ask me what they should do when they visit Yosemite! This itinerary is going to give you a peek into each corner of the park, has you hiking each day, and will show you a stunning sunset spot each night! Let’s dig in.
Backcountry Emily contains affiliate links and I may receive compensation - at no extra cost to you! As an Amazon Associate I earn from qualifying purchases. See my Privacy Policy for more information.
Yosemite Long Weekend Itinerary Overview
- Day 1 – Yosemite Valley Viewpoints & Hiking
- Tunnel View
- Snow Creek Hike
- Lower Yosemite Falls
- Valley View at Sunset
- Day 2 – Tuolumne Meadows Alpine Lakes
- Tioga Road
- Cathedral Lakes Hike
- Tenaya Lake
- Olmsted Point at Sunset
- Day 3 – Hetch Hetchy & Glacier Point Road
- Hike Wapama Falls
- Washburn Point
- Glacier Point
- Sentinel Dome at Sunset
Best Season to Visit Yosemite
My itinerary is based on a summer visit to Yosemite when both Glacier Point Road and Tioga Road are open!
I’ve been to Yosemite in every season and love every season differently, but summer has to be my favorite because I’m able to get a taste of everything Yosemite has to offer: waterfalls, hiking trails, and high country views!
The vast majority of the park is completely open from mid June – mid-October, with the best weather in June and September.
If you’re looking to visit between the months of November – March, check out my winter itinerary for Yosemite.

Glacier Point & Tioga Roads
These are the 2 main seasonal roads in Yosemite National Park.
Both roads are absolutely gorgeous, but because of their altitude, are closed due to snow every year. The roads usually close in mid-November, after the first big snow storm. Both roads close to overnight parking on October 15th each year.
When the roads open is also up to the weather and the amount of damage they endured from the winter. Spring storms are common in the Sierra, so we usually don’t know when they’ll open until sometime in late April or May.
But usually, Glacier Point Road opens first by mid-May, and Tioga Road usually opens by mid-June, except in very high snow years. Use this resource from Yosemite to learn more.
Day 1: Yosemite Valley – Iconic Views and a Challenging Hike
1. Tunnel View Viewpoint at Sunrise

Tunnel View is the most popular viewpoint in Yosemite for a reason! So start your trip here and watch the sun light up the entire valley and start your trip on a magical note!
I’ve been to Yosemite so many times and I still visit Tunnel View on every single trip. It’s really that amazing. I swear I find something different to notice and look at every time.
2. Southside Drive Viewpoints

Take the time on the drive from Tunnel View to stop at some classic Valley viewpoints. These are all very short stops with minimal walking. Each one can take as little as 10 – 20 minutes, though you’re welcome to spend more time.
Sentinel Meadow is one of my favorites. I love the boardwalks in the meadow!
- Bridalveil Fall
- Cathedral Beach
- Swinging Bridge
- Sentinel Meadow
Note: parking can be very difficult in Yosemite in the summer. You may want to skip the viewpoints above and just drive directly to a parking lot so you get a spot for your day hike. You can always do these later in the day.
3. Day Hike the Snow Creek Trail
Park your car at the Curry Village Parking, Trailhead Parking, or the main day use village parking and take the free shuttle to stop #17 – Mirror Lake.
You probably don’t see this hike mentioned in many Yosemite guides, probably because there are just so many iconic hikes in the park! But I think it might be my personal favorite hike in the Valley.
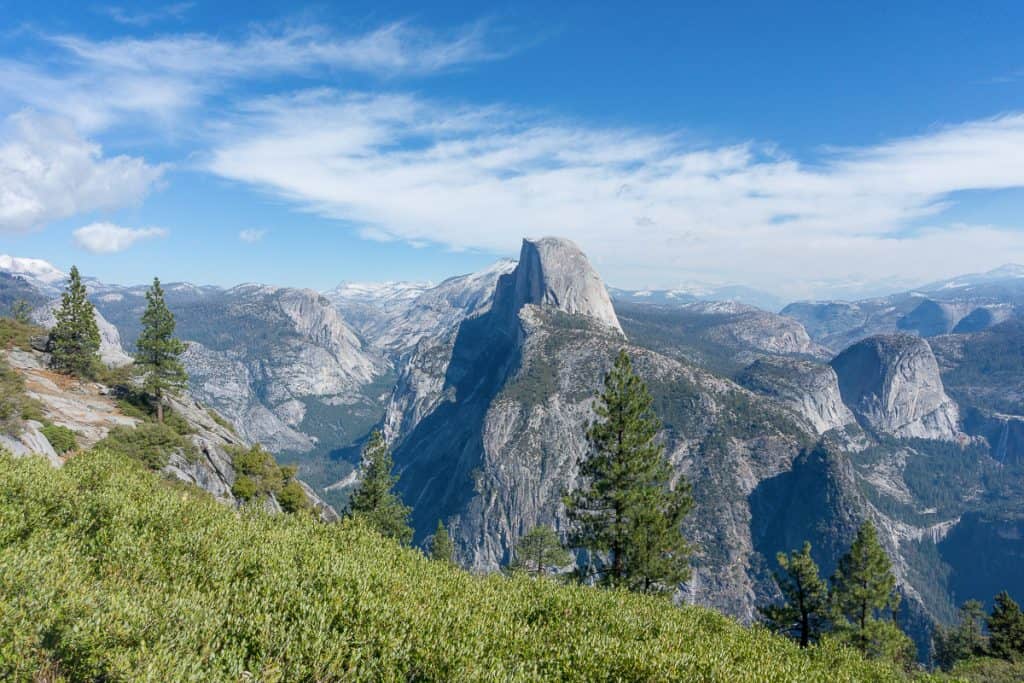
While the Snow Creek Trail may be the steepest climb out of the valley, it also boasts some of the coolest, most unique views! You’ll feel like you’re right next to Half Dome, and you get a clear view into Tenaya Canyon – something that most Yosemite visitors can’t claim!
Pro tip: I usually hike the road up to Mirror Lake so I don’t miss the bathrooms at the lake before continuing on to the trail!
TRAIL STATS

Alternate Valley Day Hike Options:
- Easier hike: Mirror Lake Loop
- Moderate hike: Mist Trail – JMT Loop
- Hard hike: Upper Yosemite Falls Trail
Try AllTrails+
Download offline maps, preview trails in 3D, access National Park guides and more! Use code “backcountryemily30” to get 30% off of AllTrails+.
4. Short Walk: Lower Yosemite Falls

After that grueling and rewarding hike, time to visit a classic Yosemite View. The Lower Yosemite Falls loop is a short, paved loop, only 1 mile long, and you can make it shorter if you just do an out-and-back to the bridge.
Even though this is one of the most popular spots in the Valley, I still visit the lower falls every single time I visit. I think it’s one of the best little trails. And I’ve even see lots of wildlife here! One time a bear and a bobcat another time!
5. Drive the Western Valley Loop

This is the perfect way to wind down after a big day. The late afternoon sunlight is gorgeous in this area, and you’ll feel carefree as you drive down Northside drive, hitting up these viewpoints along the way. The Cathedral Rocks viewpoint (pictured above) is my favorite in the late spring and early summer – when the meadows are slightly flooded and you get this reflection!
- Cathedral Rocks Viewpoint
- El Capitan Meadow
- Bridalveil Fall Viewpoint
6. Sunset at Valley View Viewpoint

I’ve watched multiple sunsets at Valley View and it’s one of my favorite places to be at sunset in the park, especially later in October. It’s quieter here than at Tunnel View and I love being by the river in the evening.
Watching the sun cast its last light on El Capitan is the perfect way to wrap up a day exploring Yosemite Valley.
Day 2: Tuolumne Meadows & Tioga Road – High Country Lakes
1. Drive Tioga Road to Tuolumne Meadows

Tioga Road is a high mountain road that connects the west side of Yosemite to the high country and the Eastern Sierra.
Mountain roads can be scary to drive, but in my opinion, Tioga Road is a pretty mild high road without too many scary hairpin turns. The main thing you need to be aware of is wildlife crossing the road! Bears are hit and killed by cars every year on this road, so drive the speed limit, put the phone down, and pull over in designated area to take pictures.
I recommend stopping anywhere you see a large pullout/ parking lot with a view.
2. Day Hike Upper Cathedral Lake
This is one of the most stunning hikes in Yosemite National Park, and it’s not too challenging for a day hike! Just make sure you get an early start to the day.
I think Upper Cathedral Lake is a little prettier than Lower Cathedral Lake, so I do recommend hiking up to that lake and hiking to the south side for the most epic views of Cathedral Peak.
Be aware that this hike is a high elevation hike. Drink lots of water and bring electrolytes. Known your body and be sure to monitor for signs of altitude sickness like lightheadedness, shortness of breath, or confusion, and descend if these symptoms are severe.
TRAIL STATS

Alternate Tuolumne Meadows Day Hike Options:
- Easier hike: May Lake
- Moderate hike: Lembert Dome
- Hard hike: Cloud’s Rest
3. Hang Out at Tenaya Lake

Tenaya Lake is a huge, stunning alpine lake that you can drive right up to! There are multiple parking lots along the lakeside, so pick one with space and wander down to the lake to hang out and rest those tired legs.
The water is freezing here, but the good news is the beaches are actually sandy, so relaxing on the shore is enjoyable, not painful.
You’re able to swim and bring non-motorized boats on Tenaya Lake, so if you have a kayak or SUP, this is the perfect time to use it!
Pro Tip: an Inflatable SUP is such a fun item to have when exploring alpine lakes! 🏄
4. Catch Sunset at Olmsted Point

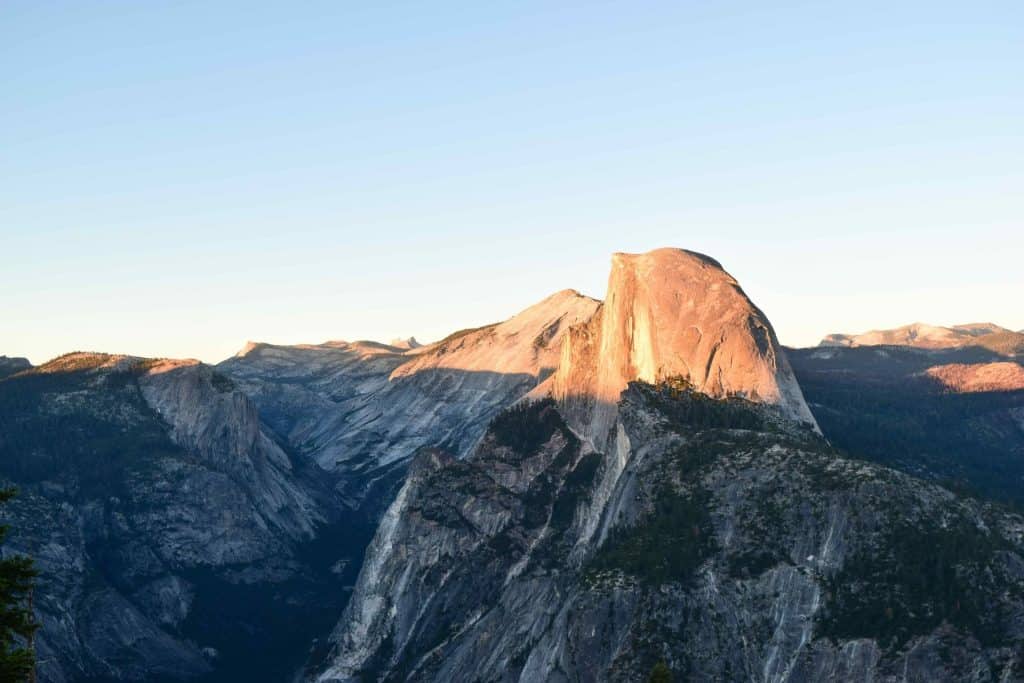
Olmsted Point is one of the best places in the entire park to watch sunset! The views of Half Dome from this point are unique and amazing.
You can also see Cloud’s Rest and Tenaya Lake and the multiple peaks and domes surrounding the lake. Be sure to leave the parking lot and take the trail down a little ways for more views and less people!
Pro tip: Want to capture a zoomed-in picture like this? You’ll need a long lens. This picture was shot at 105 mm.
Day 3: Hetch Hetchy & Glacier Point Road – Escape the Valley
1. Drive to Hetch Hetchy & Explore the O’Shaughnessy Dam

Get an early start to the day when exploring Hetch Hetchy because there is very little shade and it gets HOT!
I’ve visited the Hetch Hetchy area only three times but I think it’s one of the most underrated parts of Yosemite! The granite walls and waterfalls rival those in the Valley, and it’s not crowded at all. And as a bonus, you don’t need to make a reservation to visit this area in the summer!
Walk along the dam and read about the history behind it. The Hetch Hetchy Reservoir is a water source for San Francisco, but something John Muir and the Sierra Club fought against tirelessly before Muir’s death. If you’re interested in learning about the restoration of Hetch Hetchy, check out this nonprofit.
Swimming and boating is not allowed in the reservoir, and you will get in major trouble if you attempt this.
Pro tip: Hetch Hetchy has a separate entrance that is not open 24/7. Depending on the time of year, the entrance opens at 7:00 or 8:00 am and closes between 5:00 and 9:00 pm. For most of the summer, it’s open from 7:00 am – 9:00 pm.
2. Day Hike to Wapama Falls
The hike to Wapama Falls takes you along the reservoir’s edge – but high up! Hike along the granite walls with commanding views of the reservoir and Kolana Rock. You’ll pass Tueeulala Falls before sharply descending to Wapama Falls and crossing the outflow over a footbridge.
In the spring and early summer, these waterfalls are powerful and it’s pretty amazing to stand on the bridge and get soaked from this beautiful waterfall! I did this hike in early June and got even more wet than hiking the infamous Mist Trail!
This trail continues to the back of the reservoir all the way to Rancheria Falls, but that is a pretty long, 12 mile trip better suited for an overnight backpacking adventure.
TRAIL STATS

Alternate Day Hike Options:
There aren’t other day hikes I’d suggest in the Hetch Hetchy area. But, I do have some other ones to recommend in the Valley and southern Yosemite area if you don’t feel like going to Hetch Hetchy.
- Easier hike: Cooks Meadow – Swinging Bridge Loop
- Moderate hike: Mariposa Grove of Sequoias Loop to Wawona Point
- Hard hike: Panorama Trail to Illilouette Falls
3. Drive Glacier Point Road to Washburn Point
Washburn Point is along Glacier Point Road and pretty close to Glacier Point, but has a slightly different view of Half Dome. It’s worth checking out to get a more head-on view of Half Dome and general sight-seeing of how amazing this place is!
I also think the views of Vernal and Nevada Falls is better from here – so it’s great to visit in early summer when the falls are still flowing strong!
4. Glacier Point Viewpoint
Glacier Point is simply stunning. Being able to see Half Dome, Vernal and Nevada Falls, Yosemite Falls, Clouds Rest, so many domes… and so. much. more. It’s really incredible.
Late afternoon is a great time to be here and watch the light change as the sun lowers in the sky, casting light and shadows on all the different peaks high above the valley floor.
There is lots of signage about how glaciers formed the valley and park, and other educational and historic information all along the short paved path to the actual viewpoint, so you can spend some time learning here instead of just taking in a view.
5. Sunset Hike to Sentinel Dome
From Glacier Point, hike up to Sentinel Dome to enjoy sunset.
You still get a view of Half Dome from here but with a fraction of the people, and you’ll have a more expansive view of the rest of the western part of Yosemite Valley.
If you want to hike a little further, you can also go to Taft Point for sunset, but just make sure you’ve brought a headlamp for your hike back to the Glacier Point parking lot.
And there you have it! Three amazing, adventure-filled days in one of the most magical National Parks in the world!
Read next: Don’t have three days? Check out my one day guide to Yosemite if you’re short on time.
Best Places to Stay & Eat When Visiting Yosemite

Best Lodging Options In and Near the Park
I’m a huge proponent of staying inside the park so you can feel like you’re really experiencing Yosemite. I’m usually car camping or staying at Curry Village when I visit the park, as those are some of the most cost-effective options.
It can be really hard to score lodging inside of the park though, and there are plenty of hotel options in the gateway towns around Yosemite. For this itinerary, I recommend staying on the west side of the park, as these places are much closer to Yosemite Valley and Glacier Point.
If you’re doing a longer trip and going to Lake Tahoe or Mammoth Lakes after Yosemite, you could split your stay between the west and east side of the park.
Use the map below to check out the best hotels close to the park.
Top Food Spots in Yosemite
I didn’t build in specific meal times into the itinerary because everyone is different!
When I go to Yosemite, I usually do a mix of eating my own food and buying in the park. Be aware that food prices are pretty high in Yosemite – they rival restaurants in the Bay Area!
Here are some of my favorite places to eat:
- Curry Village Pizza Deck – this is hands down the best place to eat in Yosemite Valley! Nothing hits the spot better than this pizza. Heads up – it gets CROWDED here. So be prepared to wait.
- Bar 1899 in Curry Village – great spot for cheaper drinks & grub like smashburgers, potstickers, fries, and more!
- Yosemite Lodge Mountain Room Lounge – similar to bar 1899. Great for drinks and dinner in a more casual but still nice environment. Note that the last call for hot food is early: 7:30 pm.
- Degnan’s Kitchen & Loft – Great for breakfast on the go and lunch bites near Yosemite Village.
- Village Store – this is a large grocery store. There are some ready-to-eat items like sandwiches and wraps and fresh produce, and traditional grocery store and camping goods like canned food, fuel, firewood, etc. This is a great place to stock up on snacks.
- Tuolumne Meadows Grill — Nothing fancy here – think burgers & hot dogs. But it’s a great spot to grab a post-hike snack after hiking in the high country! Make sure you check the opening times – the grill isn’t always open the same dates as Tioga Road.
3 Days in Yosemite: What You Need to Know For Your Visit
Park Entry Fees
Yosemite charges an entry fee of $35 per car for US Residents for a three-day period.
Non-US residents must pay $35 plus $100 per person inside the vehicle. You can avoid this surcharge by purchasing a nonresident American the Beautiful Pass for $250 – it’s good for 12 months.
Personally, I always buy an America the Beautiful Pass every year for $80. It allows you free entry to all National Parks, Forests, BLM land, and monuments for an entire year! You can purchase one at the park or ahead of time online.
👉 New for 2026: America the Beautiful Pass Price Increases for Non-US residents.
Day Use Reservations
Day use reservations are required during certain times of the year. They work by allowing you to reserve entry into the park for a three-day time period, and you can freely come and go from the park in those days.
These reservations are not needed in 2026.
Seasons & Weather
This itinerary is based on a summer visit to Yosemite when both Glacier Point Road and Tioga Road are open and trails are mostly free of snow!
The summer weather in Yosemite can be varied and differ in the various areas of the park! For instance, Tuolumne Meadows could be 20 degrees cooler than Yosemite Valley, making it an excellent place to spend time if it’s 90-100°F on the valley floor in mid-summer.
Yosemite is in the mountains, and mountains are notorious for making their own weather. Afternoon storms are common from July-September. They’re usually not all day long, but you’ll want to be aware of them and always make sure you’re down from high peaks and passes if a thunderstorm is coming in.
Wildfire smoke is also something to be aware of when visiting Yosemite in the summer and fall. Lightning strikes cause natural small fires, which are usually just watched by the park service and only fought against if they become threatening to life.
So smoke can be insignificant, or totally block views and be suffocating. Wildlife smoke can cause headaches, dehydration, scratchy throats, and watering eyes and generally be unpleasant to hike and spend time in. Sadly, you can’t do much to improve your time in the park if there is lots of smoke. An N95 mask may help.

Bear Safety
Black bears are common in Yosemite, and there are no grizzly bears in California. Black bears come in all shades from blonde/cinnamon to black. You shouldn’t be alarmed if you see one – consider yourself lucky if you do!
Most bears will run away if they see you, but in case one doesn’t, don’t run or freak out. Stand your ground or slowly back away (don’t tun your back), make yourself look big, wave your arms around and yell “HEY BEAR”.
You should never have food more than an arms reach away from you, and always store food properly at night, which will depend on where you’re staying.
Bear spray is illegal in Yosemite National Park.
Hiking Safety & Tips
As I mentioned above, thunderstorms are likely in the summer. You should understand that there is no safe to be outside in a thunderstorm and know what to do in case you get caught in a storm while hiking. Best practice is to be off high points by noon.
You’ll be hiking by waterfalls, creeks, rivers, and lakes in Yosemite. Many of these you can swim in, but there are some places where you are not allowed to enter the water, and it would be dumb of you to do so. Obey all posted safety signs while you are recreating in Yosemite!
Some of these hikes are at a high altitude, so you should acclimate as much as possible before doing these hikes, and don’t be afraid to slow down and listen to your body.
Staying hydrated is super important when you’re hiking at altitude.
Helpful Day Hiking Gear for Yosemite:
- Water filter – Carry a water filter so you don’t have to lug 3-4 L of water around on all of your hikes!
- Trekking poles – These are so handy to have on steep Yosemite trails. They take the pressure off of your knees and help maintain balance.
- Shoulder strap pocket – I love having one of these on my day hiking pack. I can keep essentials like my phone, sunscreen, and lip balm within easy reach without taking my pack off!
- Maps – It’s always good to carry a physical map when you’re going on longer day hikes and exploring a park. Having a digital copy with GPS is also handy.
- Trail runners – I’m a big fan of low, non-waterproof trail runners to hike in. They’re super breathable and more comfortable than hiking boots, and the traction is just as good.

Leave No Trace in Yosemite
We all need to work together and do our part to keep our wild spaces beautiful and not trashed. If you are recreating outside, you need to abide by Leave No Trace principles so we can enjoy these places for generations to come.
The 7 Principles of Leave No Trace:
- Plan Ahead and Prepare
- Travel & Camp on Durable Surfaces
- Dispose of Waste Properly
- Leave What You Find
- Minimize Campfire Impacts
- Respect Wildlife
- Be Considerate of Others
FAQ About Planning a Yosemite Weekend Getaway
What is the best month to visit Yosemite for a 3 day trip?
I always recommend the summer months for people who love to hike, want to see the waterfalls flowing, and want to visit the high country. June is the perfect month for this! September is also lovely, but all the waterfalls will be dried up.
Do I need a car for a 3-day Yosemite trip?
For this itinerary, yes, I do recommend you have a car. There is public transportation in Yosemite and free shuttles, but none of them go to Hetch Hetchy and there are only a couple of times per day they go to Glacier Point and Tuolumne Meadows, which will restrict your visiting time.
Check out car rentals options here.
Can I visit Yosemite without a reservation?
It depends! Reservations are not needed most of the year – and not required at all in 2026.
Can I see all of Yosemite in 3 days?
It’s impossible – sorry! But in three days, you can get a good taste for the park, especially if you follow this itinerary and visit places outside of Yosemite Valley.
How can I hike Half Dome?
If you want to hike to the top of Half Dome, you need a permit! It’s the only day hike in Yosemite that requires a permit. If you didn’t get a permit in the pre-season lottery, you can apply for one 2 days in advance on recreation.gov!
Can I visit Sequoia-Kings Canyon on this trip?
I wouldn’t recommend it. I would add an extra 2-3 days to your vacation if you want to visit these parks in addition to Yosemite! They are not as close together as it looks on Google Maps.
3 Days in Yosemite – Your Perfect Itinerary
Three days in Yosemite might not be enough to see everything, but it’s plenty to experience its magic. From watching the sunrise at Tunnel View to ending your adventure with a sunset at Sentinel Dome, this itinerary covers the park’s most breathtaking spots.
After multiple visits to Yosemite, I’ve fine-tuned this itinerary to help you maximize your time – whether it’s your first trip or your tenth. And if you’re anything like me, you’ll already be dreaming of your next visit before you even leave!
Be sure to check out the posts below for even more information on planning your trip to Yosemite, and write to me down below what your favorite part of this itinerary was!
Pin For Later

