Wonderland Trail Permits & Planning Basics
I thru-hiked the Wonderland Trail in July 2019! This was my first thru-hike post-PCT and it was significantly shorter. But, I have been wanting to do the Wonderland ever since I heard about it back in college when I was living in Seattle, and even failed at getting a permit to hike the trail in 2016.
I’ve always be enthralled by Mt. Rainier. Seeing the mountain from campus on days when I was struggling lifted my mood x1000%. Needless to say, I was super excited to spend a week circumnavigating this insanely beautiful mountain.
In the guide, I’m going to cover the updated permit system for 2025, including tips on how to increase your chances of getting a permit, talk about the campsites and share my absolute favorites of the trip, share planning resources and my itinerary, and go over some important gear you should have.

Backcountry Emily contains affiliate links and I may receive compensation - at no extra cost to you! As an Amazon Associate I earn from qualifying purchases. See my Privacy Policy for more information.
Wonderland Trail Stats
- Length: 93 miles
- Elevation gain/ loss: 22,000 ft (23,000 ft with the Spray Park Alternate)
- Time to complete: 9-12 days (we completed in 6.5, some people do it in 3 days!)
- Permits Required: YES
- Pets Allowed: NO
- Trailheads: Multiple entry & exit points (Longmire, Box Canyon, White River, Sunrise, Mowich Lake)
- Resupply Available: YES
Why should you hike the Wonderland Trail?
To see the ever-changing and varied sides of Mt. Rainier, walk through beautiful old-growth forests, and experience the force of glaciers and glacial river landscapes. If you’ve been looking for a thru-hike you can easily do in a vacation period, and that has easy logistics, and probably has one of the highest scenery levels (and elevation change)/ mile, this is for you!

Wonderland Trail Permit Process
Mount Rainier National Park requires wilderness permits for overnight backcountry trips, and the Wonderland Trail is one of the hardest permits to get! This is because they don’t just give a permit for the trail: they are giving permits for each backcountry campground each night of your trip.
There are a few changes for 2025 permits, mainly the cost of the permit and the way the lottery works. Here is the step-by step guide to the full permit application.
Early Access Lottery
- Early Access Lottery Applications: February 10 – March 3, 2025 at 7:00 pm PT. Cost = $6/application, non-refundable. You should apply for this if you want the best chance of your top campsites and daily mileage.
- Early Access Period Window Award: March 14, 2025. This will give you your date and time slot for booking an itinerary on the Wonderland Trail.
- Early Access Booking Period: Begins March 21, 2025. There are 6 time slots per day, 10 applications booking per time slot. You should be on your computer, ready to book your itinerary immediately when your awarded date/time is happening. Permits cost additional $10/person/night to complete the reservation. Keep reading this post for more details about the trail and planning your itinerary.
To apply, visit Mount Rainier’s recreation.gov permit site.
General On-Sale
- Opens on April 25, 2025 at 7:00 am PT.
- Visit Mount Rainier’s recreation.gov permit site and click “Check Availability”.
- View the available campsites in real-time to book an itinerary. Toggle the options of starting area, starting date, and “daily groups” to piece together an itinerary.
- The permits costs $6 + $10/person/night.
- Pro tip: Don’t give up if there is nothing available on the first day. Keep checking back as cancellations can happen. You are allowed to modify a trip you have already booked to add an extra night or change a campsite if there is availability!
Walk-Up Permits
If you are not lucky enough to get a permit through the lottery, you can always try to get a walk-up permit. In fact, I saw 2 successful groups get one while we were resupplying at Longmire. The park reserves 1/3 of the spots for walk-ups, and people also cancel their reservations last minute.
- Visit the recreation.gov page to see which campsites have a “W” on their availability, indicating that walk-up permits are available. Go to the park with multiple itinerary options in mind as it will speed up the process of getting a permit. Help the rangers help you!
- Determine if you need a timed-entry reservation to enter the park. The 2025 rules have not been announced yet, but this is the site for booking. If this stays the same as 2024, just enter the park before 7:00 am and go to a Wilderness Information Center.
- Visit any Wilderness Information Center the day before you want to start hiking. There are 4 that issue permits. Paradise, Longmire, White River, and Carbon River. Check their operating hours here. In the middle of the summer, you will want to arrive early – possibly up to one hour before the center actually opens – to wait in line. Or, visit after 12 pm when the daily cancellations happen.
- Pro Tip: Visit a different wilderness center to get your permit than the one closest to your trailhead. That way you can leave a resupply in that area before going to your trailhead! When I hiked, we left a resupply at Longmire and started our trip at White River.
- Walk-up permits cost $6 + $10/person/night.
Here is an FAQ page about the early access lottery on recreation.gov, and an FAQ about regular wilderness permits at Mount Rainier.

How To Increase Your Chances of Getting a Permit
This new booking system is a lot different than when I applied in 2016 and 2019, BUT, I still think these tips are valid.
Start somewhere other than longmire
Longmire is the most popular starting area because it’s the easiest to access from Seattle and no matter which direction you start from there, the terrain is slightly easier on the first day.
I chose White River for a few reasons: it was easy enough to get to from Seattle, and it put Mowich* and Longmire as easy resupply options for the hike.
Other good options would be to start at Mowich Lake or Box Canyon. Sunrise would be fine too… but I’ll just say: I would never want to do the climb from White River to Sunrise going CCW at the very end of a trip. Just seems cruel. Sunrise is also very popular for day visitors and parking there could be a nightmare.
* We ended up not sending a resupply to Mowich. I didn’t want to spend all day flying to Seattle, driving to Rainier, getting a walk-in campsite at White River and then drive around the mountain dropping off resupply. Mowich Lake is the most inconvenient to reach entrance from the rest of the spots in the park. So, we ended up not dropping a resupply there (it’s also closed to cars right now – 2025)
Faster Circumnavigation
Because you are trying to increase your chances of getting a permit via campground selection, the less campgrounds on your permit, the more successful you will be.
My itinerary has 6 nights on the trail, which I thought was perfectly reasonable for my fitness level at the time (1-year post PCT thru-hike and zero off season training). It averaged out to 13 miles/day.
Go in September
September can be dicey on weather in Washington. That, plus the beginning of the school year kind of turns people off and summer mode ends. But, I think it’s totally doable. When I thru-hiked the PCT, my entire time in Washington was spent from September 1 – 25. Yes, I had some cold, rainy weather (probably 7-10 days worth), but I also had some incredibly beautiful fall days.
I’ve also day hiked in Mt. Rainier at the end of September before and WOW, seeing the falls colors in the brush and in the meadows is so special. It’s absolutely stunning!
Start on a Weekday and avoid holiday weeks
The Wonderland Trail is obviously a larger time commitment than just a weekend, but starting on a weekday vs. a weekend does help a tiny bit. Avoiding the week before Labor Day Weekend is also wise.
Going Counterclockwise
Rumor has it that clockwise is the more sought after direction on the Wonderland due to steepness of the climbs. I don’t buy it – some of the descents going counterclockwise were brutal.
But, may as well play into that hype. If more people are vying for a clockwise direction, going in the opposite direction could help you out.
Due to the huge increase in popularity of the trail since 2019 though, I think both directions are probably equally popular these days.
Be Open to Using Frontcountry Walk-In Campgrounds
You can utilize frontcountry campgrounds and lodging in your backpacking itinerary. White River has actual walk-in backpacker sites that you can use in addition to sites with driveways for car campers. Cougar Rock Campground would require a reservation to stay in. You could also book a room at the Longmire National Park Inn for one night.

Have Multiple Itinerary Options
Seriously, you need to do your planning for this trail. Use the resources provided and maps to come up with multiple itineraries in the counter-clockwise and clockwise directions. This will help you stay on target if you’re feeling stressed by booking a permit online in your booking window.
And please be realistic about your itinerary when planning. An unrealistic itinerary can not only make you unhappy, but your group members unhappy, and other people in campsites unhappy. There have been numerous reports of people not being able to make their permitted campsite and camp at an earlier campsite! This puts other people behind you, who have that campsite reserved, in an unhappy situation.

Campsites on the Wonderland Trail
In case you missed it when I mentioned it earlier in this post – you must sleep in designated campsites on the Wonderland Trail. You are not allowed to bivy or go find a random spot in the trees. Do not break this rule.
And you must camp in the campgrounds on your permit on the designated night. So please don’t knowingly choose an itinerary that is beyond your means, or straight-up ignore your permitted itinerary just because. We ran into multiple rangers on the trail and our permits were checked twice to ensure we were in the right area on the right day.
I think that if you want to hike this trail, you should take any campsites available to you to make it happen. That being said, I have some favorites and not-so-favorites when it comes to selecting campsites along the trail, which will hopefully help you plan!
*I put an asterisk next to each campsite where I used the toilet. The toilet condition may have contributed to its ranking. Mind you, I hiked in 2019 and the toilet conditions could have changed – for better or worse ;).
Best Wonderland Trail Campsites
These are my favorite, 5-star campsites that you must try for (listed in order of amazingness, in my opinion). This is mainly based on views from the campground.
- Klapatche Park*
- Summerland*
- Indian Bar
- Mystic Camp
- Golden Lakes
- Sunrise
3-Star Wonderland Trail Campsites
These are campsites I think are pretty decent. They don’t have amazing views, but they have space and are necessary for using for circumnavigation and are way better than the next category.
- Granite Creek
- Dick Creek*
- South Mowich River*
- South Puyallup River
- Pyramid Creek (this toilet is kinda bad – privacy)*
- Nickel Creek (this toilet is kinda bad – privacy)*
- White River Walk-in*
1-Star Wonderland Trail Campsites
I’ve ranked these as the worst because they either had a really gross toilet situation or the bugs were just out of control when I visited.
- Devil’s Dream*
- Maple Creek*
- North Puyallup River (toilet only available at group campsite on other side of river, probably 0.1-.2 miles away with steep trail)*
- Cataract Valley
No Ranking Campsites
I wasn’t able to rank these ones because they were either closed on our trip, or on the “real” Wonderland Trail instead of the Spray Park alternate, which is the route we chose to do.
- Mowich Lake
- Carbon River
- Ipsut Creek
- Paradise River
Off Trail Alternate Campsites
These are some campsites that you could put on your itinerary that aren’t on the real Wonderland Trail, but are really nice and close enough to the trail to make a detour worth considering, especially if you can’t get other campsites on the trail.
- Eagle’s Roost*
- Snow Lake*

What Do the Campsites Look Like?
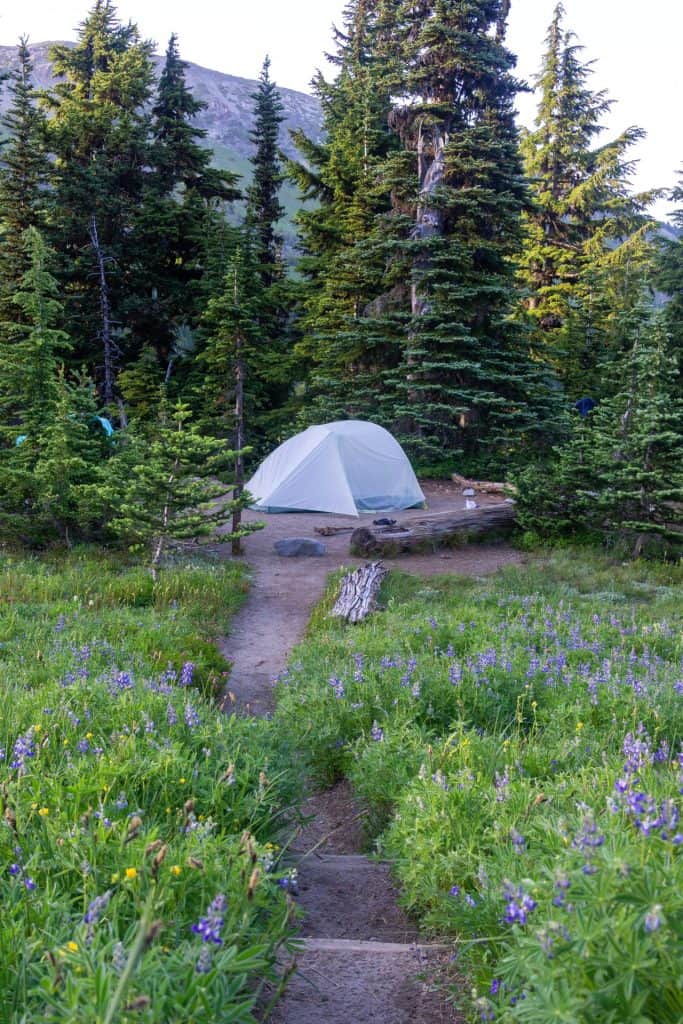
If you’re not used to designated backcountry campsites (like me), this whole campsite thing can be confusing or comforting. Generally, the campsites on the Wonderland are large spaces a little bit off trail, and well-signed. The campground is signed right on the trail, and each site within the space has a number. Some of them have water nearby, some are dry camps.
They range from 2-12 individual sites (most are ~2-4 sites), and some campsites have an additional group site that can fit up to 12 people.
Your permit will tell you if you have to camp in the group site or not. And when applying for permits, if your group has over 6 people in it, you must stay in the group campsite. This is because the individual campsites really can’t fit more than two 2-person tents (some are larger than others and you can fit maybe three 2-person tents, or two 3-person tents, but you’re going to be right next the each other).
There is also a “communal area” where there is a bear pole and a small trail to a pit toilet. The pit toilets do not have toilet paper provided, but that’s a small price to pay for not having to dig a 6-in hole every time you want to poop.
I was confused what a bear pole is, and specifically meant to take a picture/ video of how to use one for this blog post, and… completely forgot. But, there’s a pole that you hang your food from, and another pole that you use to lift your food bag onto the hanging pole.
I’d highly recommend that your food bag has a nice, big, roll-top closure that creates a big loop, for the easiest hang. Some of the poles can be a little unwieldy, but you get the hang of it. The really awesome thing about these bear poles is that you don’t need to bring a bear canister or waste time at night trying to find a decent tree to hang your food in! Thank you, MRNP for installing these.

How Do I Choose Which Campsites to Stay In?
In terms of miles per day, it will greatly depend on yourself and your group. It will also depend on the kind of trip you want! Is this a vacation or an intense physical challenge/ Death March?
This trail is by no means easy, and each day you will have at least one major climb and descent. I believe most backpackers will be able to do a 9-10 mile per day pace (9-10 days).
Use this Wonderland Planner and play around with you start/end trailhead and number of days to hike. see what the elevation gain and loss and mileage is per day, and think about what trips you’ve done in the past and how those stats compare to certain days on this trail.
I think grade and elevation gain are more important determinators than miles, but this is coming from someone who has hiked many 25+ mile days.
If you are resupplying, maybe try to do your “harder” days the day before resupply, when your pack will be the lightest. And remember, the fewer nights you stay out, the better your chances of getting a permit in the lottery.
The Spray Park Alternate
My hiking partner and I both decided that we wanted the opportunity to see the amazing views of Spray Park. We also really like being above treeline, so taking the Spray Park alternate was a really easy decision!
Unfortunately, the day we did Spray Park, we had lots of fog and clouds, so Mt. Rainier was hiding. I’d still choose the Spray Park route again, because even though the continual climb was tough, it was so amazing trekking through the alpine meadows at the top, and we had beautiful views of other mountains in the park!
I still plan on one day doing the “true” Wonderland route over Ipsut Pass, and will probably save it for when I come back to do the Northern Loop. If an extra 1,000 ft of climbing doesn’t excite you, or old growth forests and sticking to the “real” Wonderland Trail do excite you, you should do the Ipsut Pass route!

My 7 Day Wonderland Trail Itinerary
- Day 1 – White River Campground to Dick Creek: 16 miles, +4,600 & -4,700 ft
- Day 2 – Dick Creek to South Mowich River via Spray Park: 12.4 miles, +3,600 & -5,000 ft
- Day 3 – South Mowich River to Klapatche Park: 13.3 miles, +4,900 & -2,000 ft
- Day 4 – Klapatche Park to Pyramid Creek: 13.7 miles, +3,400 & -5,200 ft
- Day 5 – Pyramid Creek to Nickel Creek: 16.7 miles, +3,700 & -4,000 ft
- Day 6 – Nickel Creek to Summerland: 11.2 miles, +5,000 & -2,400 ft
- Day 7 – Summerland to White River: 7 miles, +500 ft & – 2,200 ft
*All mileage and elevation taken from FarOut Guides, which I highly recommend downloading!

Best Time to Hike the Wonderland Trail
The Wonderland Trail is really only accessible during the summertime. And that is Mt. Rainier’s summertime, not the usual summer timeframe. Of course, climate is changing and we’ve seen crazy high snow years and low ones in recent years, so it’s hard to say when the trails will be open, and personal comfort is an important factor.
For most people, going on the trail between end-July and early-September will be the most risk-averse and easiest. I have seen people going on the trail earlier in the season, possibly before the footbridges over the rivers are in, and late in the season when snowfall becomes more likely.
Good weather is not guaranteed at any time on the trail. The mountain makes her own weather, and we’re in Washington, so rain/ sleet/ hail can fall at any time, and the mountain can be obscured under thick clouds.
Some people have experienced full trips of rain, never seeing Mt. Rainier. Our trip took place from July 23 – 29, 2019. We were incredibly lucky, and only didn’t see the mountain at 2 disappointing times (Spray Park & Reflection Lakes), and were rained/ hailed/ drizzled on 3 times. That being said, there are some general timeframes to consider when selecting dates.
May
Not accessible for hiking.
June
Not feasible for a thru-hike unless you have mountaineering skills. Only the lowest elevation campsites start melting out in mid-June.
July
Snow is melting everywhere, and continues to melt more as the month goes on. The highest elevation campsites like Indian Bar and Summerland begin to melt out by mid-July. Bear poles and toilets in place at campsites, definitely by mid-month.
On our trip, we had an early-melt summer, but still had snow in Spray Park and Panhandle Gap at the end of July.
Weather improves as the month goes on (sometimes), mosquitos can be bad in meadows and camp areas. Lots of water, though some small seasonal sources could dry up by the end of the month. Some bridges can still not be in place. Wildflowers at the end of the month are in their prime.
August
Temperatures can be hot, but start to decease as the month goes on, mosquitos are better, wildflowers are dying, but berries are growing at the end of the month. Seasonal water sources drying up. Bear poles, toilets, bridges are in place.
September
Can be wonderful weather-wise through the month, but there’s a much higher likelihood of bad weather, and hike-ending weather. Bear poles and toilets will come down as the month winds down and the park prepares for winter. Fall colors are at their peak mid-end of the month.
Berries are ripe at the beginning of the month, leading to more bear sightings as they prepare to fatten up for the winter.
October
Not recommended for backpacking, snow could fall at any time, if it hasn’t already put the park into winter operations. You need to get a walk-up permit from the park, and know how to handle early-season snow and its consequences. There will be no facilities (bear poles, toilets, bridges) in place. The park stops accepting advance wilderness permit reservations beginning October 5th.
I’d highly recommend following the park’s wilderness conditions page throughout the summer. They are pretty good at updating it, especially early in the season, when conditions are changing quickly.

Wildlife
Mt. Rainier is home to many animals! On my trip I saw a black bear, a herd of mountain goats, and so many marmots.
Remember to Leave No Trace and do not interact with wildlife or feed them. Keep a clean camp to avoid wildlife interactions and use bear poles in the campgrounds to keep food away from bear and other critters.
Black bears don’t want to interact with humans. If you come upon a black bear on trail, just take steps back, talk to it – you can yell “Hey bear!” – and give it time to move away from the trail. If a bear enters camp, you should attempt to scare it off by yelling or banging pots. Do not chase bears. If you feel more comfortable on trail, you can carry bear spray. Learn how to use it and in what situations you should use it in.

Resupply Options
This is a physically challenging trail, so why carry more food weight than you absolutely need? There are four locations you can drop a food cache: White River, Sunrise, Longmire, and Mowich Lake.
The park service requires caches to be stored in lidded buckets. If you don’t have one/ want to buy one, you may be able to get one from the caching locations, as many hikers leave their buckets behind, “donating” them to the park/ other hikers. You can either mail your cache or drop it off in person. The park service has a host of regulations surrounding food caching, which you can read specifics on here.
We decided to only do one resupply, which we picked up early on our 5th day of the hike, at Longmire. We did not want to drive to Mowich Lake to do a resupply drop, and also didn’t want to pay to mail one there.
If you don’t want to drive to Mowich (or any of the other locations) but still want to resupply there, you will have to mail your items. We are ultimately really happy with our decision.
Unfortunately, we heard of a handful of hikers having their caches stolen from Mowich Lake and White River. Mowich Lake is the most unsupervised cache location, and is where we heard of the most theft happening.
I have to assume that non-hikers are stealing caches, because backpackers know how precious resupply is. At Longmire, the caches are held in the wilderness office, and there is a sign-out log to receive your cache. So, you have to pick it up during business hours, but it is the most secure.

Training For the Wonderland Trail
I would highly recommend training beforehand. I went into this hike straight from the couch, after barely hiking/ backpacking since my PCT thru-hike. And I really can’t recommend this method to anyone.
Thankfully, my hiker legs were in there somewhere, and we had plenty of daylight in our days, and I have some crazy mental grit, because this trail is HARD!
Whether that looks like the stairmaster at the gym with a loaded pack, or finding trails that have an average grade of 800 ft/mile, you should do something like that at least once a week to get prepped for this hike.
Transportation to Mt. Rainier National Park
Sadly, there is no public transportation to Mt. Rainier or from Seattle-Tacoma International Airport.
There are some private groups that offer customized Mt. Rainier tours that do pick up in the Seattle area, so you could try to inquire with them about options and cost.
However, if you are flying in to do this hike, the most cost-effective solution is probably renting a car from SeaTac airport. Even though you’ll be leaving it at a trailhead for 7+ days. You don’t need a fancy car with AWD/ 4×4 – a normal car will be fine. But if you are starting at Mowich Lake, having a car with high clearance is recommended.

Gear to Pack
I think the Wonderland Trail is an awesome trail to go ultralight on, because it’s physically demanding, you have resupply options, and don’t need to carry a bear canister!
You can read what I brought on my Wonderland Trail hike in 2019, but I also have a more modern and updated ultralight gear list for my current adventures.
Important Gear Considerations
- Make sure your rain jacket/ other rain layers are sufficient, and don’t skimp on your insulating layer.
- Campsites are on dirt, so using a non-freestanding tent should not be an issue.
- You need a water filter – even though there are designated campsites, there is no potable water.
- Trekking poles will save your knees on this trip.
- Bring microspikes if you are planning an early-season hike (July), and possibly an ice axe depending on snow at Panhandle Gap.
- You’ll want to bring an external battery to charge your phone and headlamp since there aren’t really any places to charge it when resupplying.
- If you’re hiking while the snow is melting, bring a bug net and thank me later.
- Bring toilet paper! There’s no TP in the outhouses on trail. I’d still bring a trowel in case you have an emergency poop and can’t get to a campsite in time. Remember to Leave No Trace!

Final Thoughts
The Wonderland Trail is a stunning, bucket list summer backpacking trip. Planning for this hike can be daunting, but as long as you follow the tips in this post, and secure an early access lottery reservation, you’ll be in good shape!
Have any questions, comments, or memories about the Wonderland Trail that you’d like to share? Let me know in the comments below!
Pin For Later

