
My Ultralight Backpacking Ditty Bag: First Aid & Gear Repair Kit
A tent and sleeping bag are pretty hard to forget when you’re packing for a backpacking trip. The tiny things? Much easier. And a sleeping pad patch isn’t very helpful sitting in a drawer at home when your pad goes flat in the middle of the night.
That’s where my backpacking ditty bag comes in. It keeps my first aid supplies, gear repair items, and toiletries together so I’m not digging through my entire backpack looking for something smaller than my thumb.
This should help you figure out the tiny extras you can bring on a backpacking trip for when things go awry: torn gear, hot spots, burns, and more. Many of these also make up the 10 essentials, and I actually carry the majority of items in this bag when I’m out day hiking too.

Backcountry Emily contains affiliate links, and I may earn a commission—at no extra cost to you. Some gear in this post may have been gifted or part of a paid collaboration, but I never accept products or partnerships I wouldn’t personally recommend. All opinions are 100% my own. As an Amazon Associate, I earn from qualifying purchases. See my Privacy Policy for more information.
What Is a Backpacking Ditty Bag?
A ditty bag is just a small bag for all the little things that would otherwise disappear into your backpack. You don’t need a special bag with “ditty” in the name. A lightweight pouch, stuff sack, or even a Ziploc can do the job.
Mine combines my toiletries, first-aid kit, and repair kit. There’s some overlap between those categories, and I’m fine with that – like some toiletries are actually preventative first-aid!
I keep my electronics in a separate waterproof stuff sack just because those cords can get messy and as a photographer, I’m usually carrying more electronics and photo gear than the average hiker.
The point is being able to find what you need.
My Backpacking First Aid and Repair Kit at a Glance
Here’s the small-stuff side of my setup, with toiletries covered separately in this post.
First Aid
- Leukotape
- Gauze squares and Band-Aids
- Alcohol swabs
- A small amount of antibiotic ointment
- Burn gel
- Moleskin
- Personal medications and the over-the-counter medications I carry
- Heat-it tool
- Small tweezers
- Bandana*
- Garmin inReach*
Gear Repair
- Tenacious Tape
- Duct tape*
- Repair kit for my inflatable sleeping pad
- Needle
- Safety pin
- Small knife
*I carry duct tape wrapped around my trekking pole and a bandana outside the bag. They’re useful for repairs and first aid, but they don’t actually live in my ditty bag – along with the Garmin inReach.

My Ultralight Backpacking First Aid Kit
I keep my first aid kit small, but what’s right for me won’t necessarily be right for you. Your medical needs, first aid training, hiking partners, and the trip itself should all factor into what you bring.
One thing I took away from my Wilderness First Aid course is that carrying supplies and knowing how to use them are two different things. If you are an avid hiker and backpacker, I can’t recommend a WFA or Wilderness First Responder (WFR) course enough. It’ll give you so much context to your first aid kit and maybe even save your life or someone else’s.
This is a look inside my kit, and what I’m comfortable carrying and using outside, not instructions for treating an injury.
Leukotape & Moleskin for Hot Spots
Leukotape is one of those little things I really don’t want to forget. The adhesive is strong, it lays flat, and I use it for covering a hot spot before it becomes a blister.
If you feel a spot rubbing, stop and deal with it. I know, taking off your pack and shoes is annoying when you’ve finally gotten into a rhythm. Hiking the next several miles with a blister forming is worse.
You don’t need the whole roll in your pack. I wrap some around my pill bottle – the adhesive works even after unrolling it and re-rolling it – it’s that strong!
I also have Moleskin in my first aid kit in case the blister forms too quickly and I want some padding. I find that putting the Moleskin on first and then the Leukotape over the Moleskin to really make sure it sticks is the way to go.
Note that Leukotape contains latex – so do not use this if you are allergic to latex. One of my PCT hiker friends found this out the wrong way at the beginning of the trail and earned his trail name for it.
Gauze, Band-Aids, and Small Wound Care Supplies
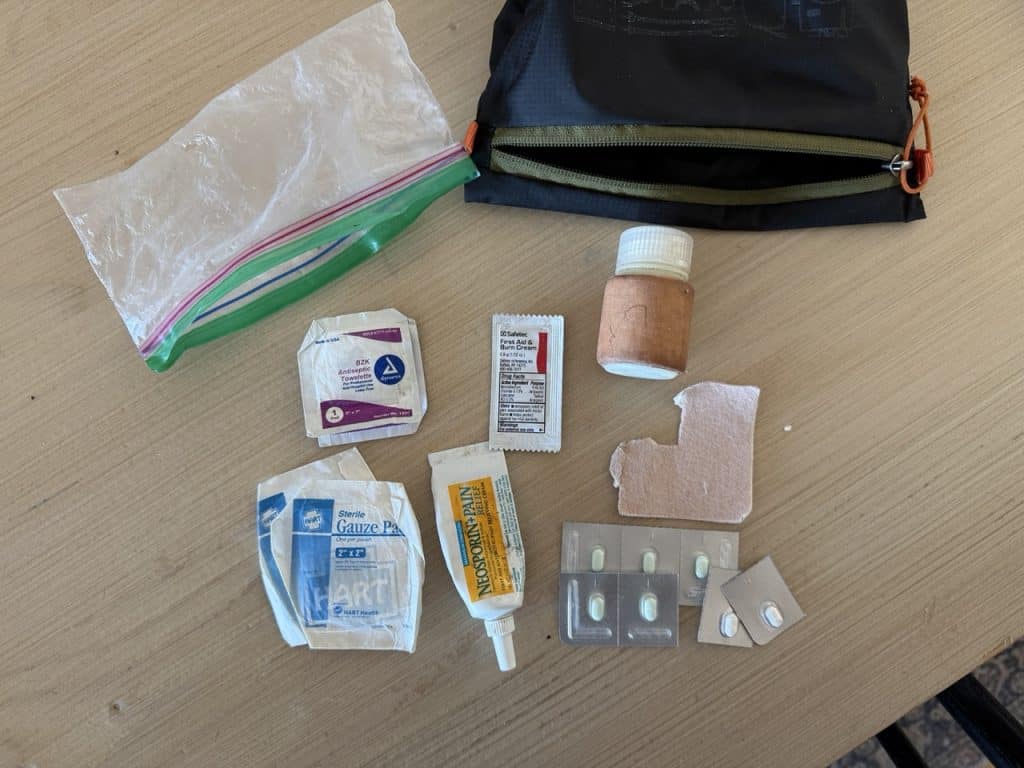
I carry a few gauze squares, Band-Aids, alcohol swabs, burn gel, and a small amount of antibiotic ointment. These are the basic supplies in my kit for minor mishaps, rather than a giant assortment of every bandage shape available.
Keep individually wrapped supplies sealed and protected from moisture, and check that you’ve replaced anything you used on your last trip. It’s easy to remember using the last Band-Aid and then completely forget to put more in the bag.
My personal favorite way to take care of a cut is to clean it, use a gauze square, and then actually use leukotape to adhere the gauze. I have found Leukotape to be a much better adhesive than Band-Aids, but I still carry a few Band-Aids.
- ➡️ Grab this pre-made first aid kit for the basics and repackage it for weight savings
- ➡️ Get first aid re-fills at REI
Personal Medications
Medications are one part of this list you really need to make your own.
Bring your prescriptions and any emergency medications you’ve been prescribed, along with appropriate over-the-counter options for your needs.
Keep medication names and directions with them, follow their storage requirements, and check with your pharmacist if you’re unsure about repackaging. A handful of mystery pills is not a great packing system.
If you use an Epi-pen for any allergies, always make sure it’s easily available, and make sure your hiking partners know about it and how to access it in case you need it!
Personally, I pack Advil, Tylenol, Benadryl in daily amounts, and I bring 2 Aspirin and my personal rx meds.
➡️ I pack pills in a small plastic container
Heat-it Tool
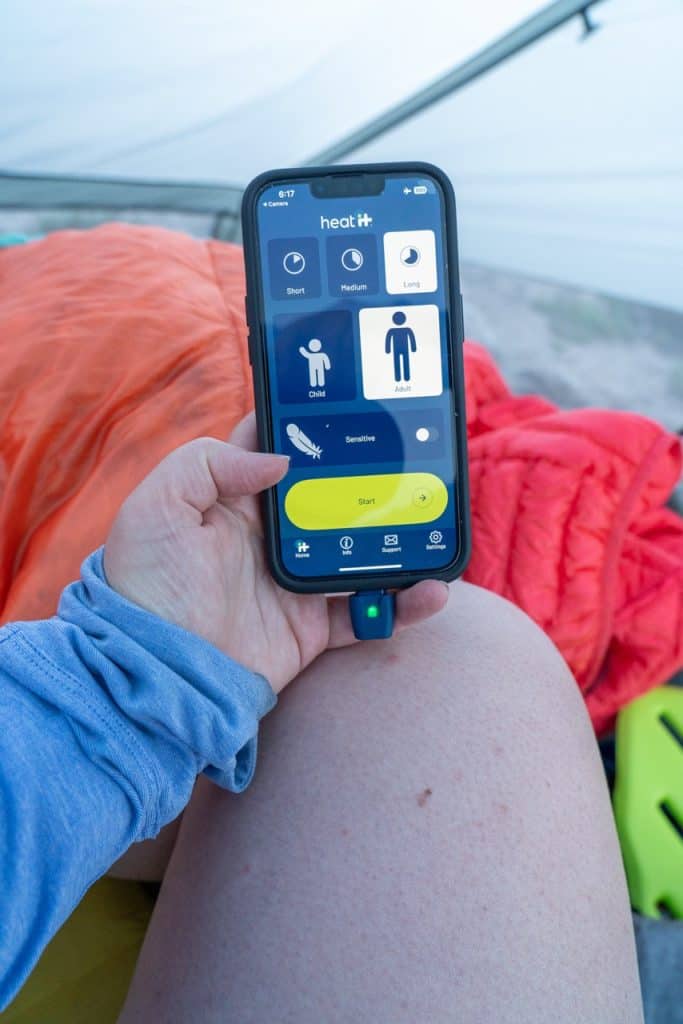
I swear by this tiny little device for stopping mosquito bite itching. You do need to use it with your phone and have the app downloaded.
It works by applying heat directly to the bite. It hurts a bit, but it does stop the itch for me. Some of the more itchy bites I’ve had to use it a couple of times on at the strongest setting.
Having this device is so much better than scratching your skin raw and potentially getting open wounds due to itching that can then turn into a larger first aid problem.
➡️ Grab the best anti-itch tool out there
Small Tweezers
I bring a small pair of tweezers for splinters and other tiny things I don’t want stuck in my skin. They’re also in my toiletry guide because, yes, they get used for personal grooming too. It’s one pair doing both jobs.
➡️ My favorite tiny tweezers that actually grab
Bandana
So people might actually carry a legitimate sling in their first aid kit, but I make do with a bandana, knowing that if I actually need it for a sling or to stabilize a broken bone (with help of a trekking pole), it’s going to hurt like a b****.
I also use it for blowing my nose into – which may sound gross but so is blowing snot rockets, and Kleenex is just another thing you have to throw away or worry about not accidentally littering.
Garmin inReach
The most important piece of my first aid kit: a way to call for help if I need evacuating and self-rescue becomes impossible. I advocate for everyone to have some kind of PLB or SOS device if you’re regularly hiking.
I know some phones now have SOS messaging: but have you seen how much battery life that uses when it’s attempting to connect and communicate? I watched my (brand new) phone go down nearly 20% over less than an hour using that service.
Dedicated 2-way satellite messengers with direct access to emergency services is the better route. Plus, Garmin has a rescue insurance plan you can add on with your subscription.
➡️ Get the best device for calling search and rescue

Toiletries that Double As First Aid Items
You can read all more about all the items in my backpacking toiletry kit here, but there are a few toiletry items that double as preventative first aid that I wanted to point out.
- Eyedrops: I have dry eye so this is personal, but it’s also helpful if a bug flies into your eye for washing it out – or if you get sand or dirt in your eyes.
- Sunscreen prevents burns – we all know how bad that can be!
- Picaridin/ bug spray prevents those annoying bug bites – and mosquitoes carry disease! So this is a pretty necessary item in bug season if you ask me.
- Vagisil/ anti-chafe prevents chafing. I use Vagisil or Monistat gels because it works best for me. Chafed skin can open and become open wounds. Mix that with sweat and dirt and an infection is a possibility.

My Backpacking Gear Repair Kit
My repair kit is tiny. I’m mainly carrying supplies for small repairs that can keep a piece of gear usable until I get home. A tear in a jacket or a hole in a sleeping pad doesn’t take much space to prepare for.
Repair Tape for Clothing and Shelters
I carry Tenacious Tape for small gear repairs, like a hole in a down jacket or tent, and DCF repair tape when I’m using a Dyneema tent. I like using Tenacious Tape more than duct tape because duct tape can leave behind pretty bad residue.
Tenacious Tape in the field is also not usually my final gear repair step: I take the tape off at home, clean the gear well, and then repair it with more permanent methods like a legitimate patch.
Inflatable Sleeping-Pad Repair Kit
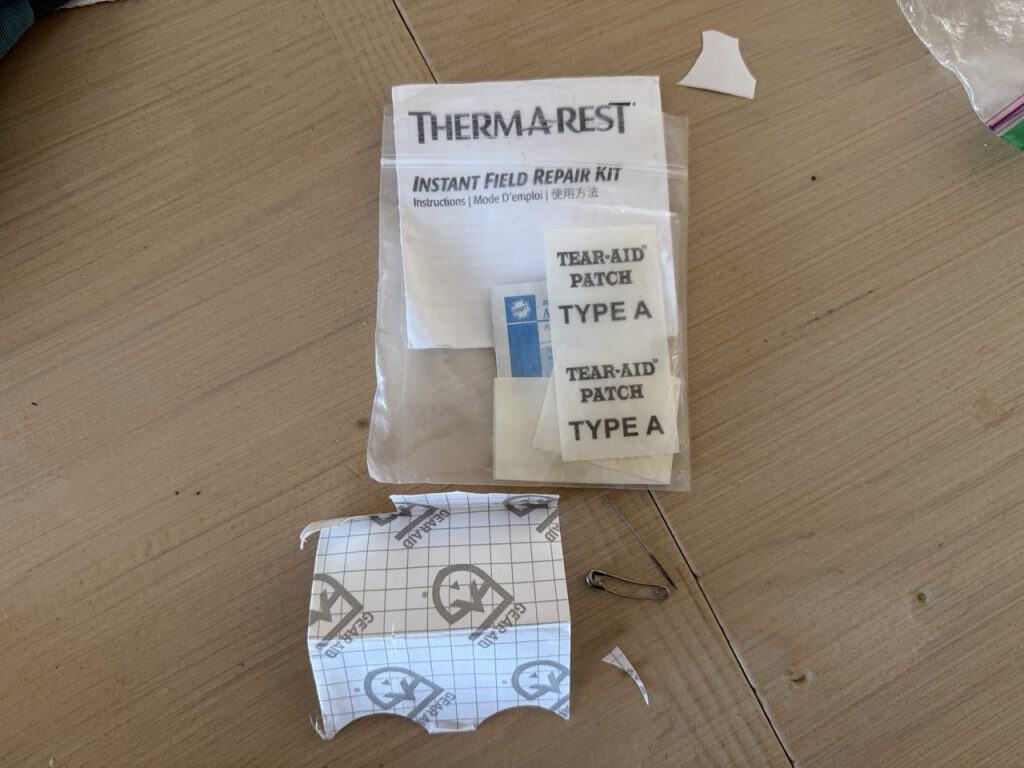
If you sleep on an inflatable pad, bring a repair kit that works with it. I’ve had to patch my sleeping pad in the field before, so this one has earned its place in my bag.
I use the Therm-a-Rest repair kit for my pad that comes with the pad when you buy it. Check the instructions for your particular kit before heading out, including any wait time before reinflating. It’s much easier to figure out at home than when you’re tired and just want to go to bed.
I also prefer to use the real repair kit for the pad. Some people just use Tenacious Tape, but the pad repair kits have a goo-like gel that plugs the hole first, then the tape goes over that. It’s a much more robust repair system, but you could always just use the tape in the field and use the full kit when you get home.
I do not re-do the repair on this when I get home: once I do it in the field, it stays. And it has stayed repaired for years, so if you do it right, it actually does work!
➡️ This is a repair kit that works for all sleeping pads
Needle, Floss, and a Safety Pin
A needle and some unwaxed floss can handle small sewing repairs in clothing or tent mesh. Most people will just deal with it until they get home – but if you’re camping and the mosquitoes are bad and you get a hole in your tent mesh: this might be a sanity-saver.
I tore my tent mesh on my tent on the PCT and left it for a few weeks before finally asking a hotel for a sewing kit in Oregon and doing a self-sew on a zero day. I have to say: my repair held up. It’s still self-sewn to this day.
A safety pin is another tiny item that can help hold fabric together temporarily. Neither takes up much space, and you don’t need to bring an entire sewing kit.
I also use the needle for lancing blisters in the field – I sterilize it with my lighter.
➡️ This repair spool from Igneous solves multiple problems
Small Knife
I carry a small knife for cutting repair tape and other little tasks. For this kit, I don’t need anything huge; I just want a tool that handles the jobs I’m bringing it for.
➡️ I carry the Spyderco Ladybug
Duct Tape
My duct tape lives wrapped around my trekking pole, so it doesn’t take up space inside the bag.
Like I said earlier, I don’t like to use it on my nice gear, but I have used it on my shoes before on the Colorado Trail when my shoe upper mesh separated from the outsole during the last 50 miles of trail. It didn’t last long…but it kind of helped.

How to Adjust the Kit for Your Trip
Trip length matters, but so does how far you’ll be from help or a way off trail. A quick overnight close to a trailhead, a thru-hike with resupply stops, and a remote 2-week-long route all deserve different planning.
Before packing, think through:
- Duration: Do you have enough consumable supplies and medication for the trip, including a reasonable allowance for delays?
- Remoteness: How long could it take to reach help if something goes wrong?
- Your actual gear: Do your patches work with the shelter and sleeping pad you’re bringing?
- Personal needs: Are there medical needs or recurring problems your kit should account for?
- Your hiking partners: If you’re sharing any supplies, has someone actually packed them?
Keeping things light means being thoughtful about what you bring. It doesn’t mean removing something you need.
How I Pack My Ditty Bag
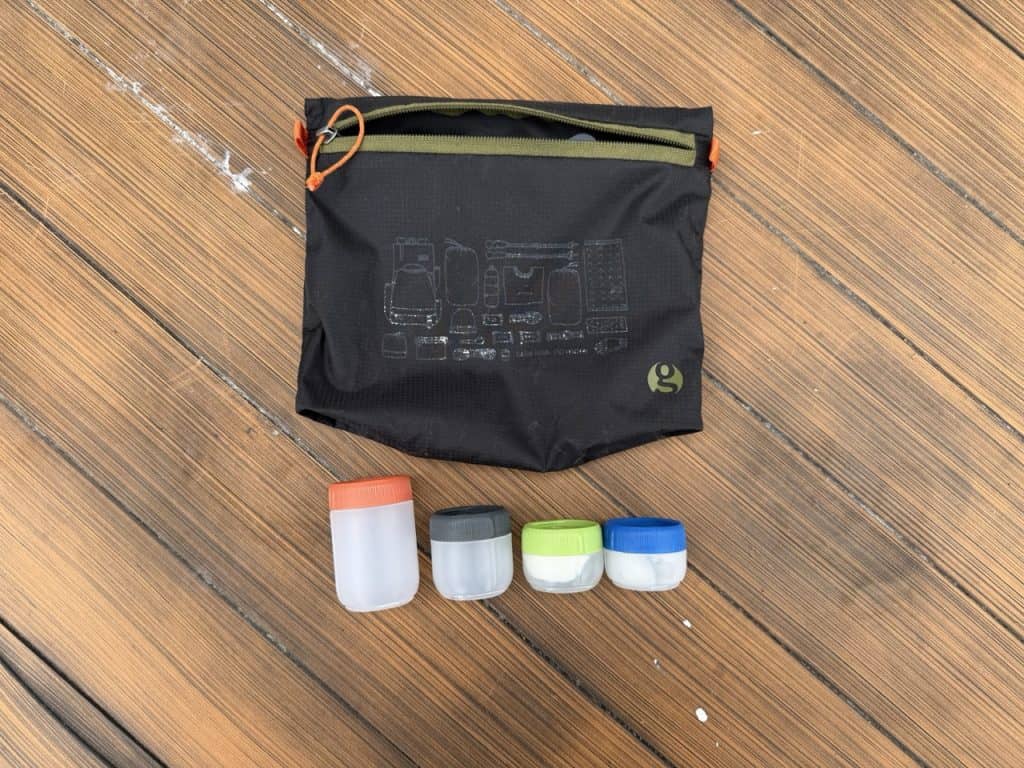
I like having a small bag that keeps everything together and fits easily in my bear canister with my toiletries. A wide opening is helpful when you’re looking for something tiny.
Not everything stays in there all day. Items I use while hiking stay easy to reach in hipbelt pockets (like sunscreen and anti-chafe), and my bathroom kit is separate. I also do a bit of re-organizing at camp.
For first-aid supplies, protect anything that needs to stay dry with sealed packaging or a small waterproof inner bag. I keep my bandages, gauze, and ointments in a small Ziploc inside my main, larger toiletry bag.
I also put my unscented repair items like the patches, needle, floss, knife, etc. in another small pouch (actually, the pouch the sleeping pad repair kit comes in).
When I’m backpacking in bear country, I keep smellable first-aid items with my toiletries to go into the bear canister, and the non-smellable repair items go inside my electronics bag inside my tent.
Keep the Small Stuff Useful
My ditty bag doesn’t need to be fancy. It needs to keep the little things together, and those little things need to work with my gear and the trips I take.
Start with your own needs, check the supplies you already have, and replace what you’ve used. That last part is easy to skip (and I’ve accidentally been there so many times).
Remember that many of these items are part of the 10 Essentials of hiking. Need to learn more about what to pack for hiking safety? Check out this post.
If you need some help paring down your toiletries, check out my women’s backpacking toiletry guide. And if you’re putting together the rest of your ultralight backpacking gear setup, check out my complete backpacking gear list.

This is personal, but… do you have periods? I don’t see any mention of menstrual products or how you handle it on trail. Thank you.
For personal reasons, I choose to skip my period with the pill. Thanks for pointing that out though – I realize I have not mentioned this in this article. Most women I know who backpack will use a menstrual cup or pack their known amount of tampons they expect to use and an extra ziplock bag to pack out used tampons.