
Backpack to Little Lakes Valley
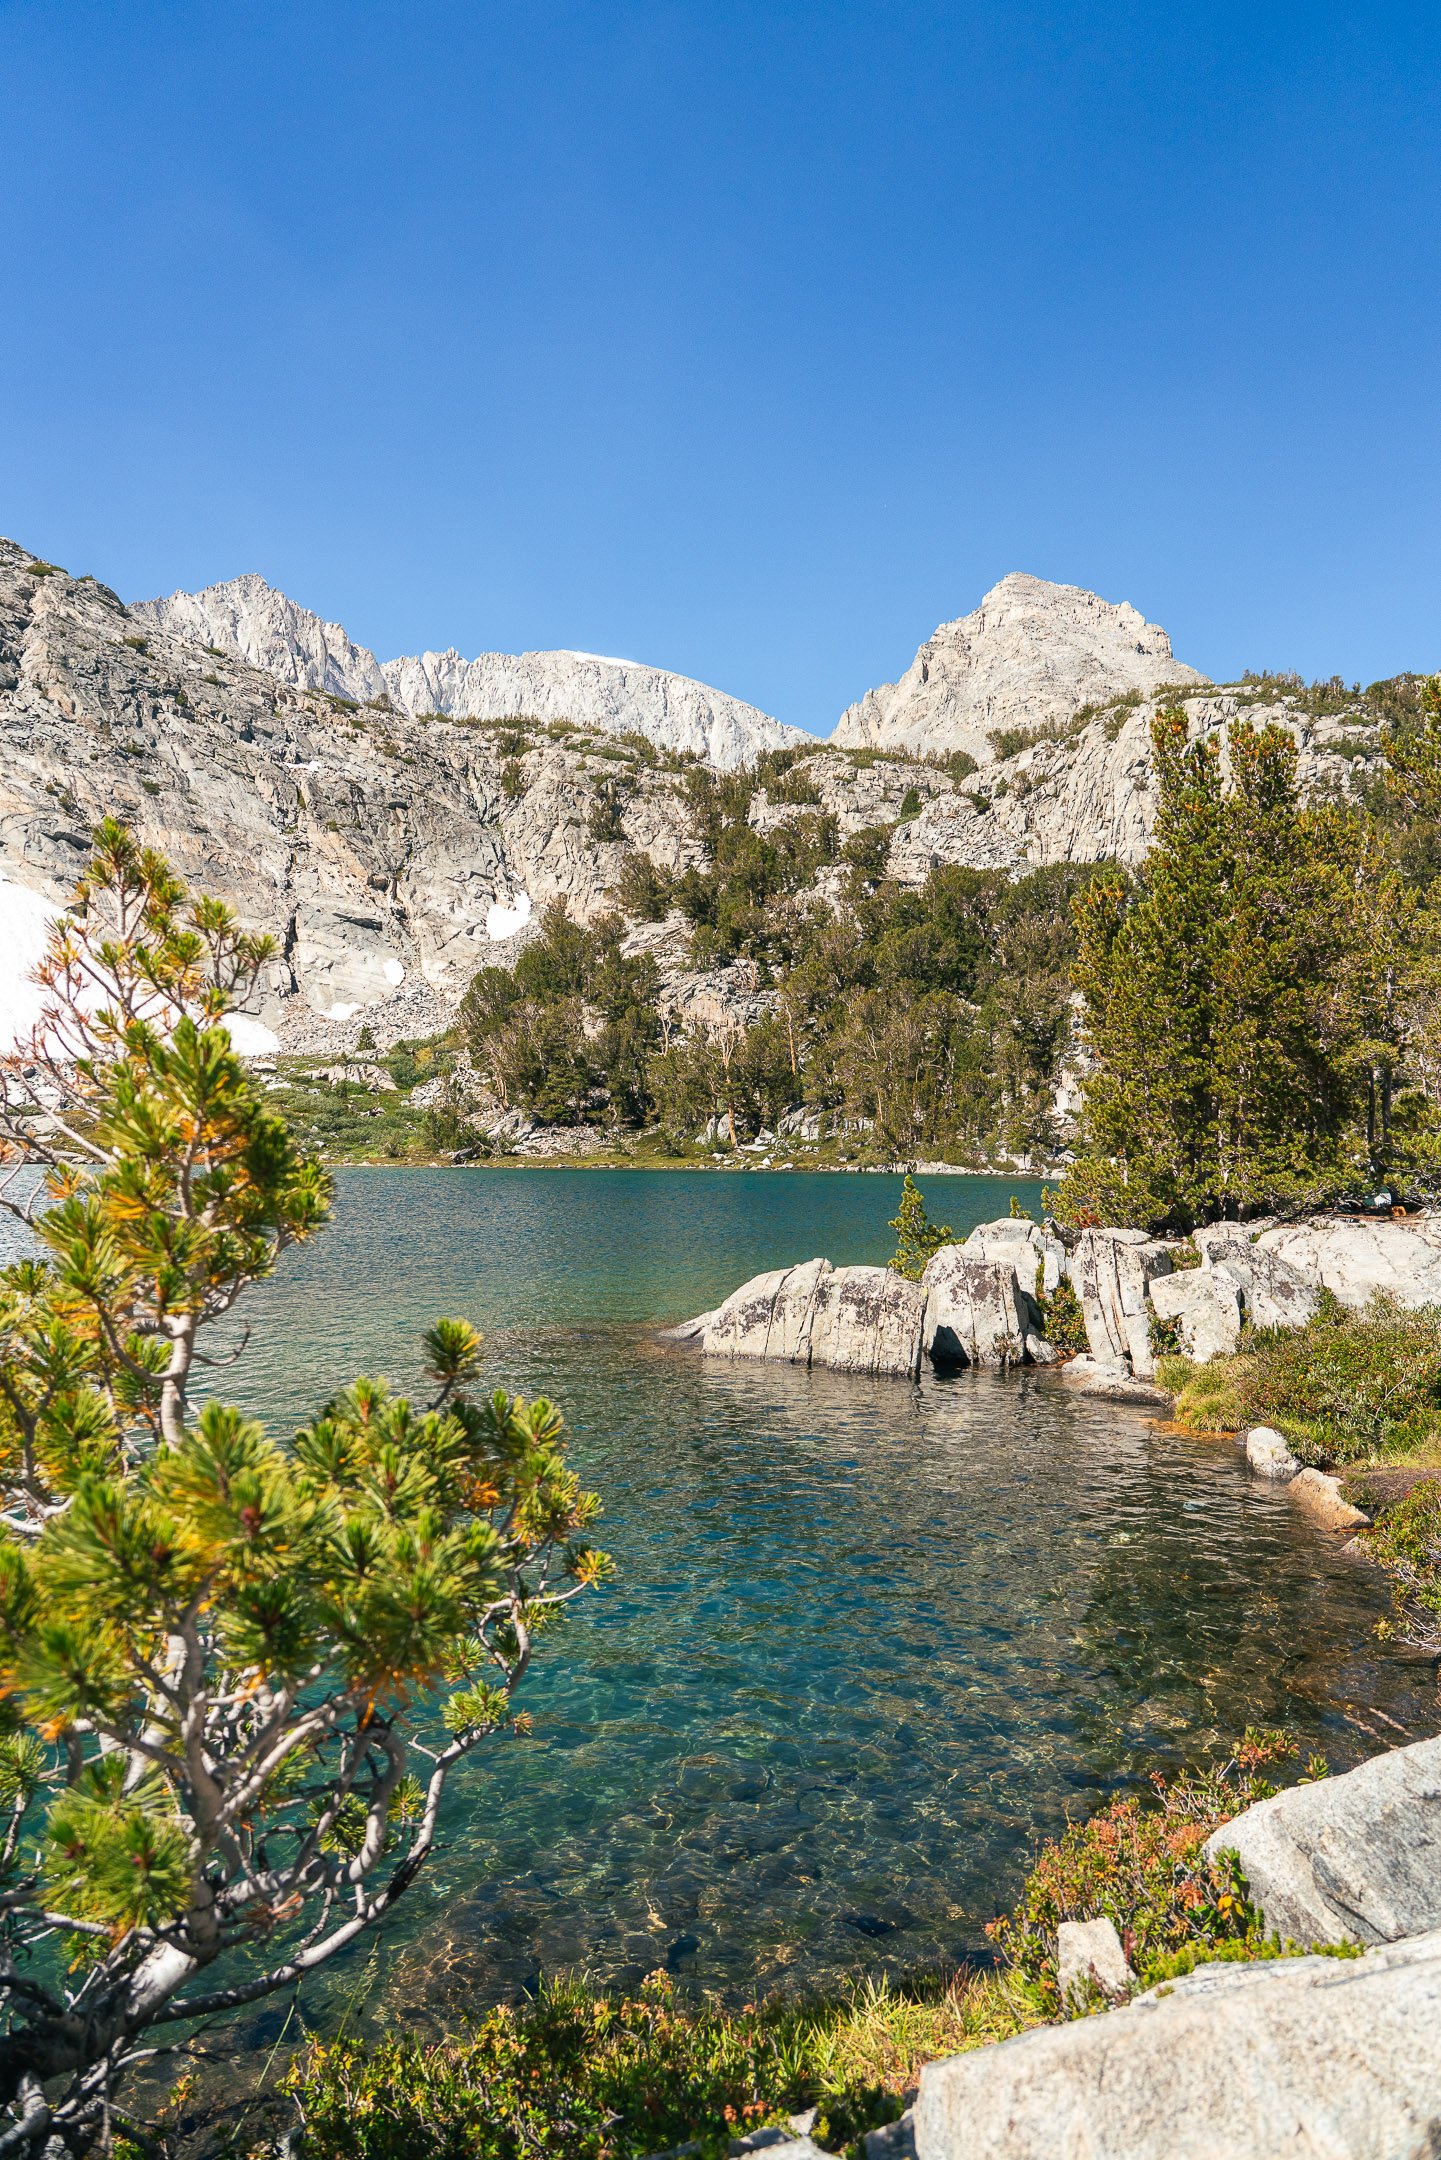
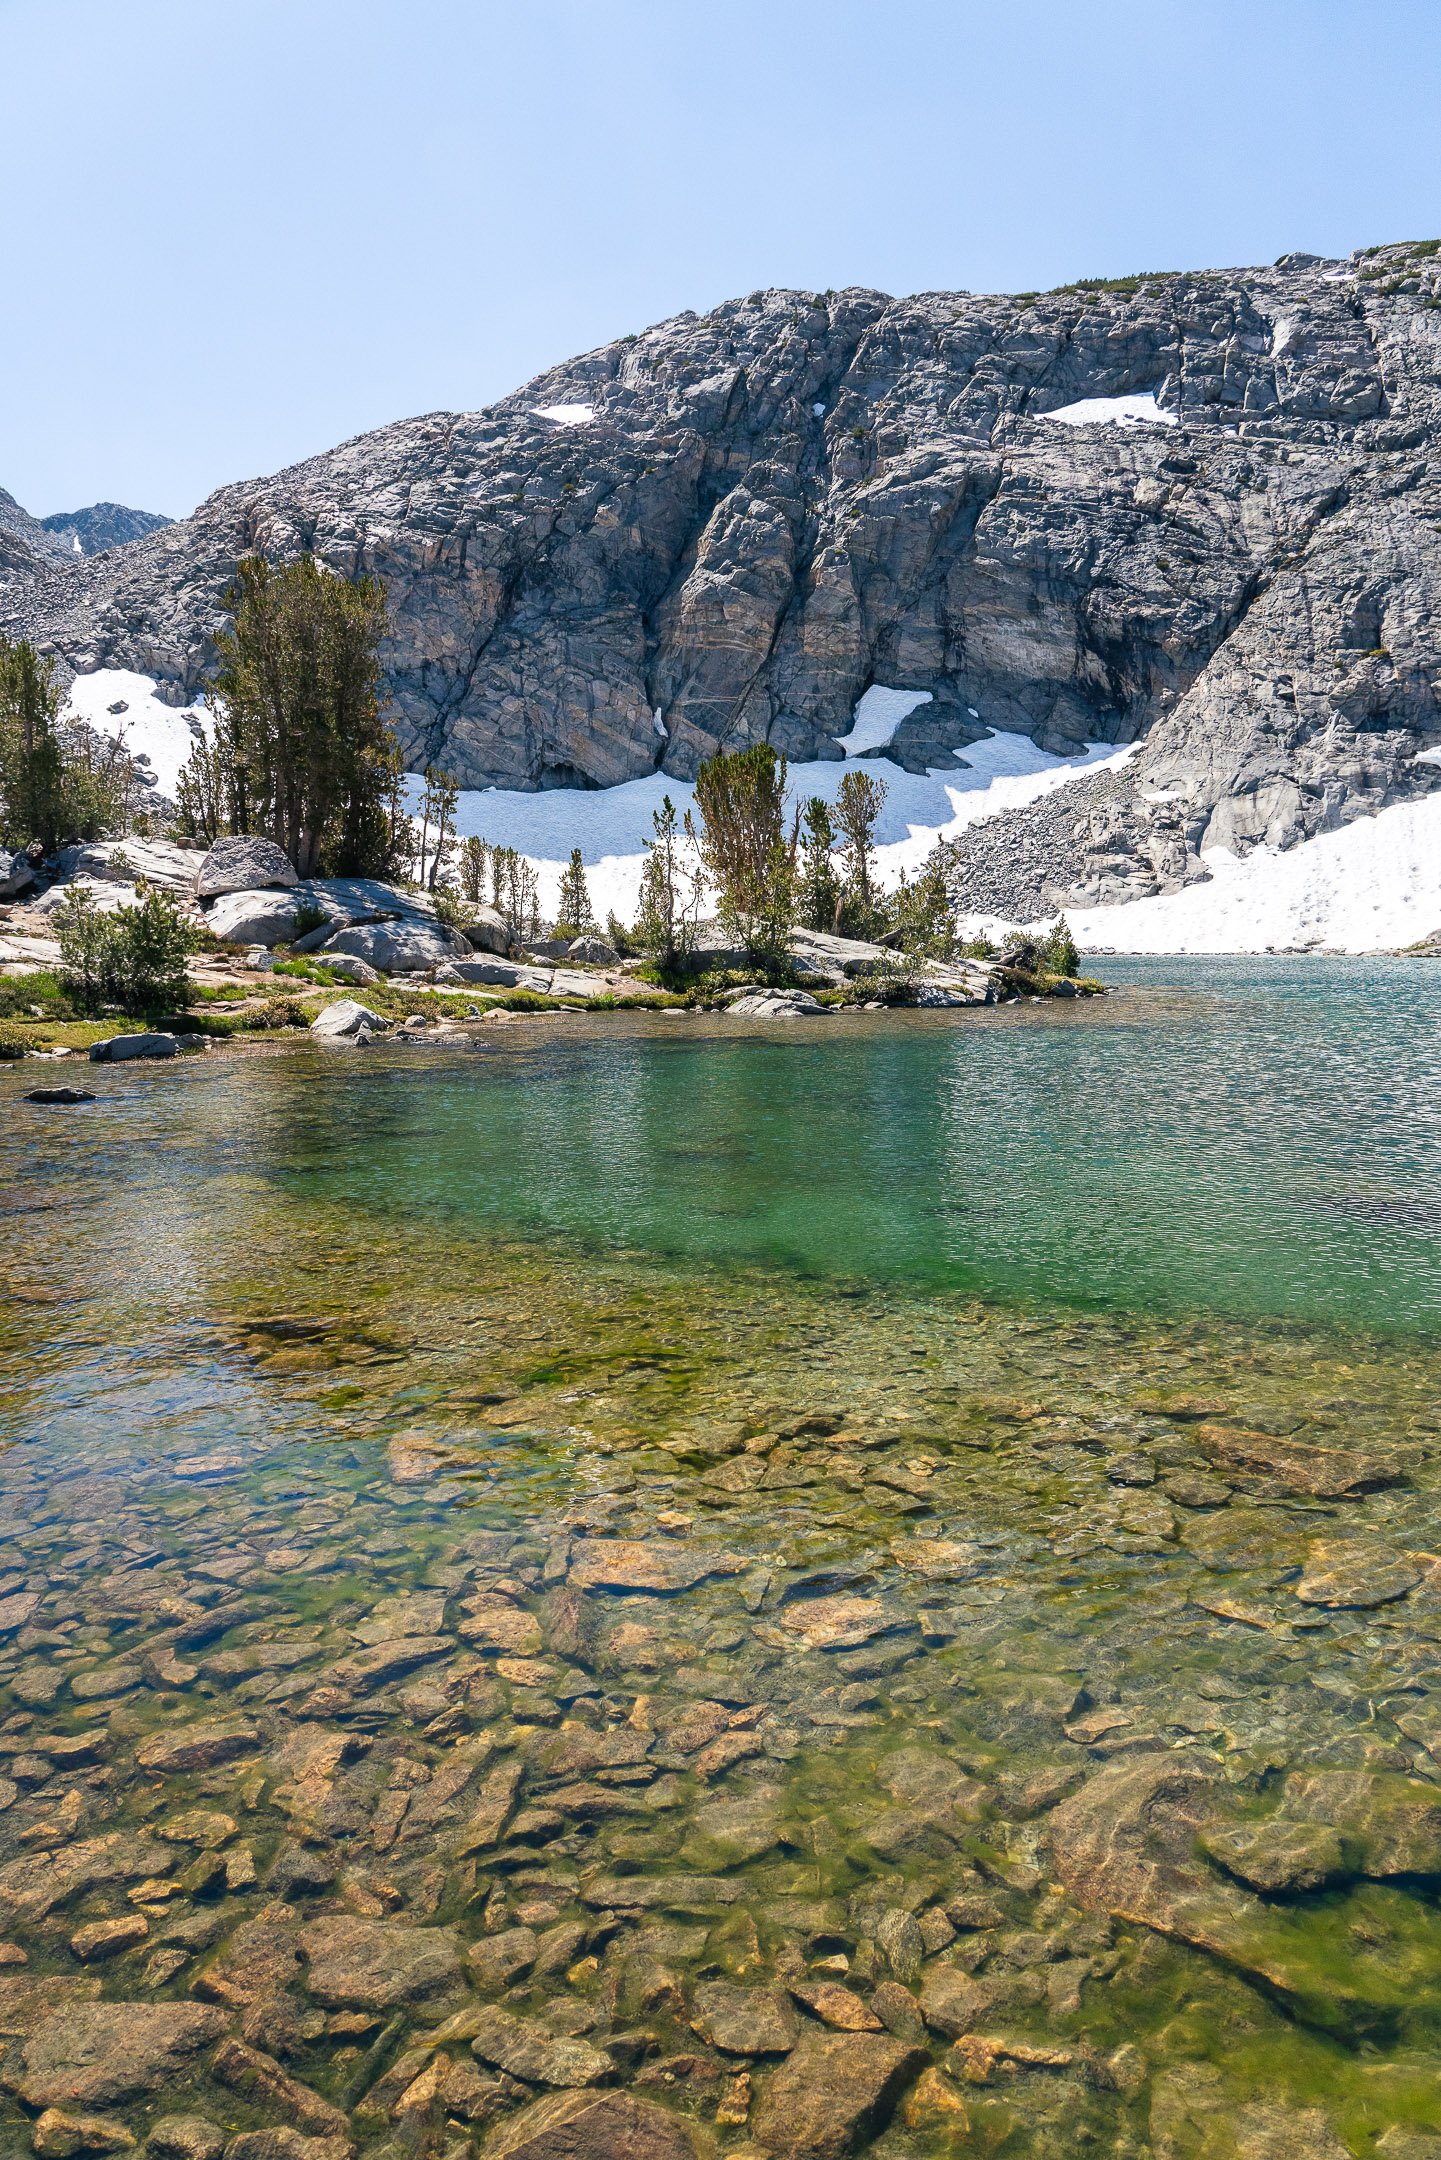
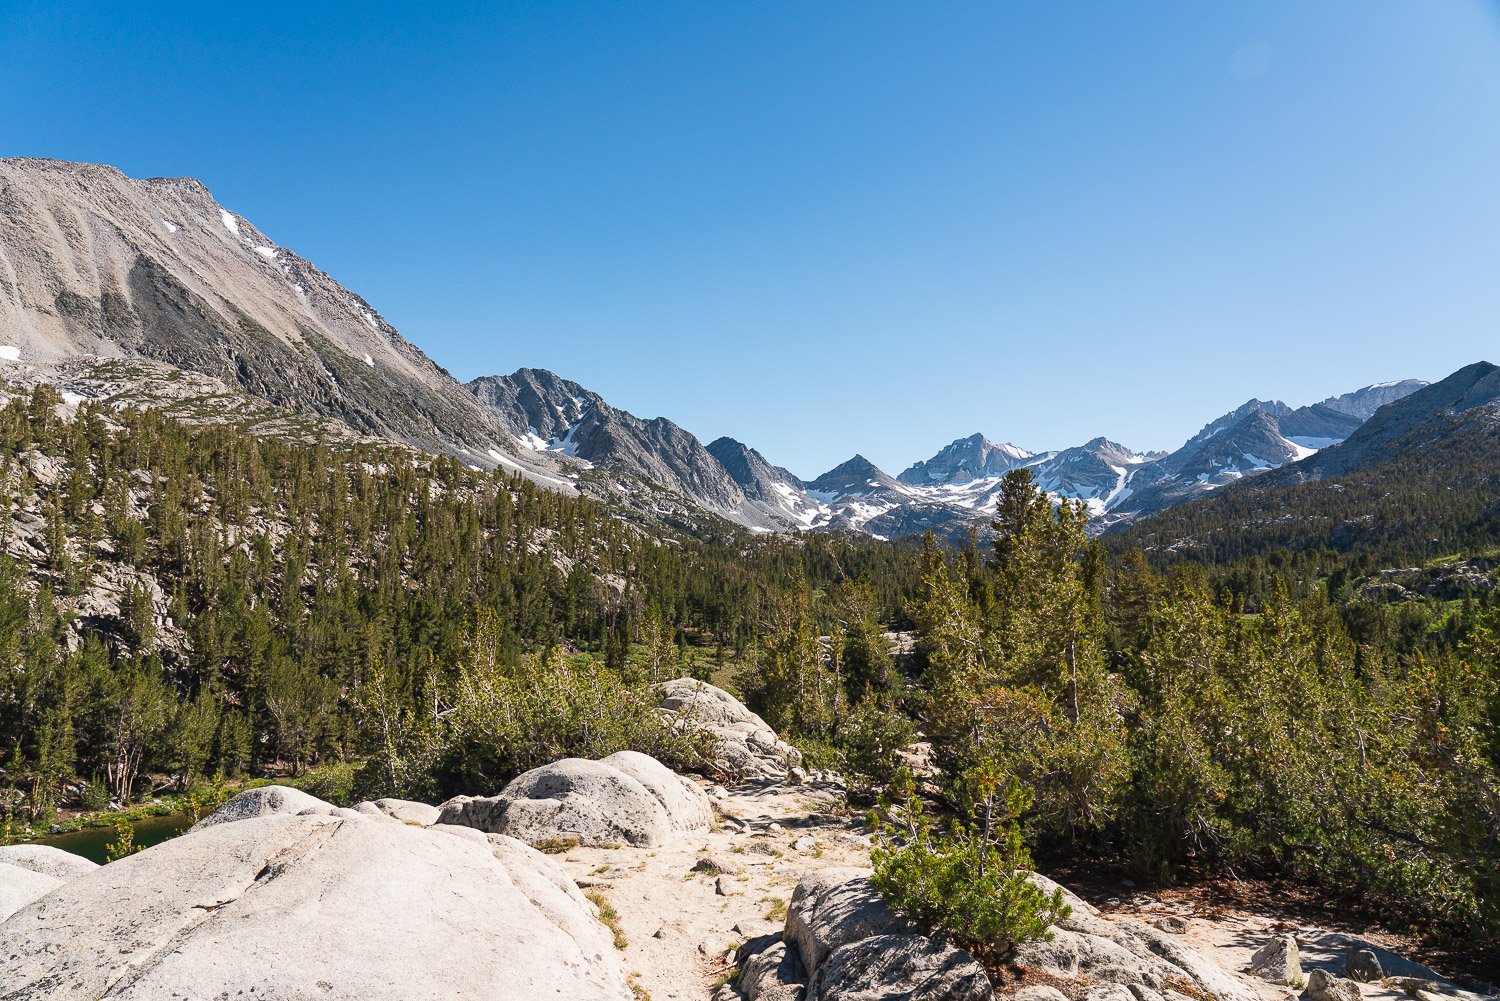
Little Lakes Valley in California’s Eastern Sierra is home to what seems like a billion beautiful alpine lakes. The trail wanders through a mountain-lined valley and passes by seven named lakes, all with stunningly clear water that practically beg you to jump in. This hike is a perfect trip for beginner backpackers or those just needing to get away for a quick overnight trip. Keep scrolling to get all the information you need about how to backpack this trail!
Note: Included in this blog post are affiliate links. I will earn a small commission at no extra cost to you if you choose to use these links to shop! Thank you so much if you do use these links. It keeps this website up & running!

Trail Stats
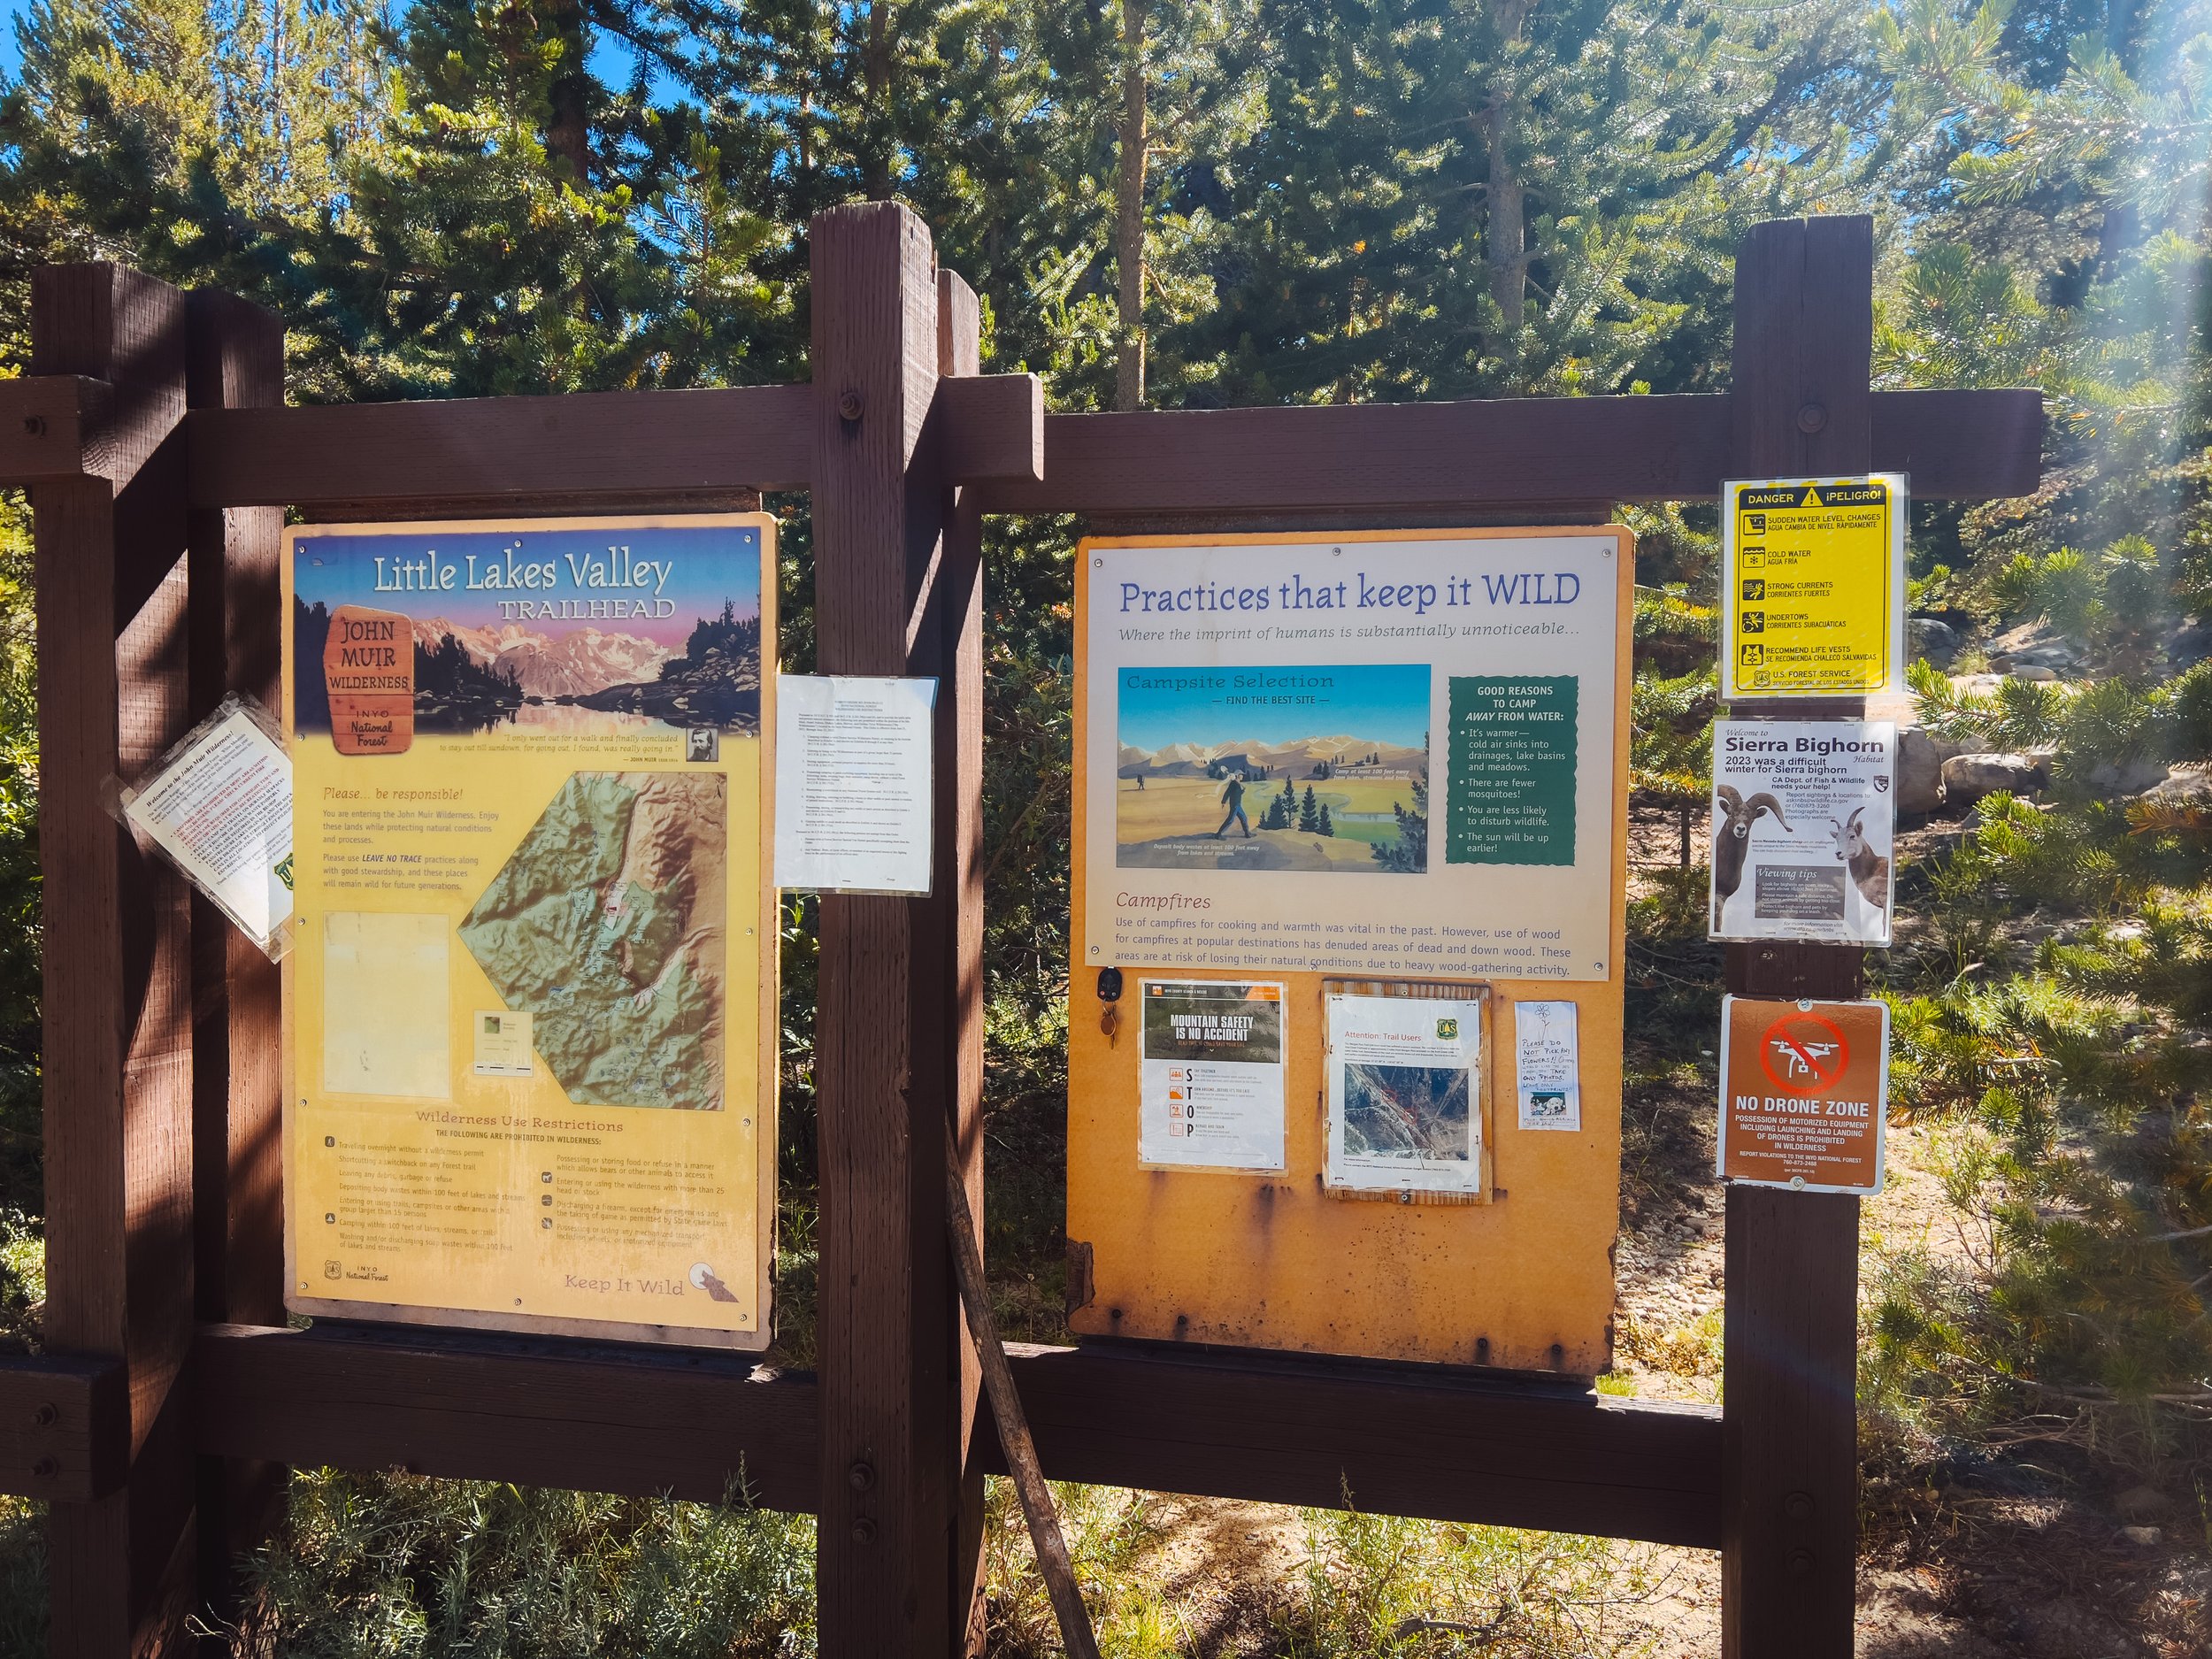
Where: John Muir Wilderness, Inyo National Forest
Miles: 7.25 miles round trip to Gem Lakes. Add an additional 0.5 mile each to detour to Chickenfoot Lake and Morgan Pass.
Elevation Gain/ Loss: +/- 1,200 ft
Time to Complete: 2 days
Trail Type: Out-and-back
Permits Required: YES
Pets Allowed: YES, on-leash
Trailhead: Little Lakes Valley on Recreation.gov
AllTrails hike information link.
Want to download offline maps for this hike onto your cell phone? You can get AllTrails+ for 30% off with my discount code backcountryemily30. Try it out here!


Itinerary & Trip Planning
Permits

Inyo National Forest requires wilderness permits for all overnight trips. These permits are awarded by entry trailhead. Most trailheads in Inyo National Forest are pretty popular, and Little Lakes Valley may be the most popular one due to the relative ease of the trail.
Permits can be reserved on recreation.gov 6 months in advance, on the matching day (i.e. July 4th permits are released on January 4th). Permits are released at 7 am PT exactly. Quota season for Inyo National Forest begins on May 1st and ends on November 1st. Permits are still required during non-quota season, but they are unlimited.
60% of the permits are available in advance, and the remaining 40% are available as “walk-ups” online. The online walk-up permits are released at 7 am PT 2 weeks before the start of the trip, on the same day of the week (i.e. if you want to start your trip on a Wednesday, you would book it two Wednesdays prior). Popular trailheads will be booked immediately. Permits can be booked online up to the day before your wilderness entry date if there is quota space available. The Forest Service does state that permits may be given to another party if you don’t pick yours up on time, so in-person walk-ups may be available, but I would not rely on this method.
Inyo National Forest lets you print your permit at home. Your permit will be cancelled if you do not print it by 10:00 am on the day of entry, and you can print your permit beginning one week before your permit start date. You may elect for traditional permit pick-up at a ranger station as well - you have the choice when making the reservation.
Permits cost $6/permit and then an additional $5/person for this permit. Permits in Inyo are more expensive if you plan to exit via the Mt. Whitney zone.
Looking to score a permit for Little Lakes Valley but everything is sold out? You can use the tracker below and sign up for personalized alerts for this trailhead (and many more) on Outdoor Status!
If you will be operating a backpacking stove, you must have a California Fire Permit. Getting one is easy and free. You can get one at this link.
Campfires
Campfires are prohibited in Little Lakes Valley.
Leave No Trace
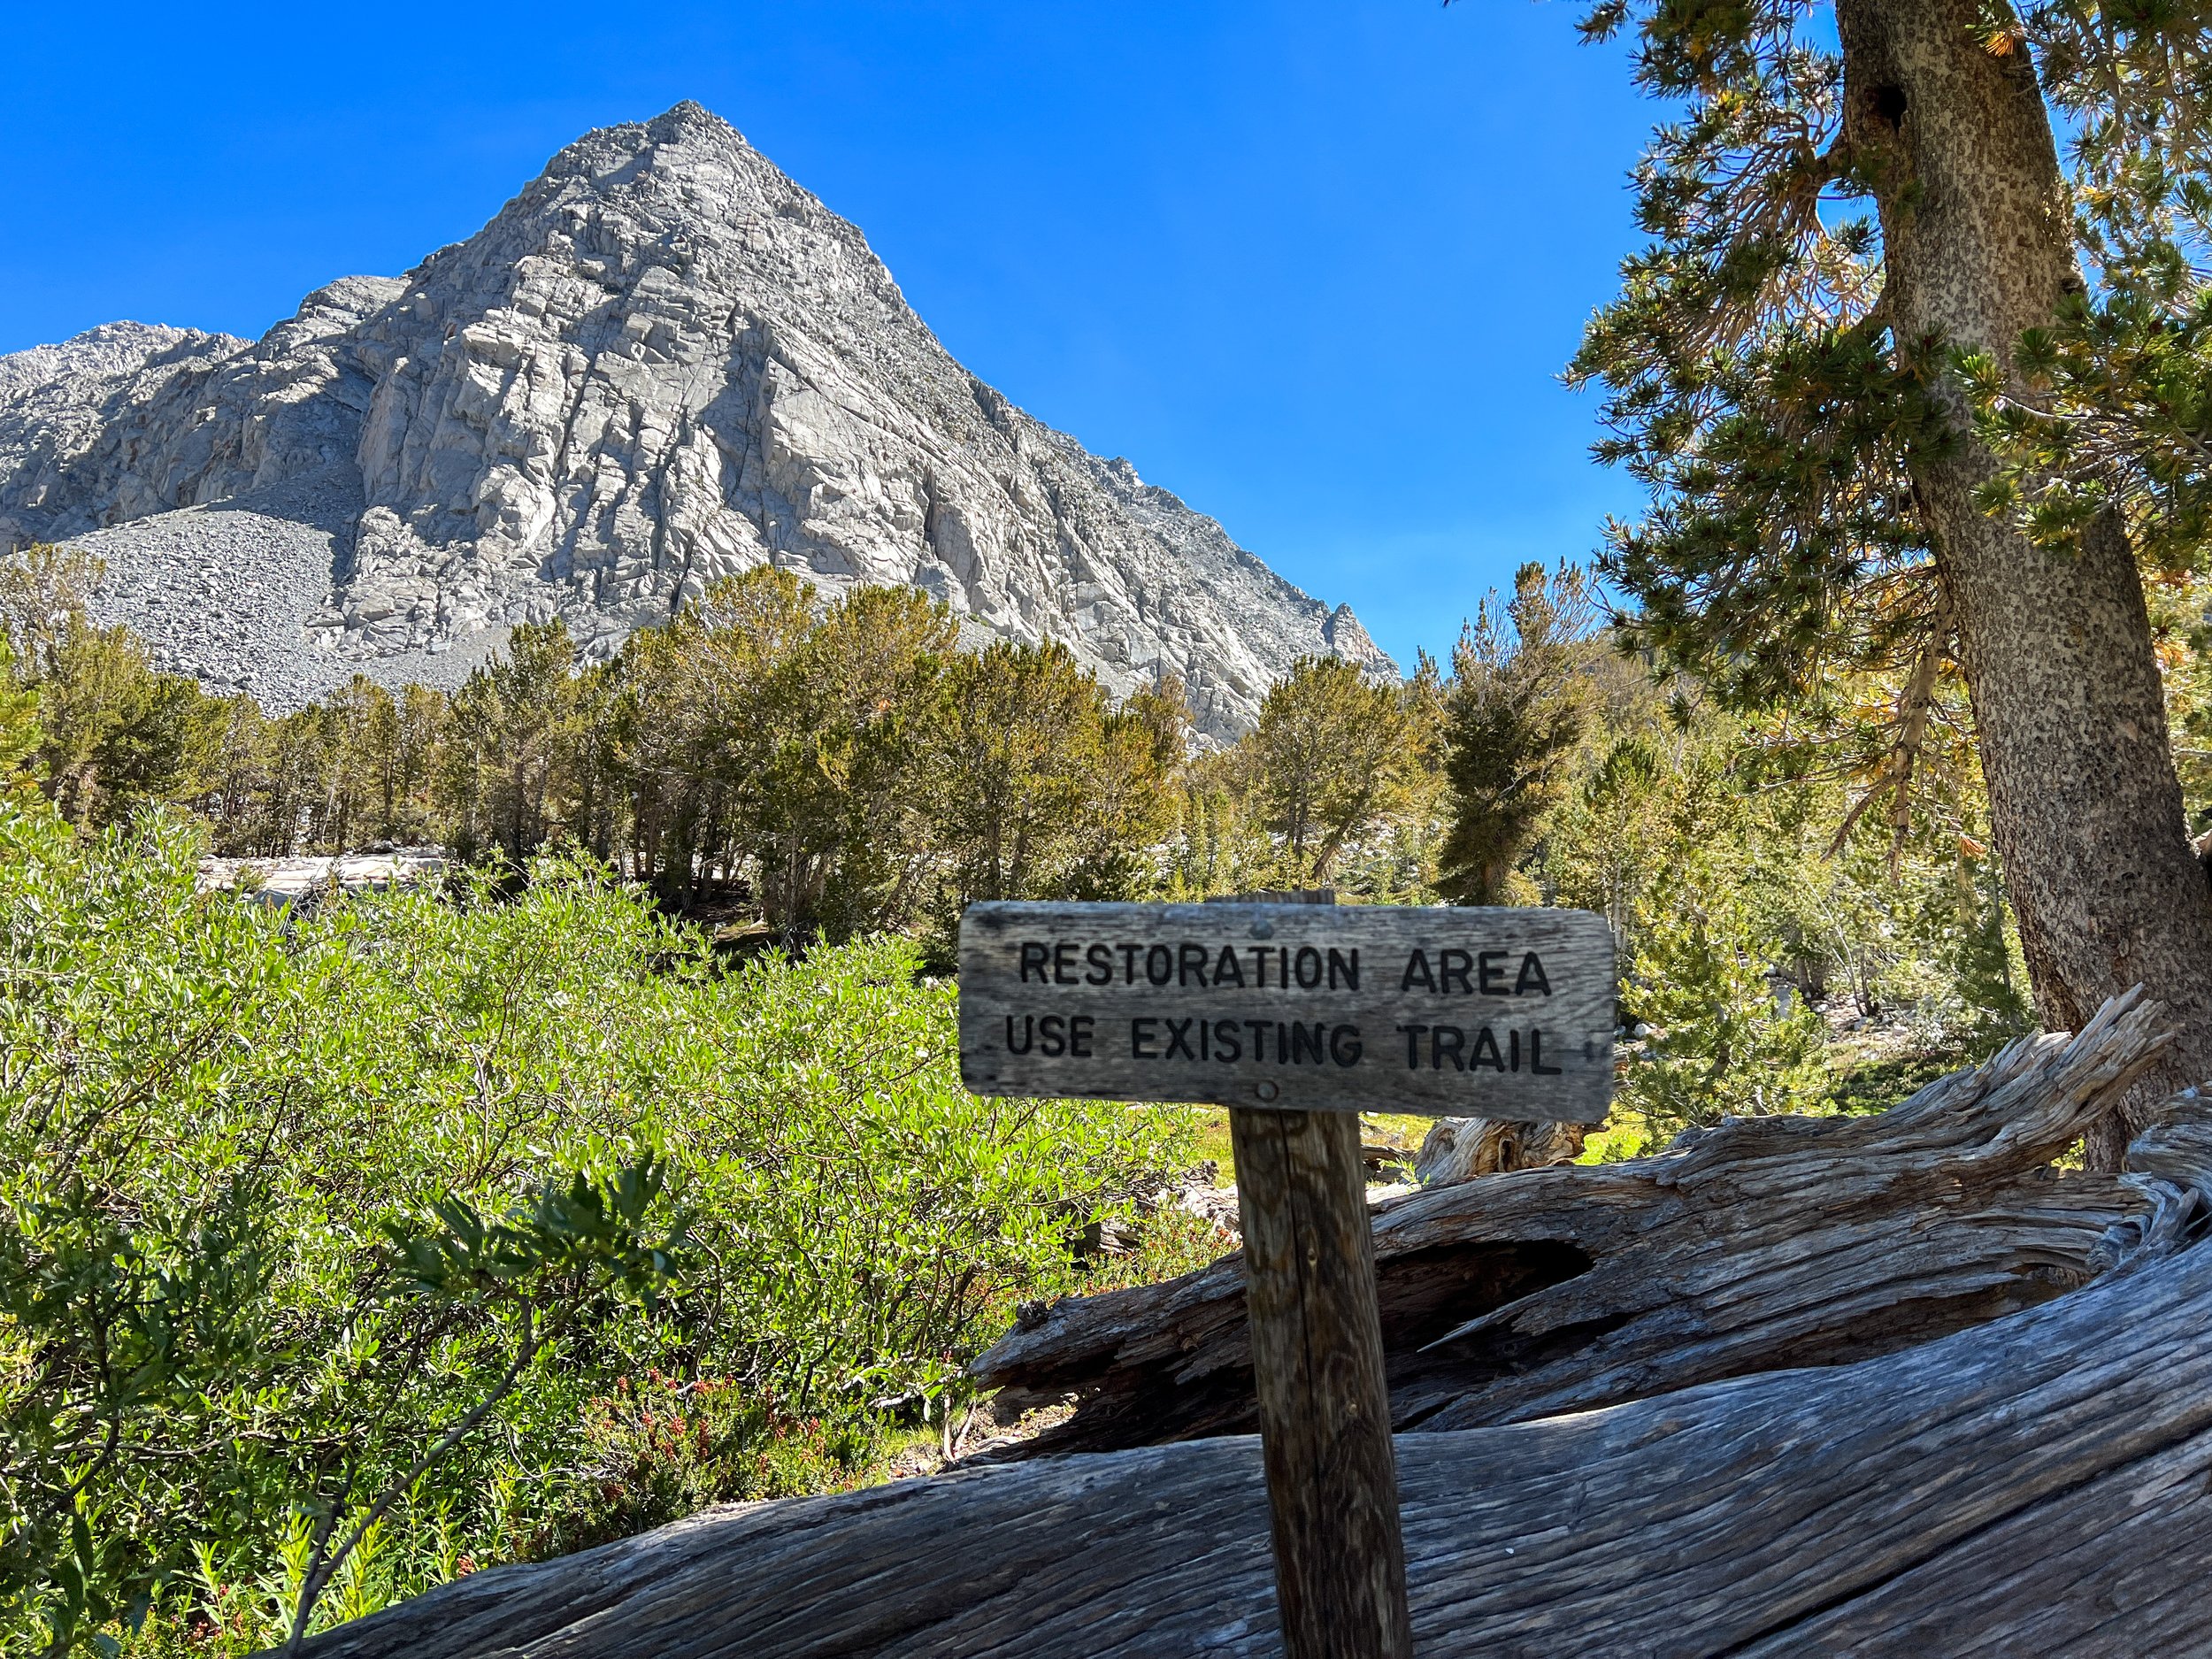
Brush up on the principles of Leave No Trace. This is an incredibly popular area with tons of foot traffic. It is important to stay on the established trail, even if it is muddy or covered in water. You must camp and go to the bathroom at least 100 feet away from water sources and any trail. Make sure you pack out all of your toilet paper and trash - leave nothing but footsteps behind so we can all enjoy this wonderful place for many years to come.
More information about Leave No Trace here.
Bears
Bears are prevalent and active in Inyo National Forest. There are 8 special areas in the forest where food must be stored in a bear canister, and Little Lakes Valley is one of them! No other method of food storage is allowed. I personally love the Bear Vault brand.


Seasonality & Weather
Summer is the most popular time for backpacking in Little Lakes Valley, though any time between June to mid-October is potentially feasible for a snow-free backpacking trip. Chickenfoot Lake sits at 10,700 feet, so it can take a while for snow to melt, but depending on the snow levels and temperatures throughout the spring, you might be able to go in a little earlier. The flip side is that with heavy winters, there could be snow on the trail into mid-July. The 2023 season was at the end of the highest snow year on record, and the trail completely dry by my trip in September, and there were no complicated creek crossings, but there was mud in a few places! It’s one of the most popular trails, so reading conditions reports on AllTrails is a good bet for getting decent conditions beta.
Generally, thunderstorms are a possibility once summer starts. They aren’t a daily occurrence, but you should be prepared. Thunderstorm risk for the area dies down towards the end of August and into September. There were thunderstorms in the forecast the weekend I was there in September, so there it can happen later in the season too!
Summer heat can be a doozy in the Sierra. This trail is pretty exposed without much tree cover, so make sure you cover yourself with UPF clothing, use sunscreen, and bring electrolytes with you! Heat combined with elevation can lead to altitude sickness. Because of the higher elevation, evenings can be cold, and once the sun sets behind the mountain ridges, you’ll probably want a warm jacket and a sleep system rated to 20-30*F.
Visiting Little Lakes Valley is not recommended in the winter months unless you are a proficient snowshoer or backcountry skier. The road usually closes after the pack station when snow starts to fall, and could close much further down as well. Check the road updates here. Starting your journey at the pack station adds another 4 miles round trip to the mileage! You can check the status of the road at this website to see if it is open to the pack station. NOTE: even if it’s open to the pack station, it may not be open past the pack station.
Trailhead & Parking
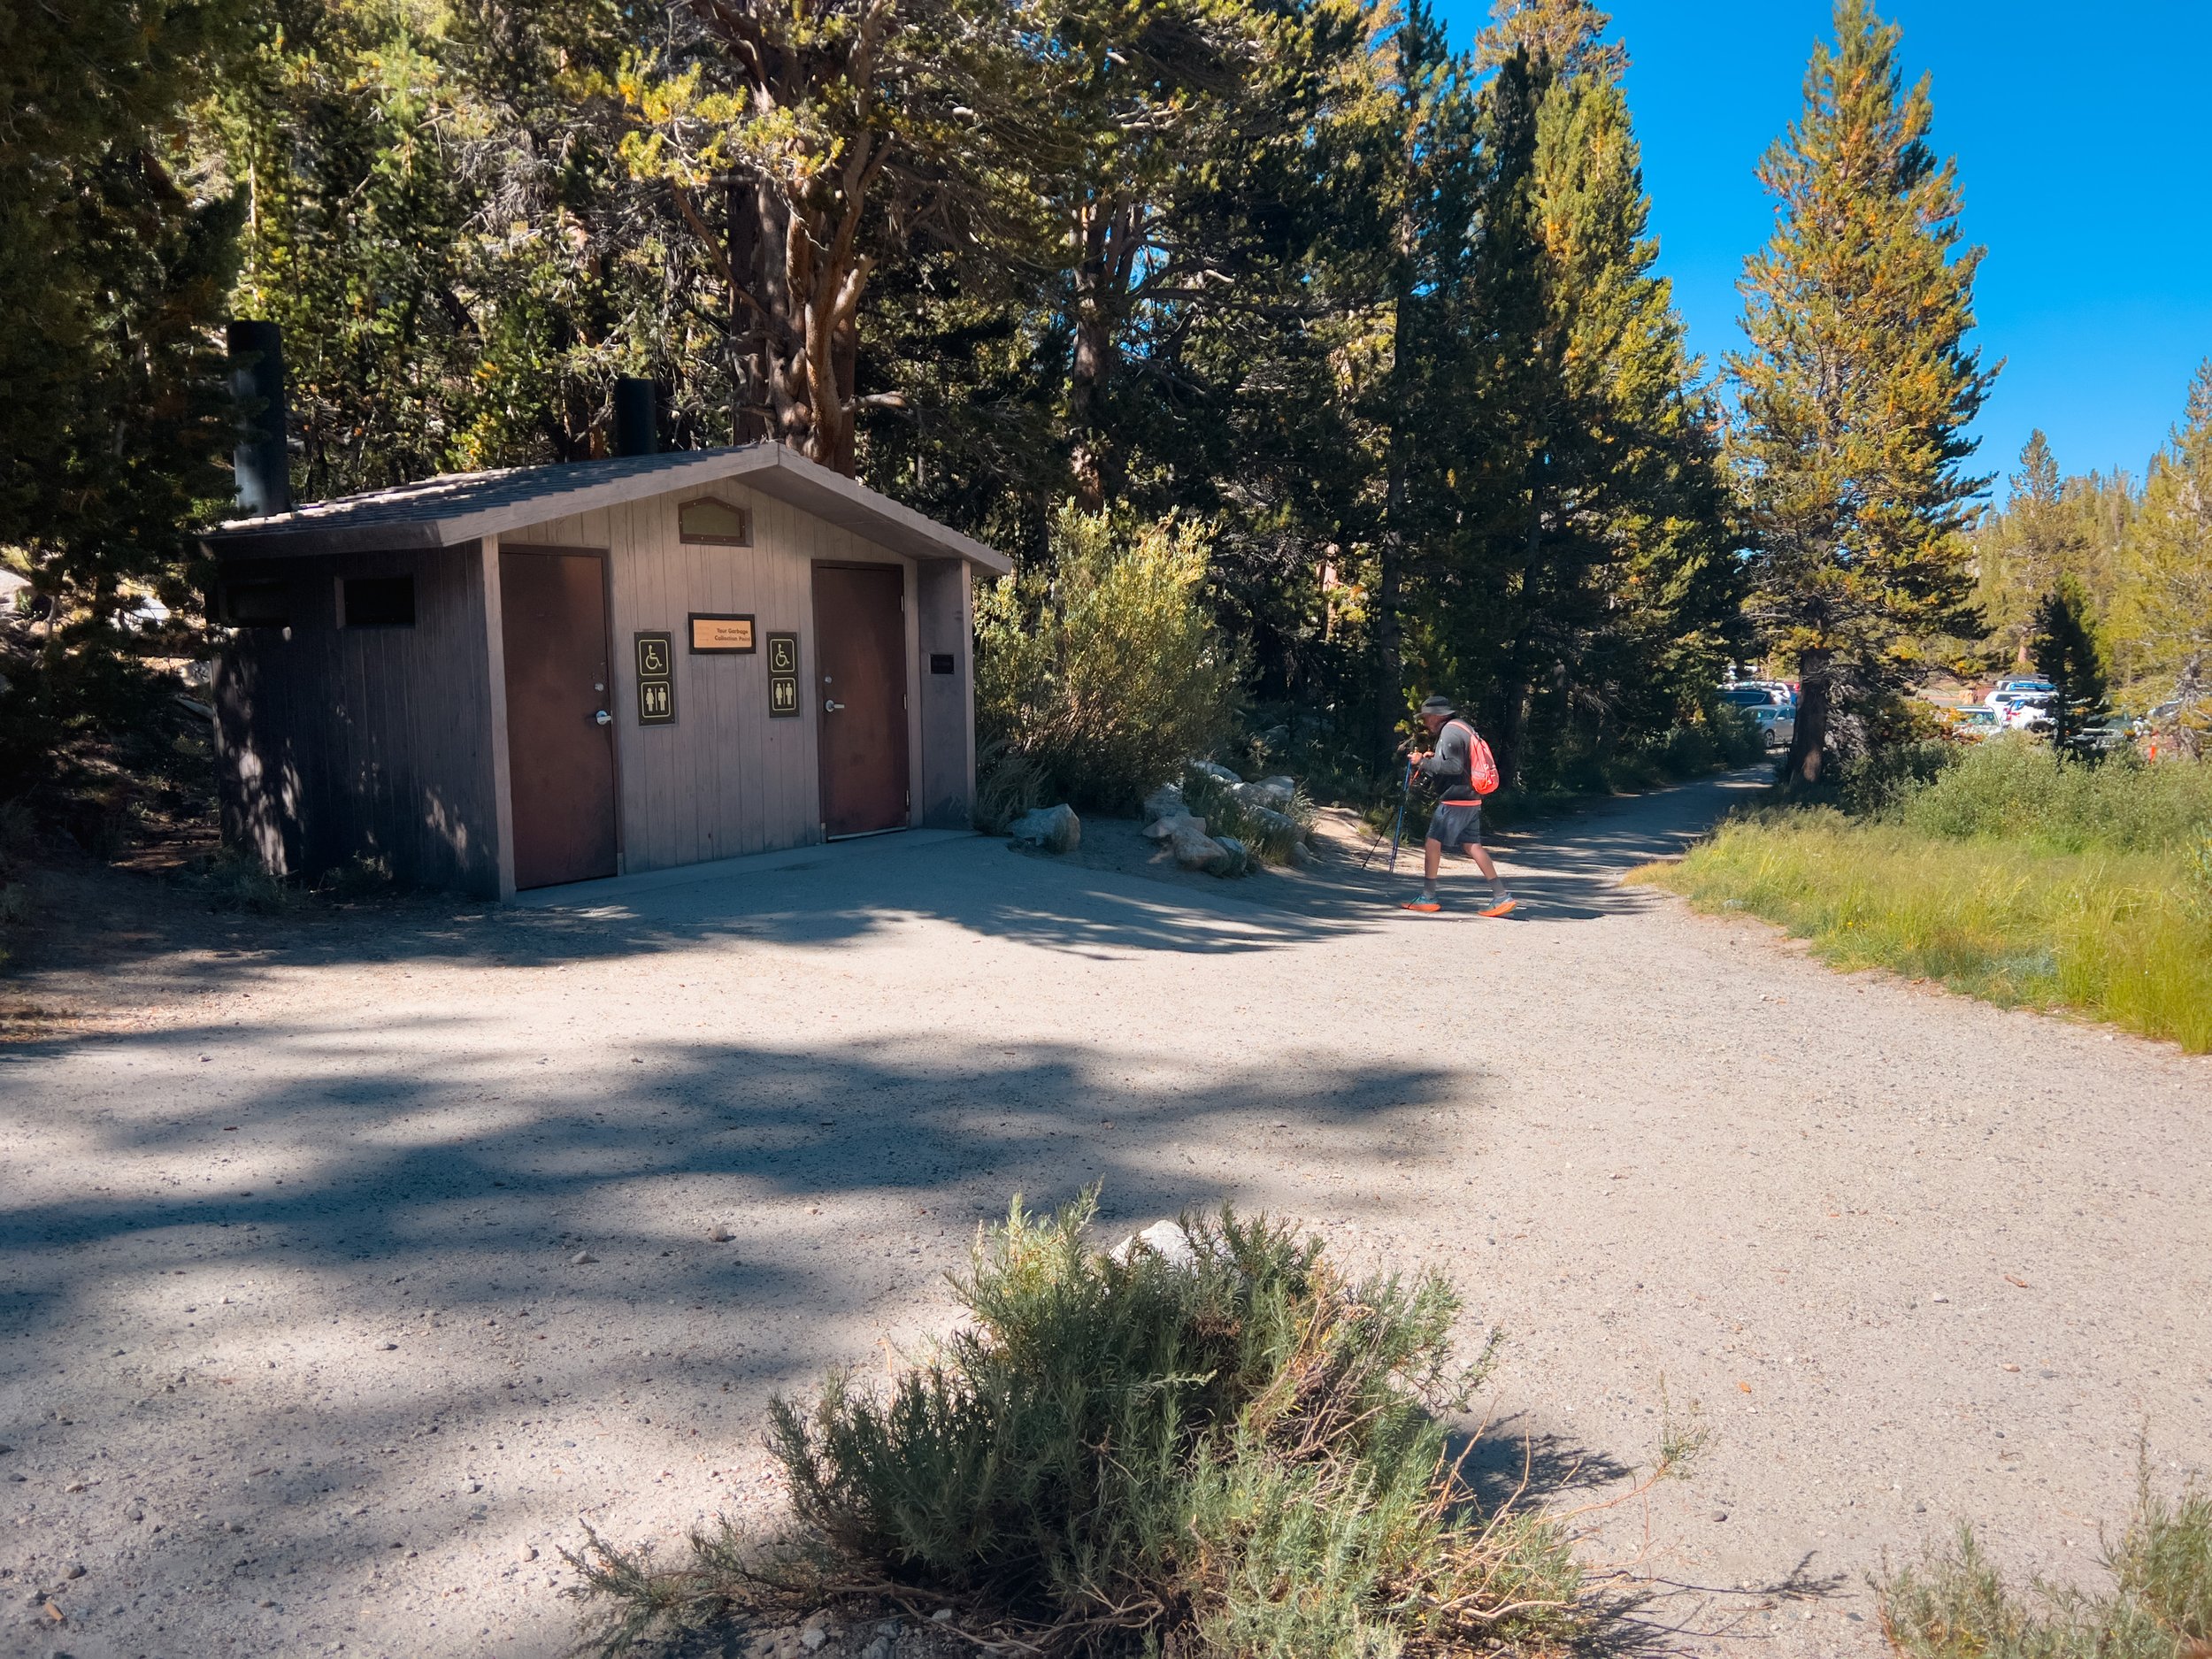
The Little Lakes Valley Trailhead (also known as Mosquito Flat) sits at the very end of Rock Creek Road. It’s a large parking area, with room for probably 60-70 cars. There are more parking options earlier up the road too. The trailhead has 2 pit toilets that seem to be serviced frequently, and a large bear-proof dumpster in the parking lot, so if you use it to dump trash, make sure you re-lock it!
There are multiple bear lockers in the parking lot. It is prohibited to leave food or trash in your car - even locked - at the trailheads in Inyo National Forest due to bears. Please use the bear lockers to store any scented items and food in until your trip is over!
There is no potable water at this trailhead, but there is a nice creek that runs through the area, which is perfect for filtering fresh, cold water before your hike.
This trailhead is unique because there is a backpacker’s campground! If you arrive late at night before the beginning of your trip, you’re welcome to stay at the small campsites. There is no fee to stay at the backpacker’s camp, which is great! Please do not abuse this camping area: it is only for the night before your trip begins, for people using this trailhead for Little Lakes Valley or Mono Pass. You can read about the backpacker’s camp here.
What to Pack
When backpacking, gear can be an important factor to happiness on the trail.
Check out my post: Ultimate Lightweight Backpacking Gear List for the items I always bring backpacking and my favorite pieces of gear!
Some favorites used on this trip:

Route Description & Trail Notes
Day One: Little Lakes Trailhead to Chickenfoot Lake. 3 miles, 700 ft elevation gain
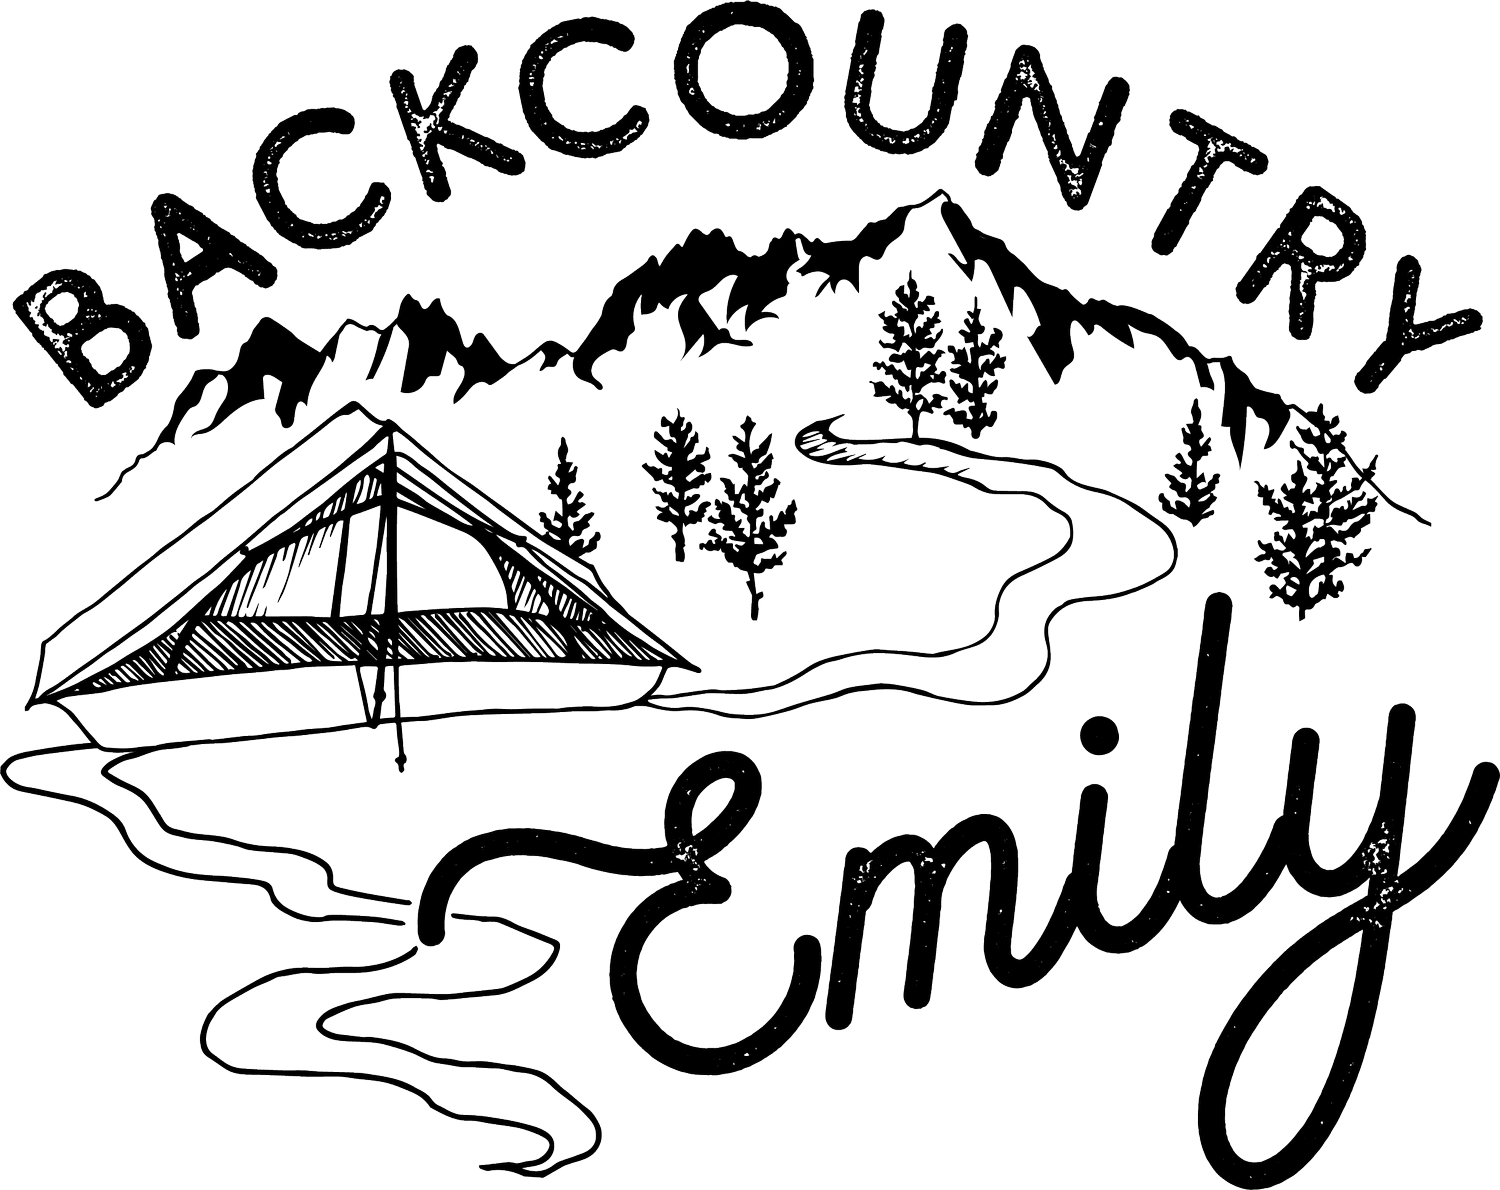
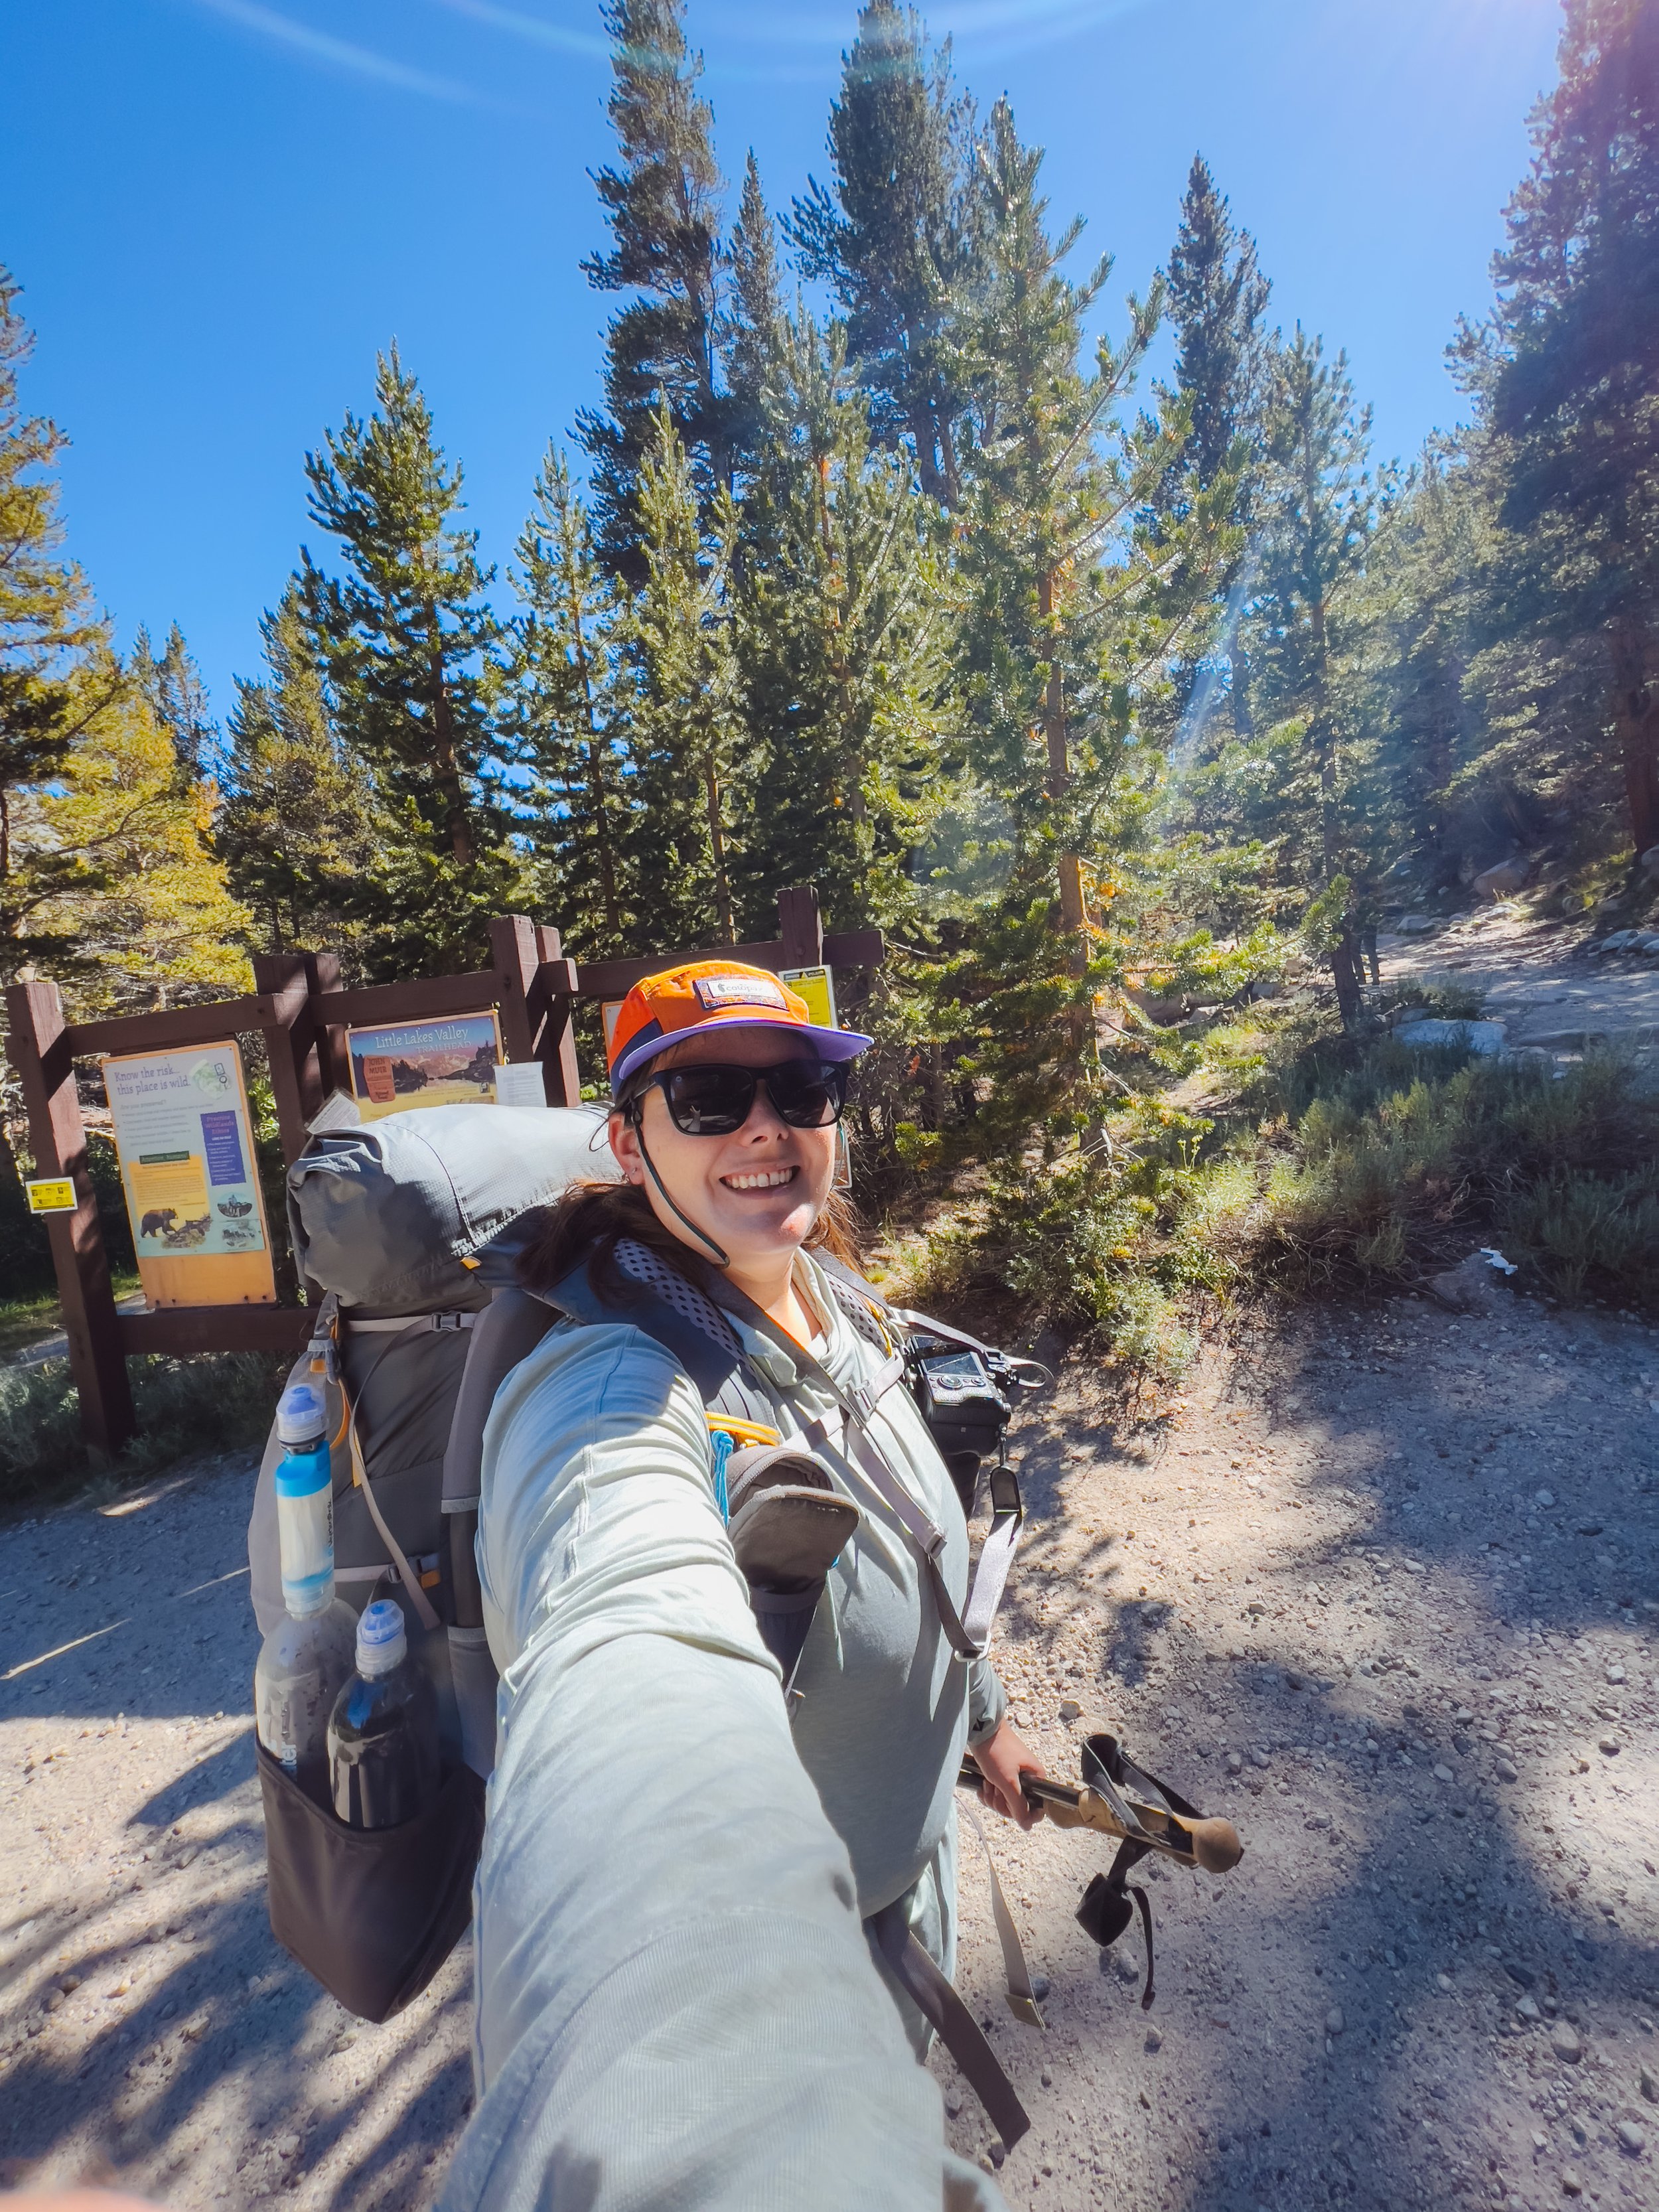
The Little Lakes Valley Trail begins at the very end of Rock Creek Road at the Mosquito Flat Trailhead. It is actually the highest elevation trailhead in the Eastern Sierra, sitting at 10,300 ft! Directly next to the large parking lot are pit toilets, an informational board, and a backpacker’s campground. The trail is immediately beautiful, right after you walk past the toilets! Rock Creek tumbles downstream beside you as you begin a gradual climb up into the valley.
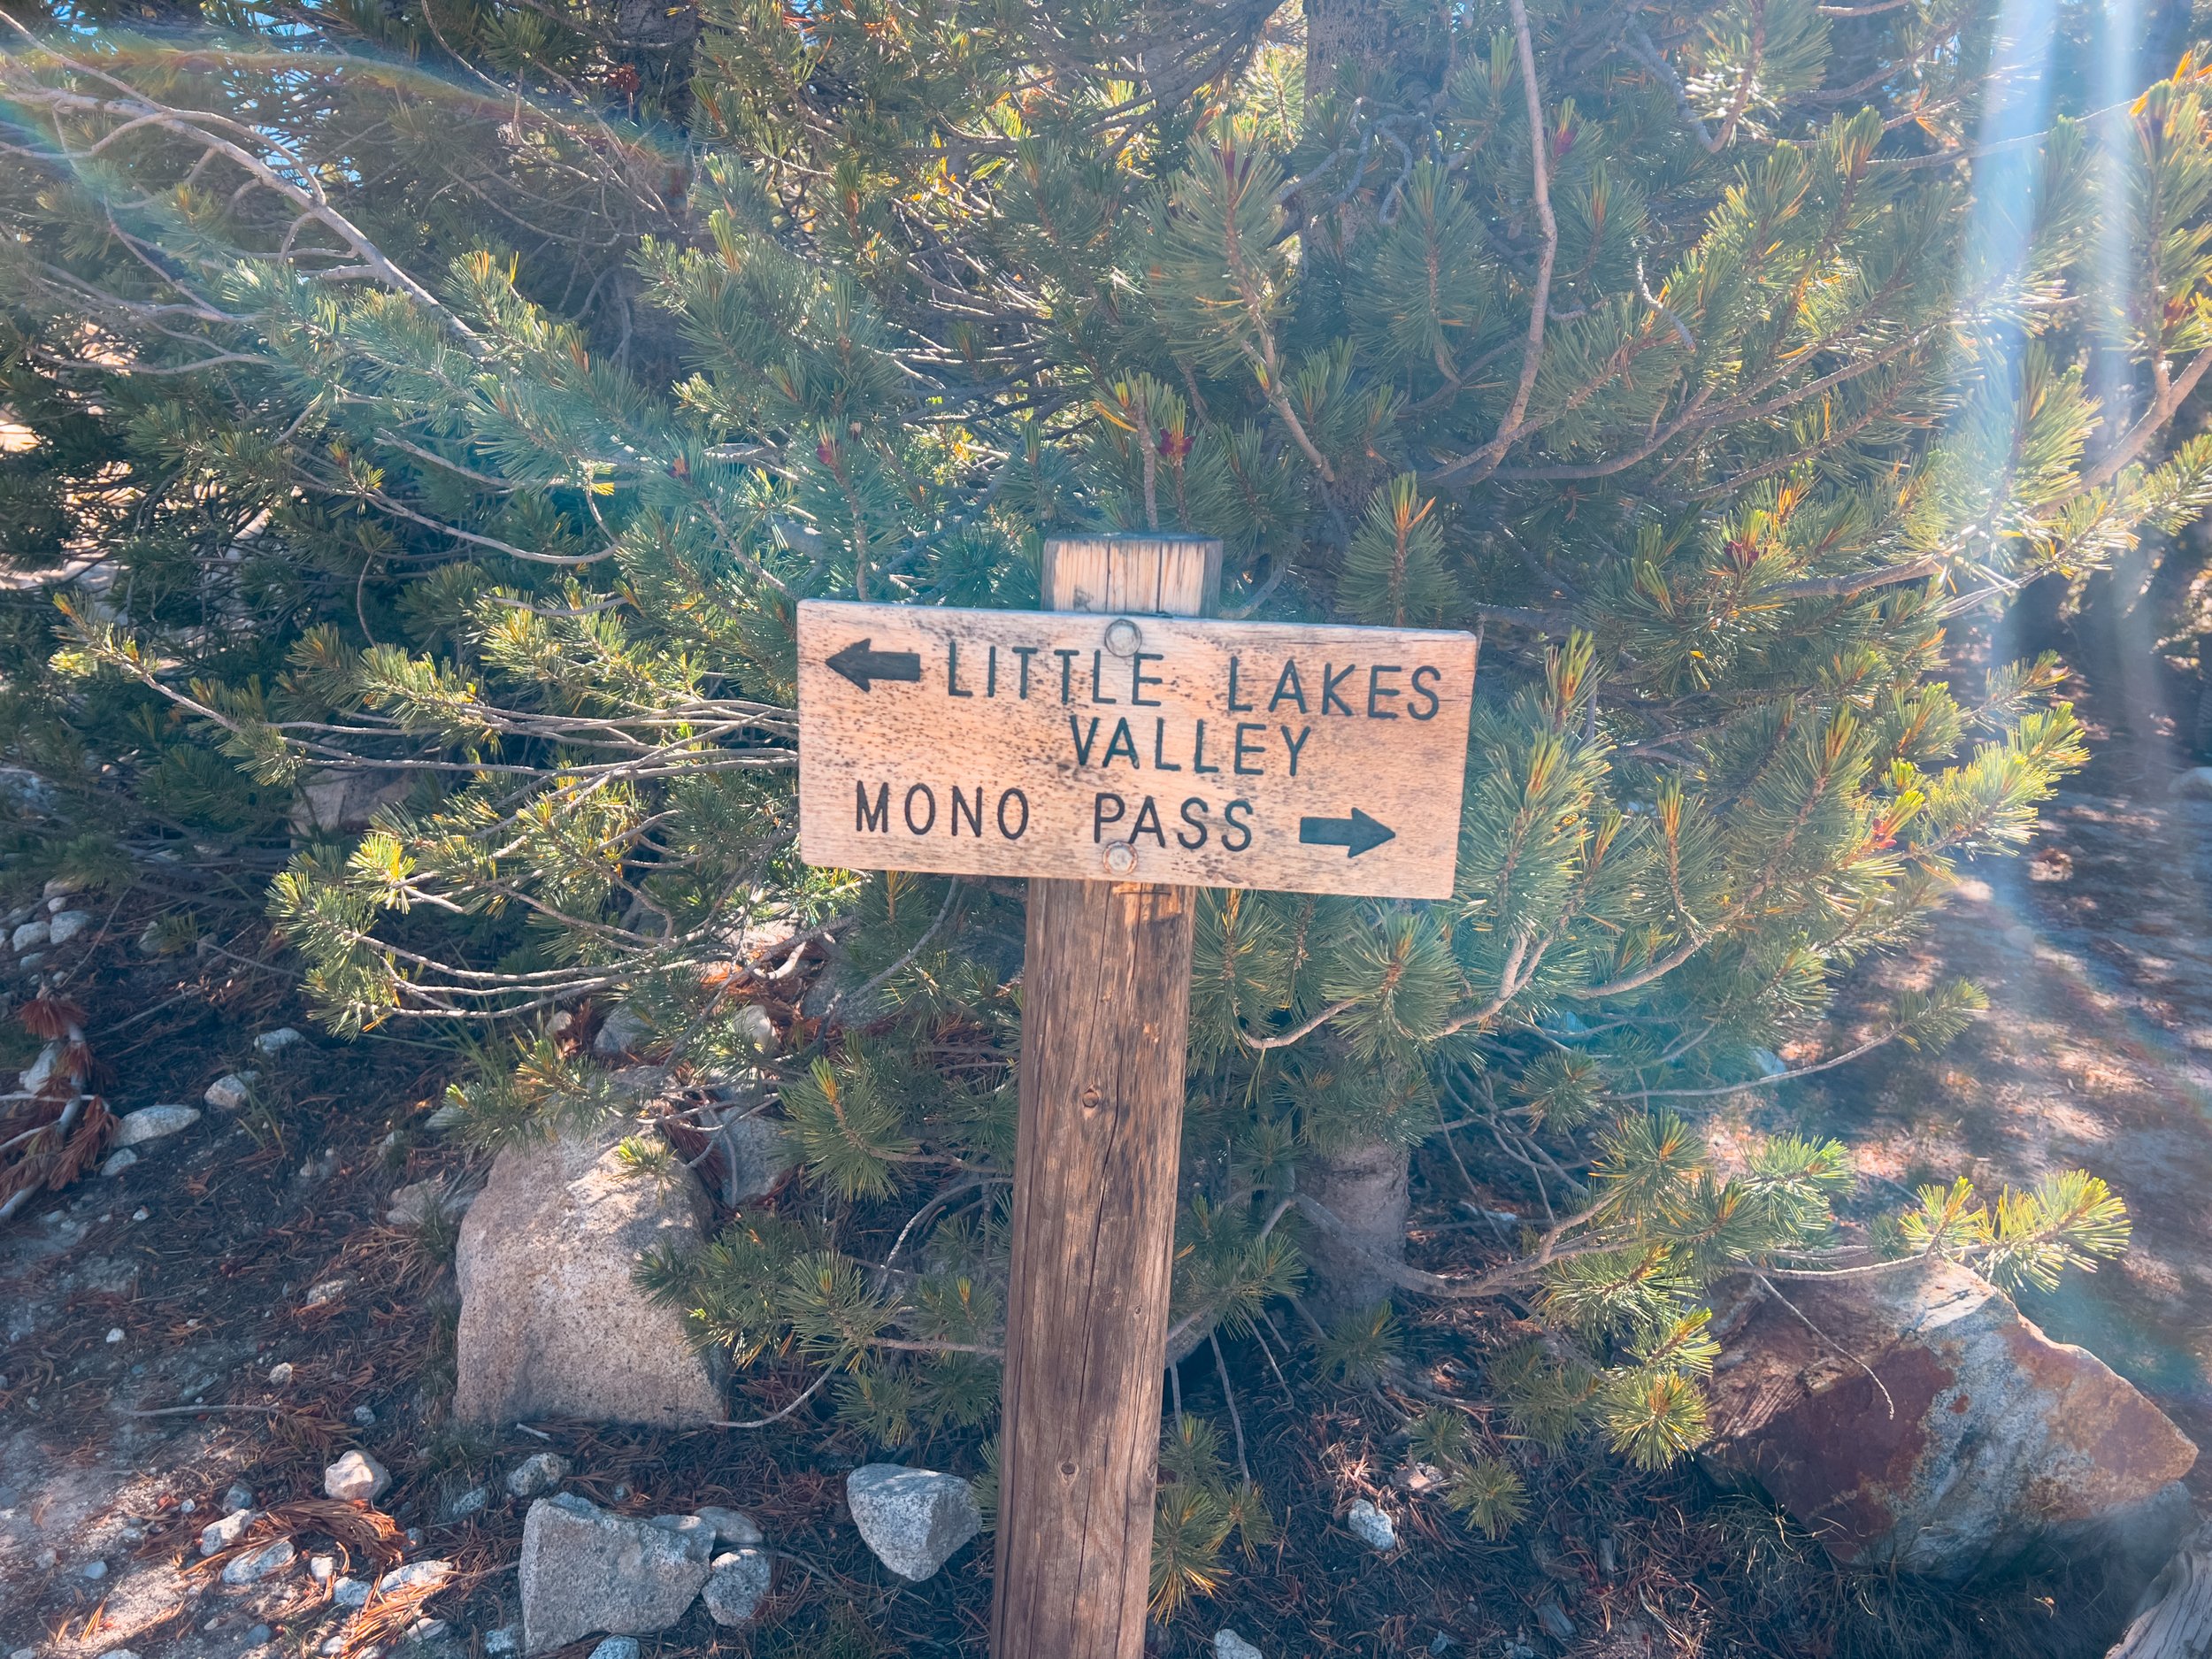
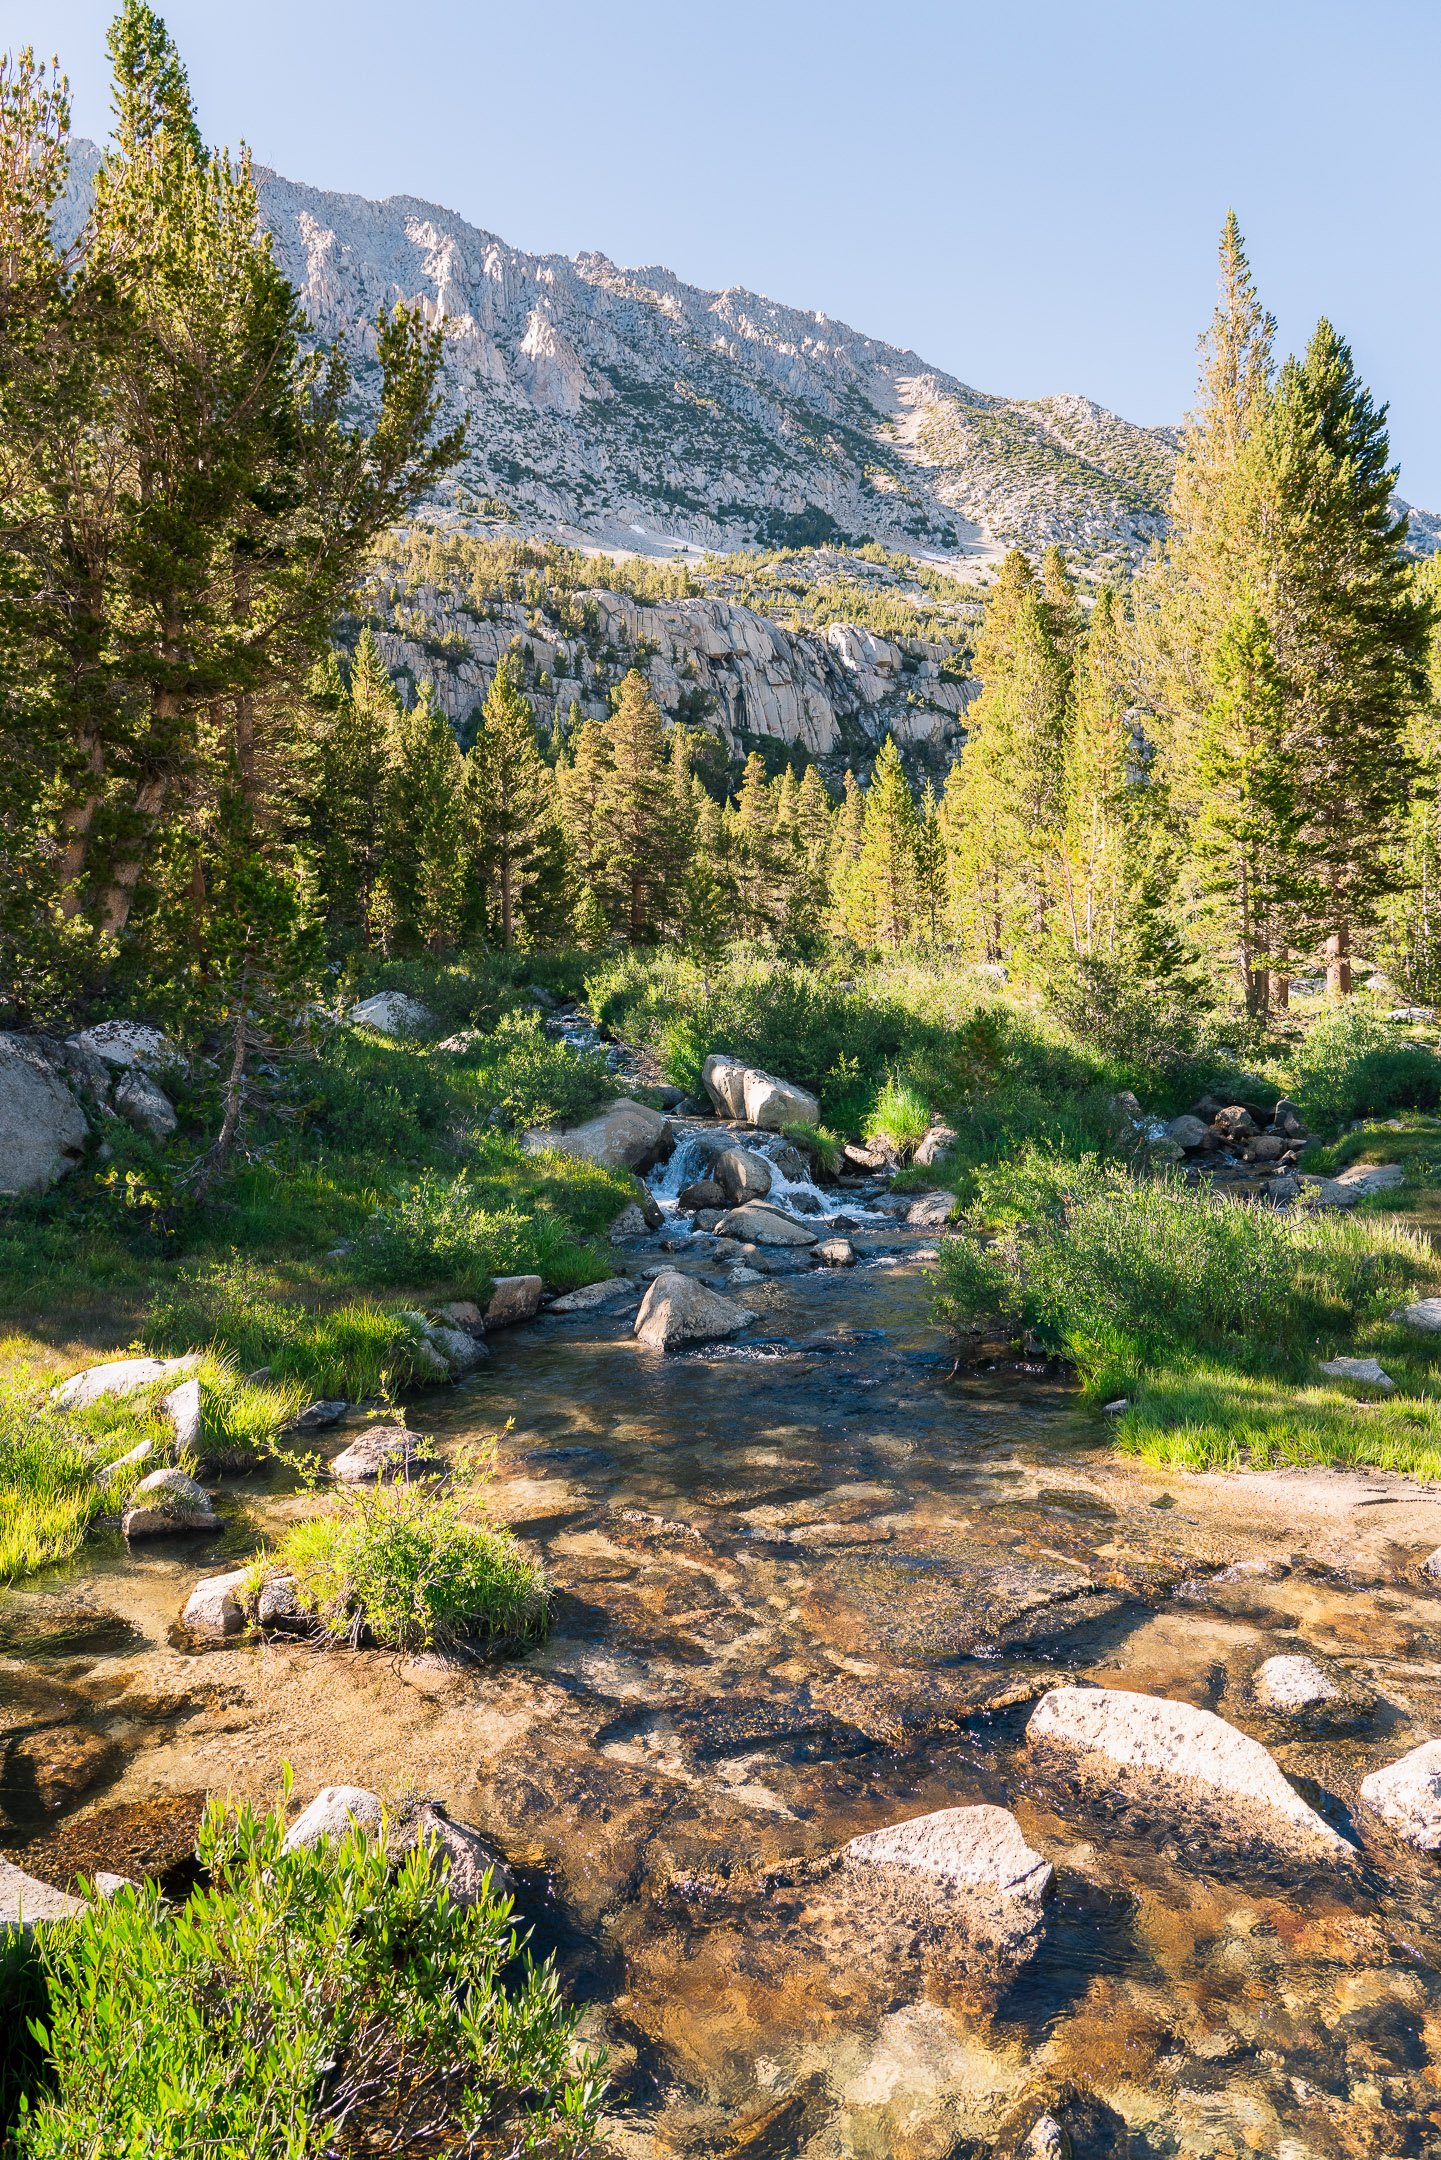
After only a half mile, the trail splits. You’ll want to stay to the left and walk towards the view of the mountains that are surely beckoning you forward. You’ll pass by the first lake of the chain here: Mack Lake. It’s easy to miss since it’s below the trail. But if you walk over to the edge of the rocks, you’ll get a nice view of it down there. After a slight downhill you’ll see a faint social trail to your left, leading to Marsh Lake. Depending on how distracting the views of the mountains are, you may miss it (I know I nearly did). Marsh Lake is pretty small, but I did see a lot of people with fishing poles go that way, so it may be worth fishing in! Keep walking straight on the main trail.
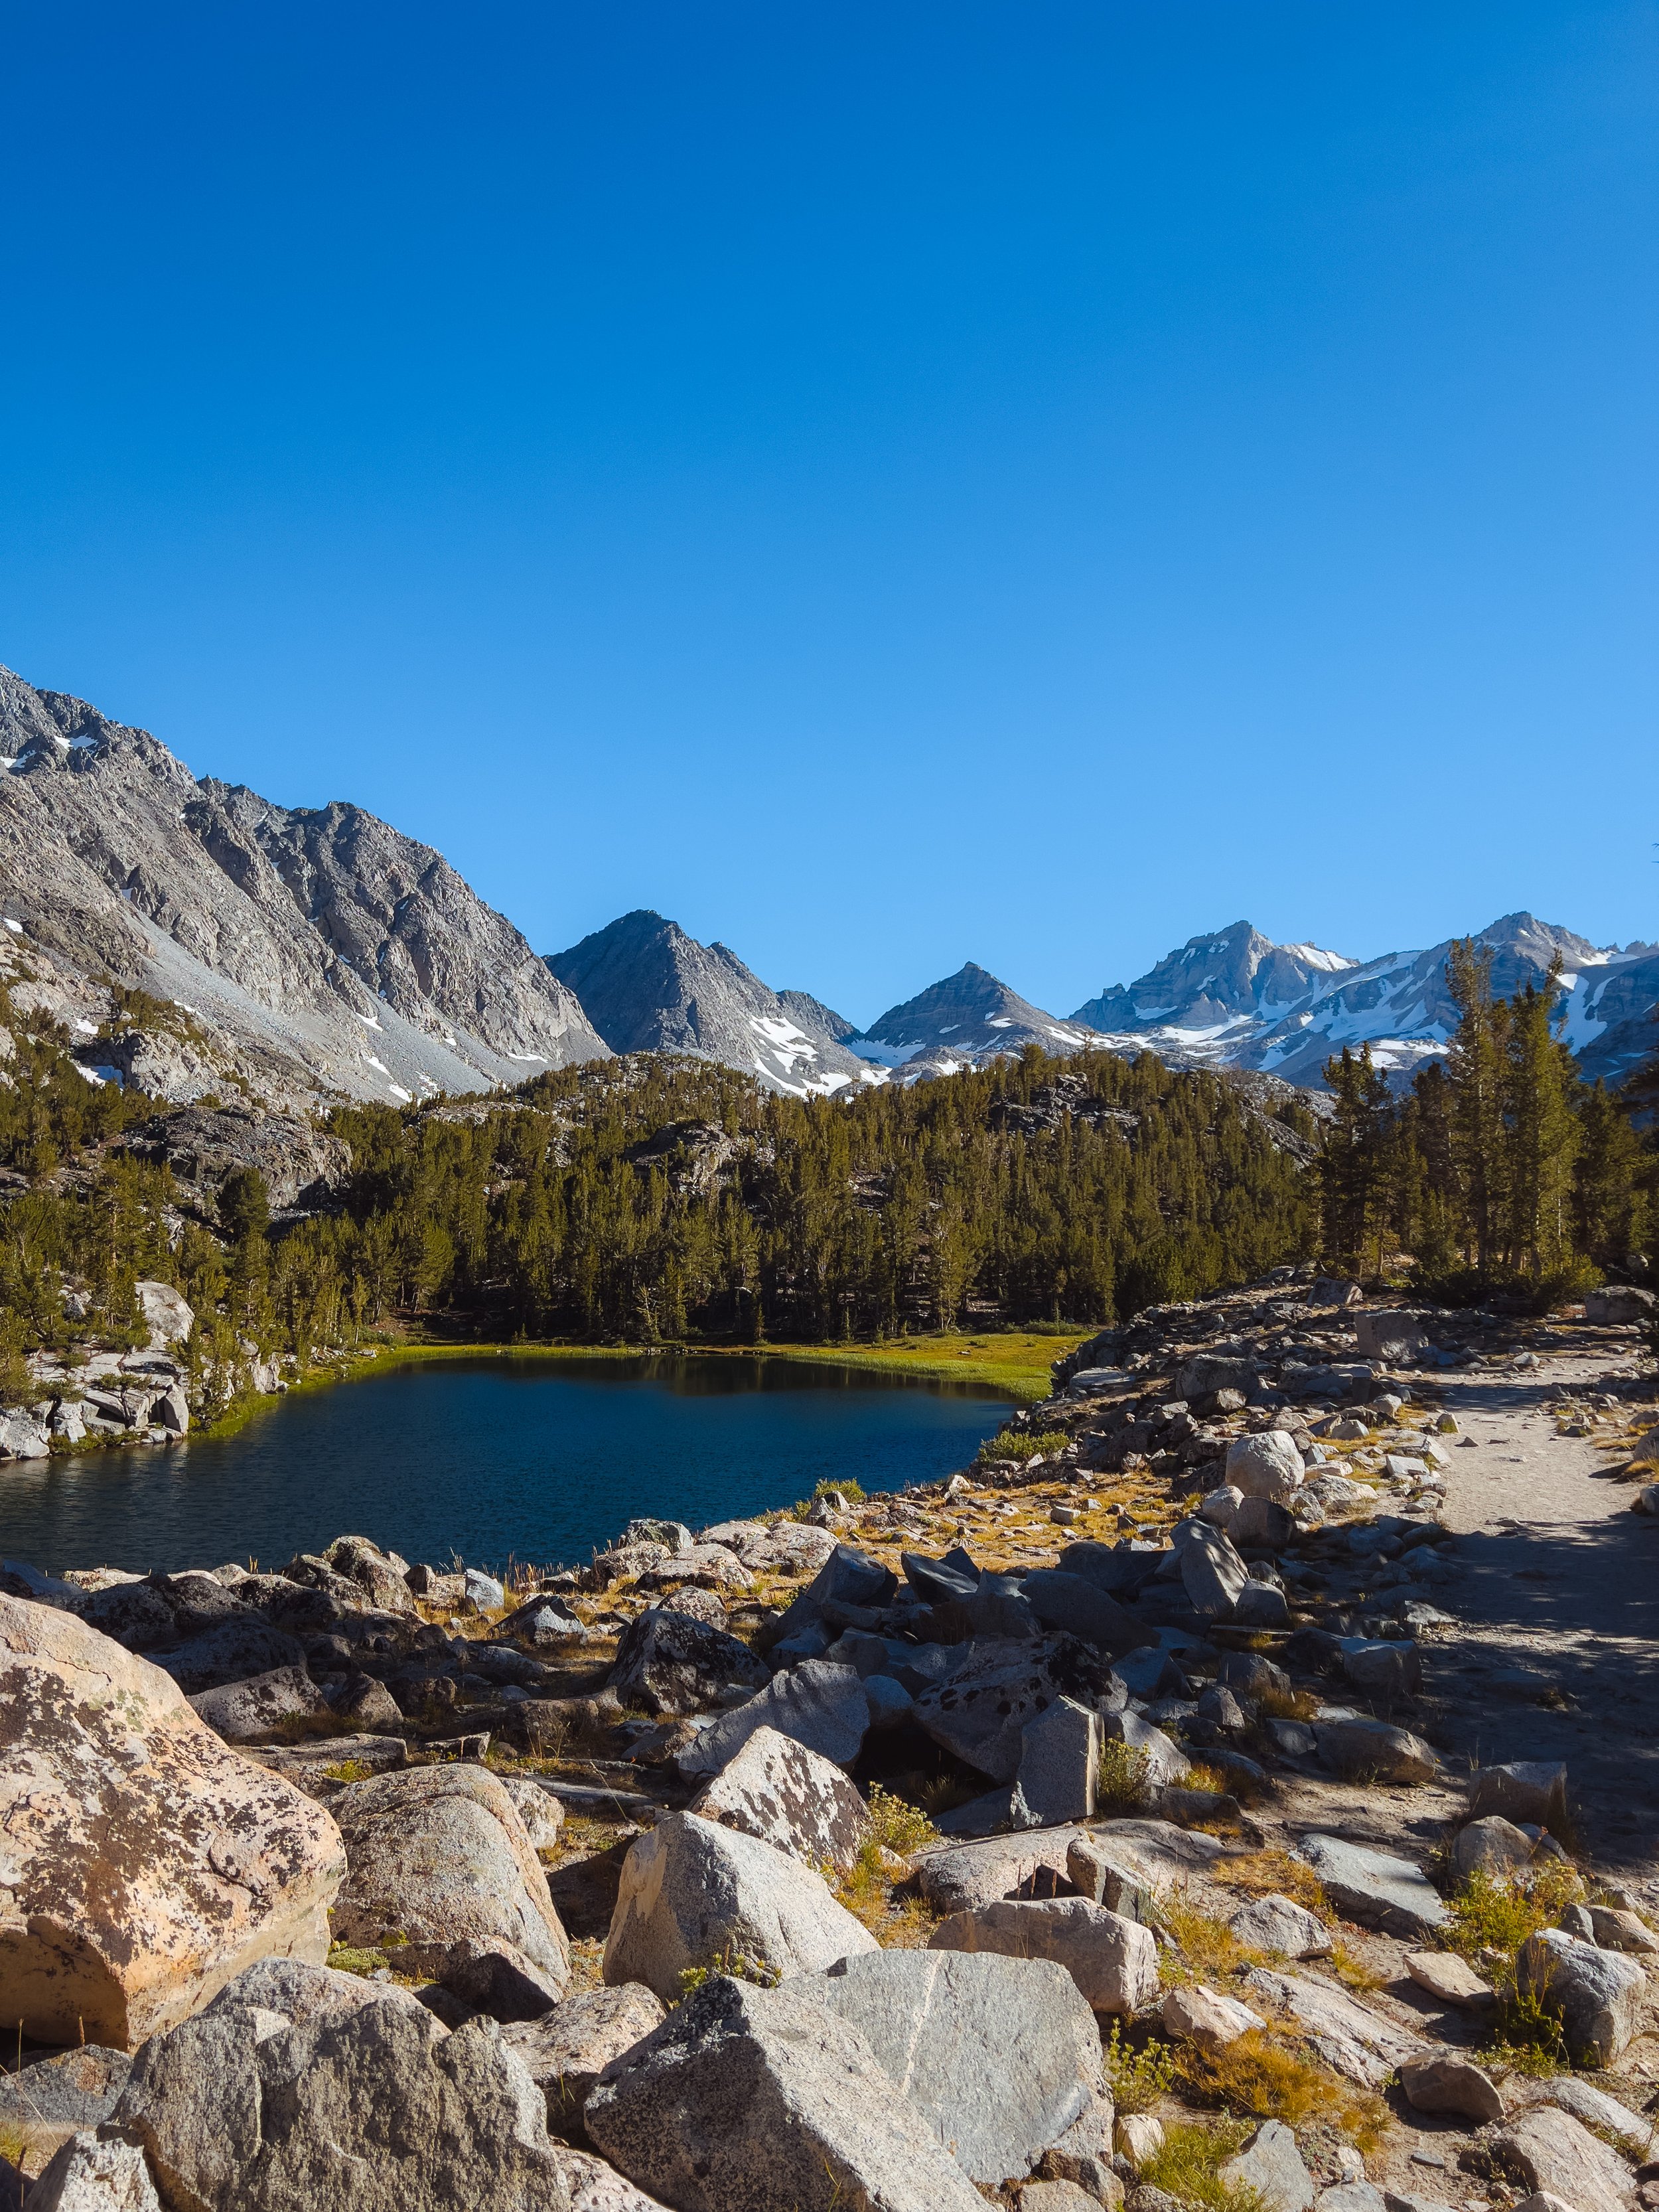
After a mile total, you’ll reach Heart Lake, which may have been my favorite lake on this stretch. This would be a perfect location to turn around if you’re wanting a short day hike. The lakeshore is easily accessible, you get an amazing view of the mountains, and there’s even a small waterfall cascade at the end of the lake, further into the valley. Talk about perfection!

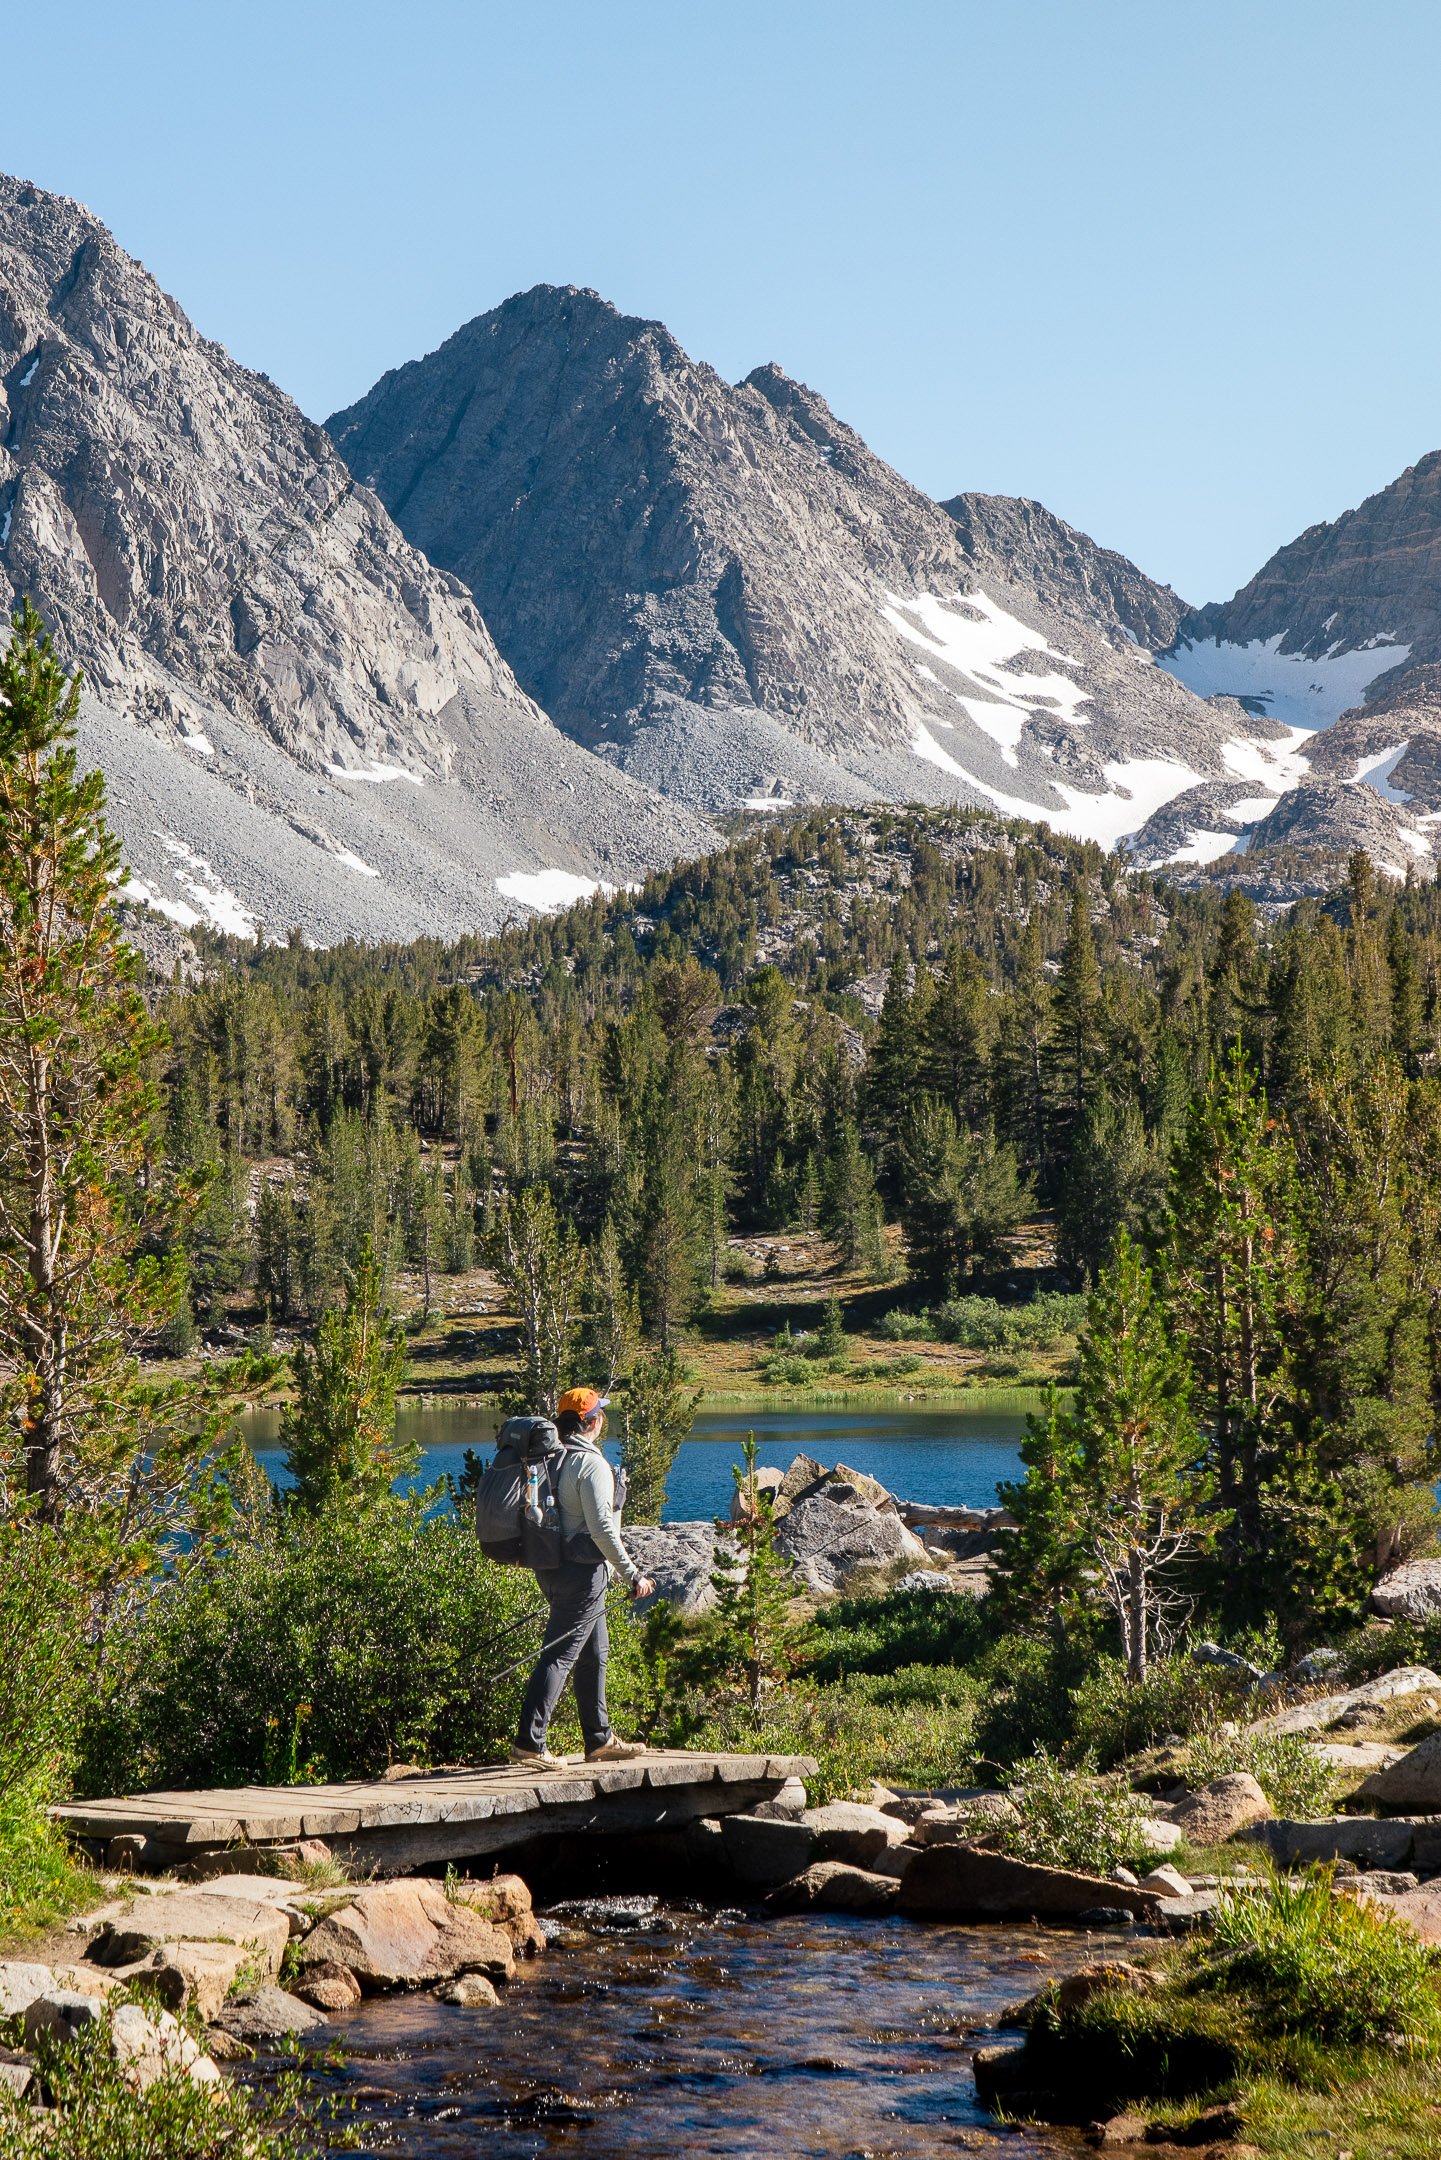
The trail continues to climb, but not for too long before you get a view of yet another lake! Did I mention this trail goes by seven named lakes?! Box Lake is another favorite of mine. I enjoyed sitting on the rocks way above the lake beside the trail, eating my snacks and watching the people cliff jumping into the lake on the other side. It felt like a perfect summer day (except it was too cold for me to want to swim).
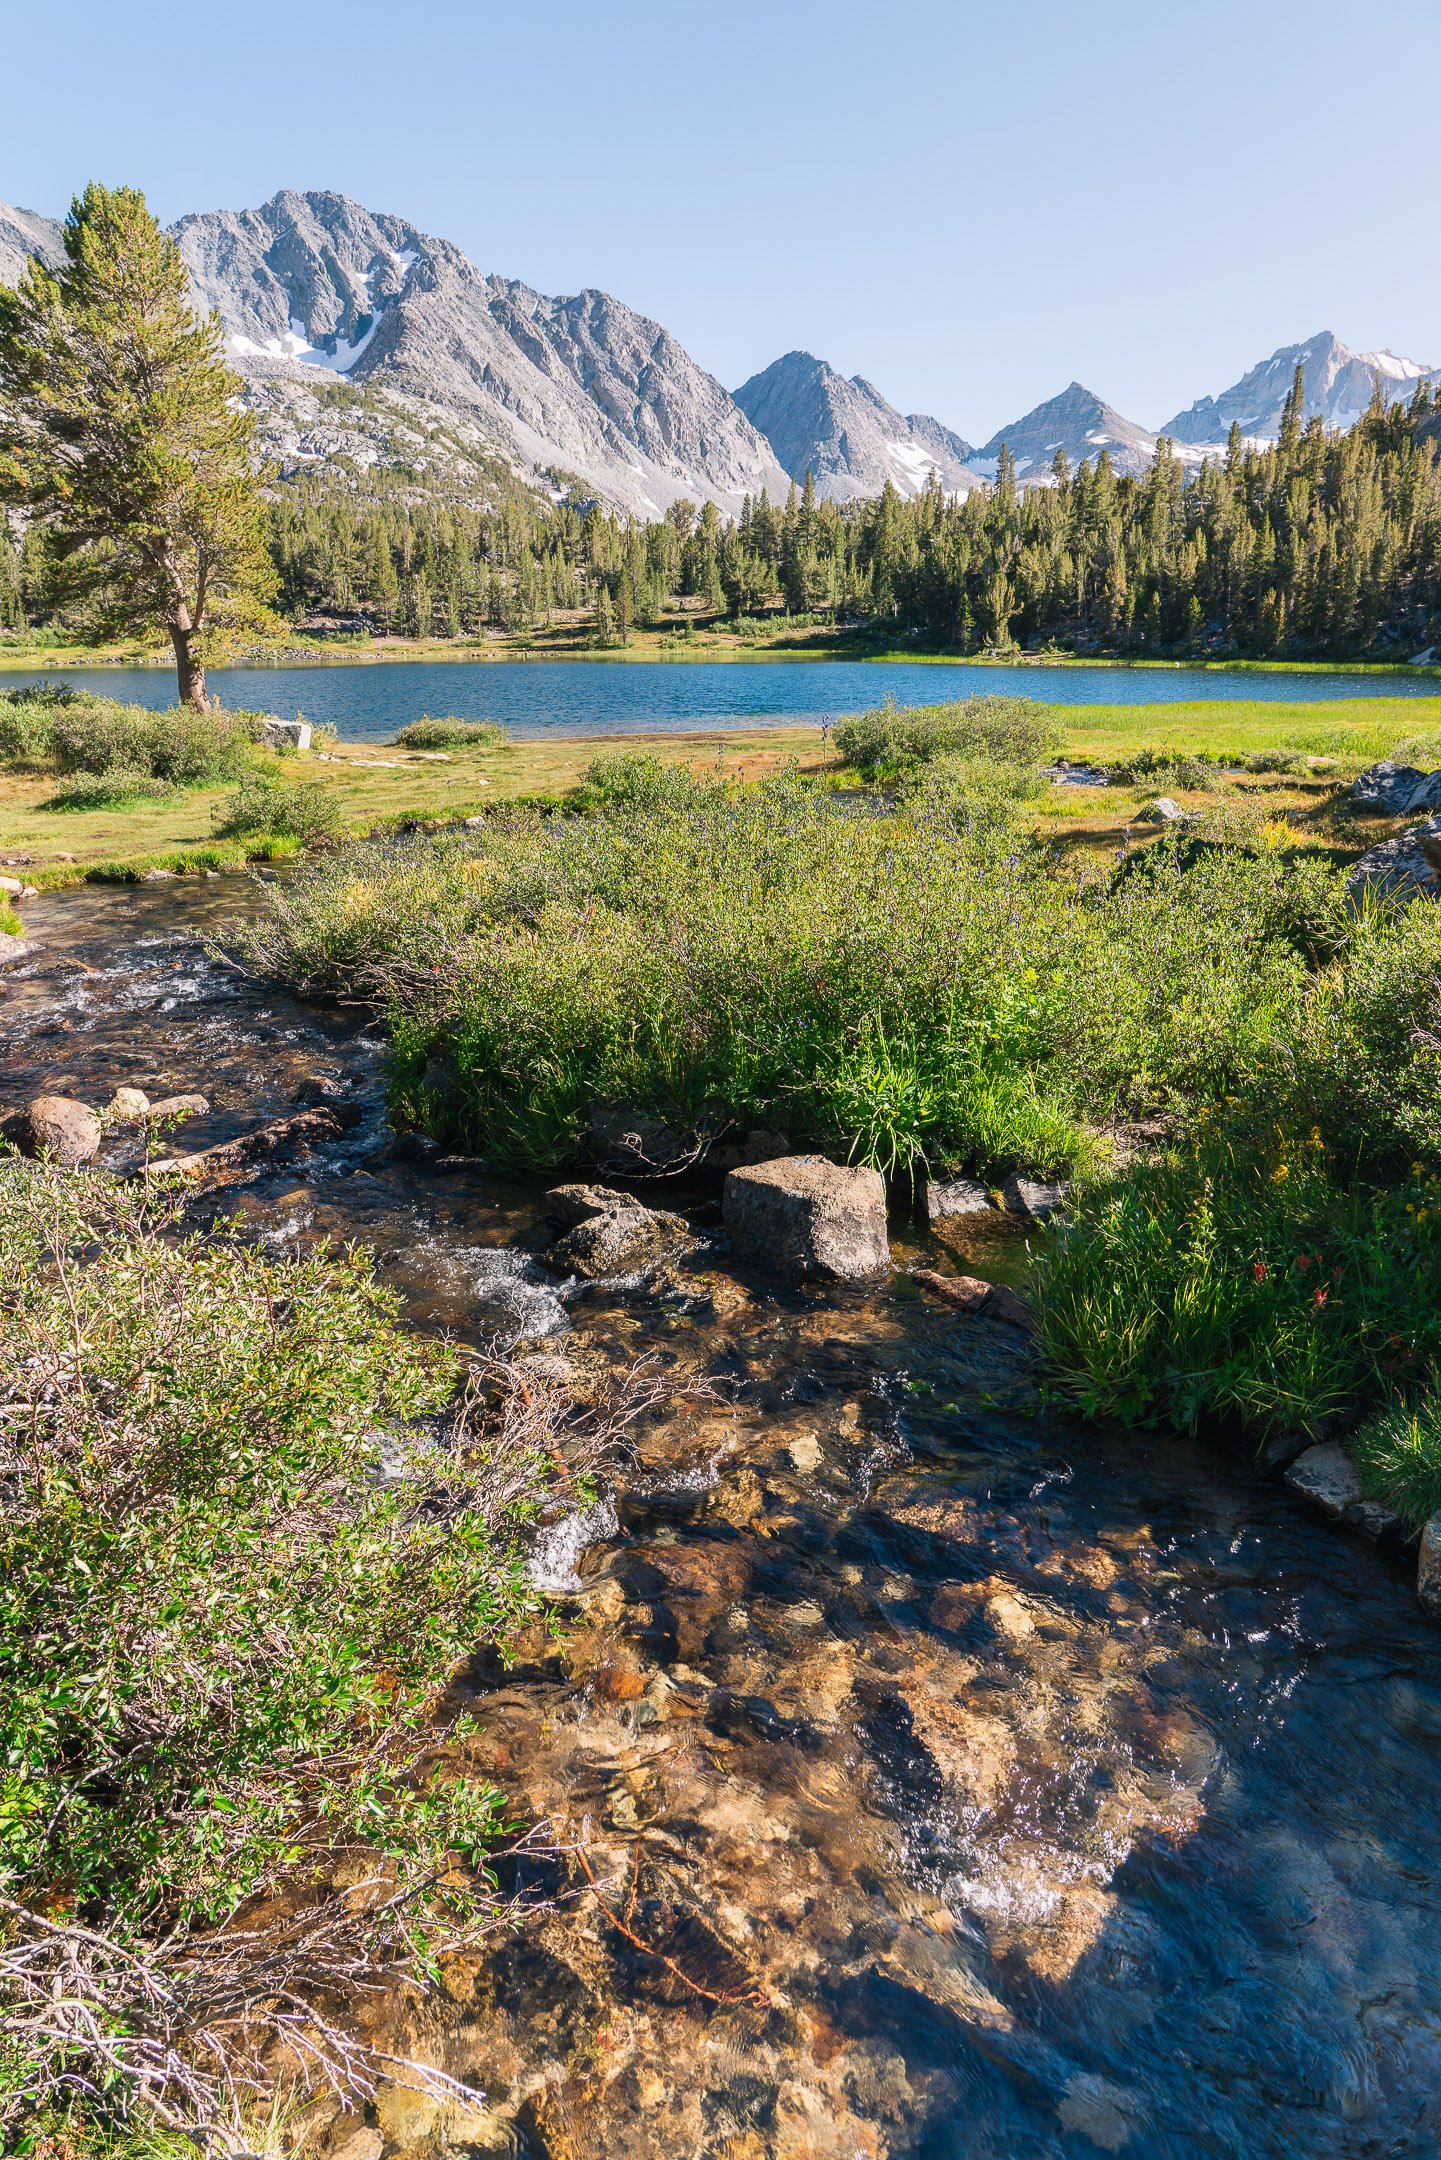
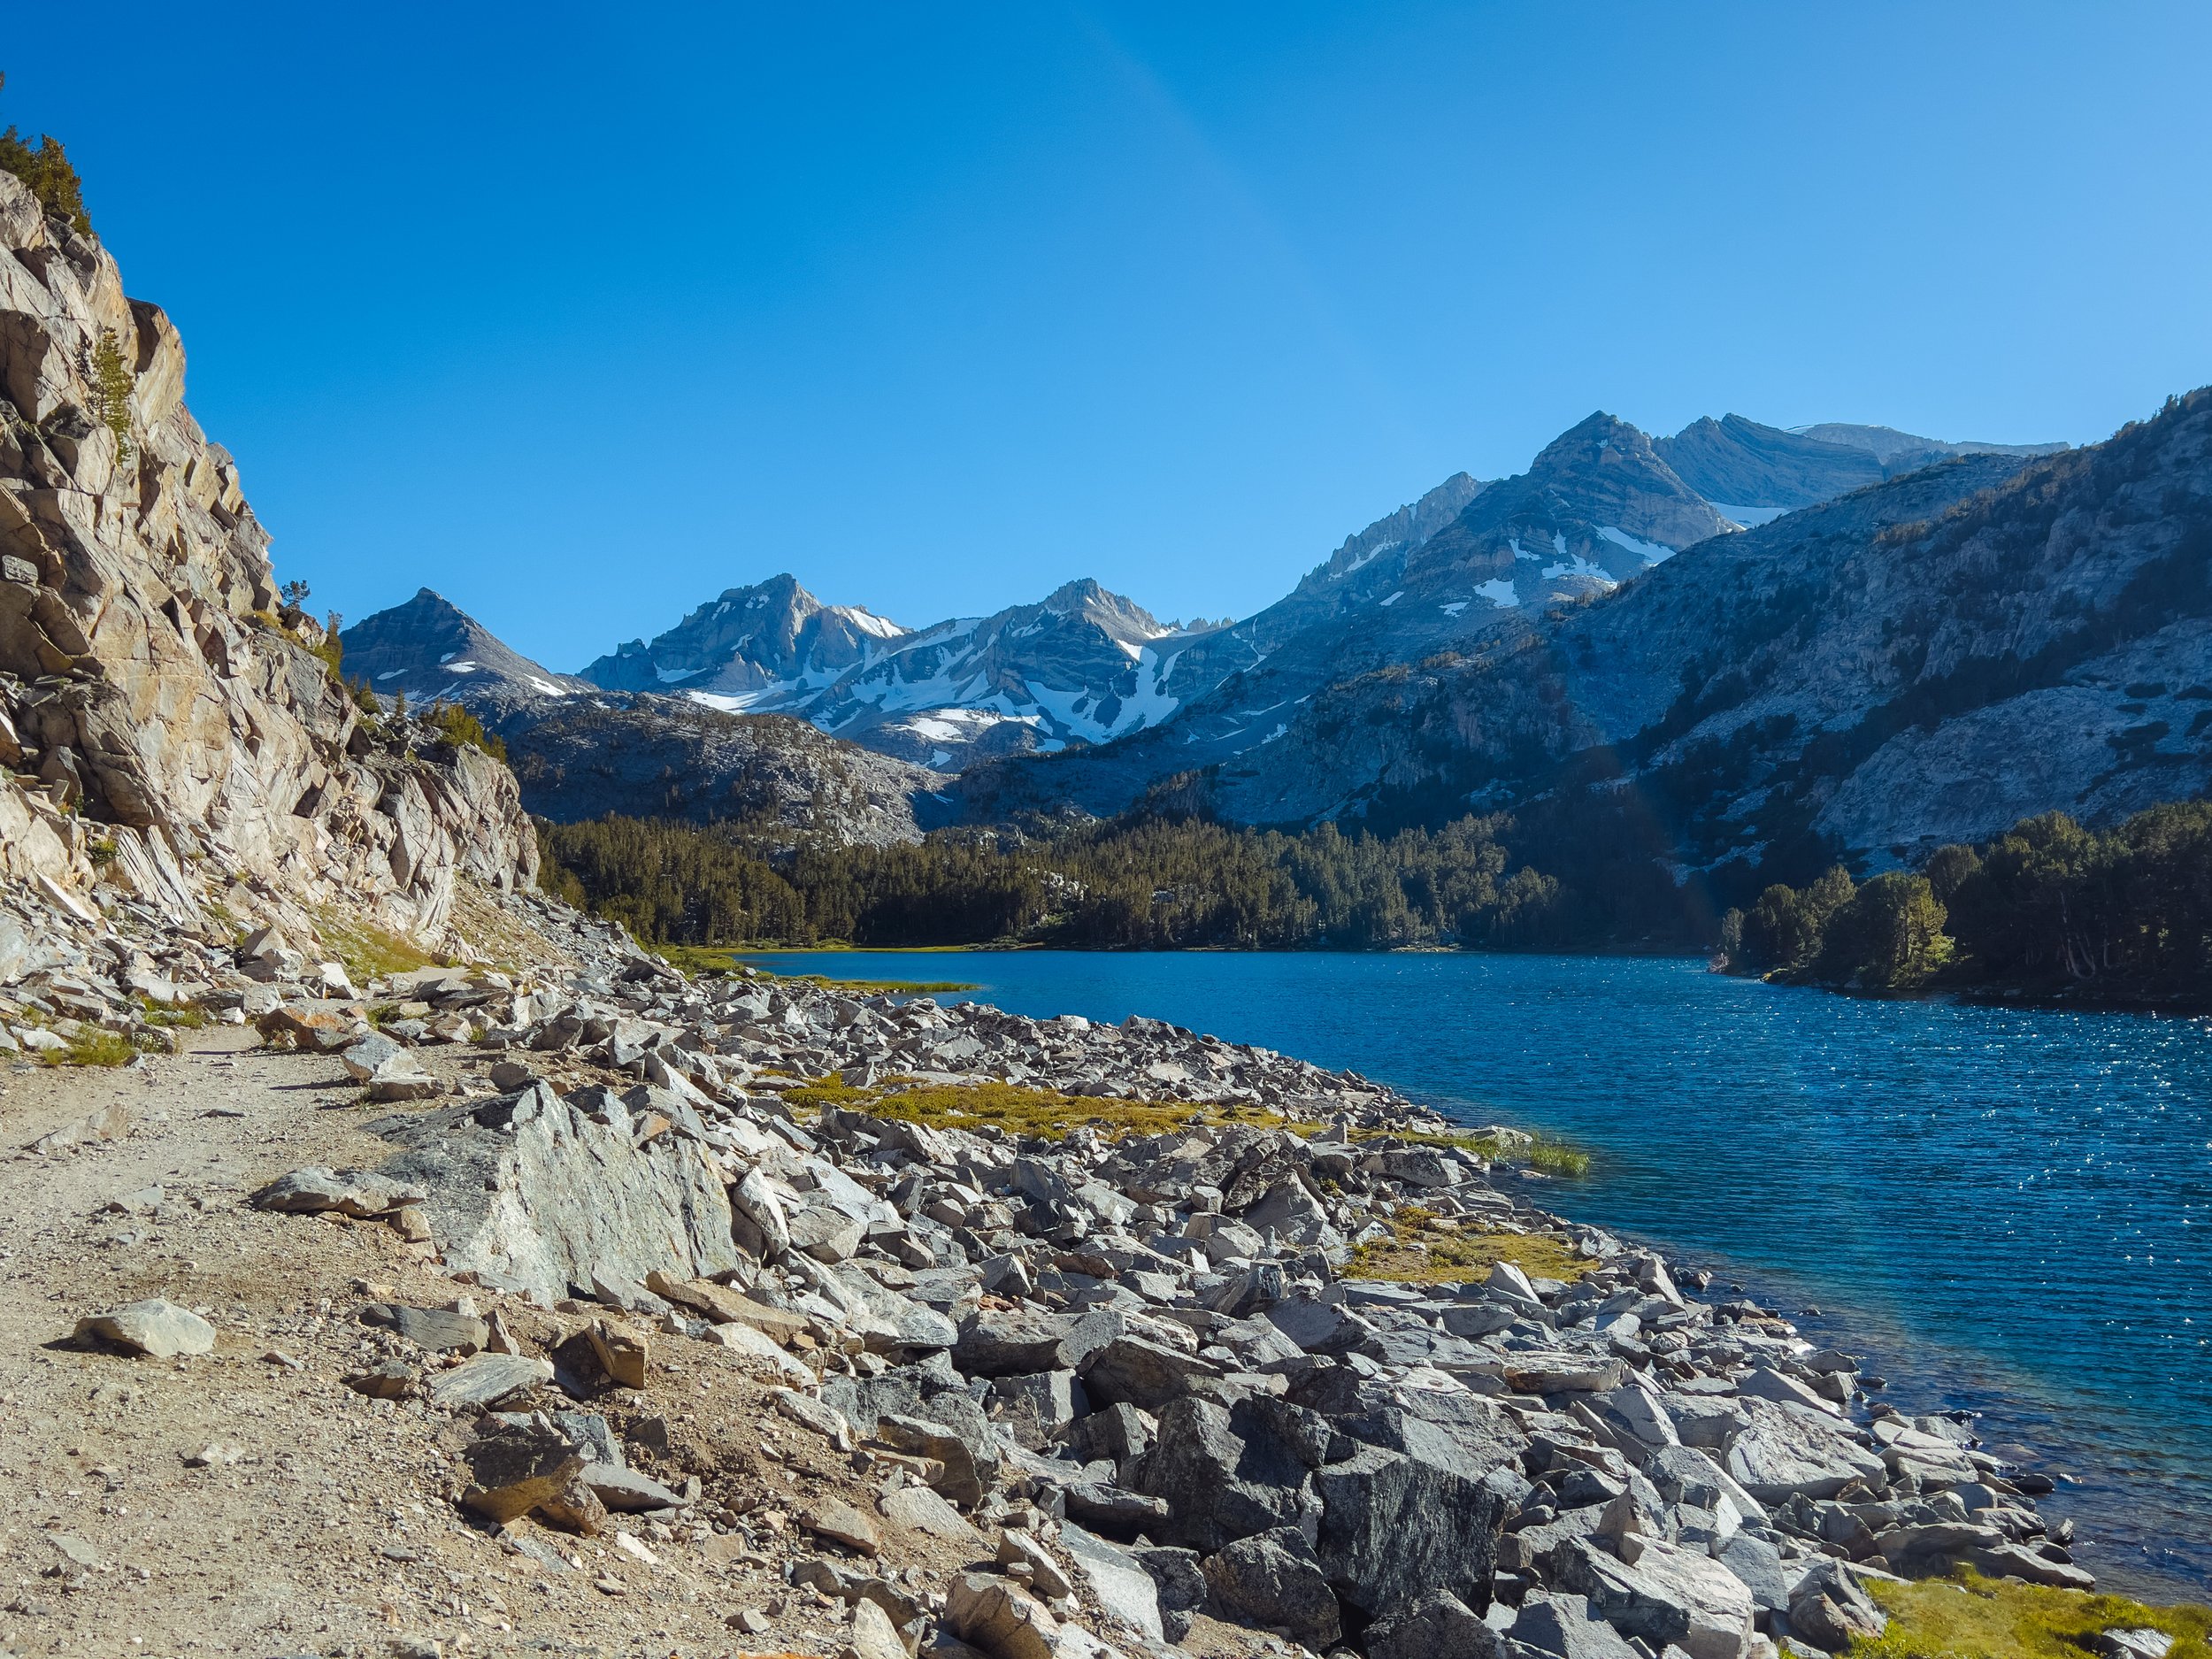
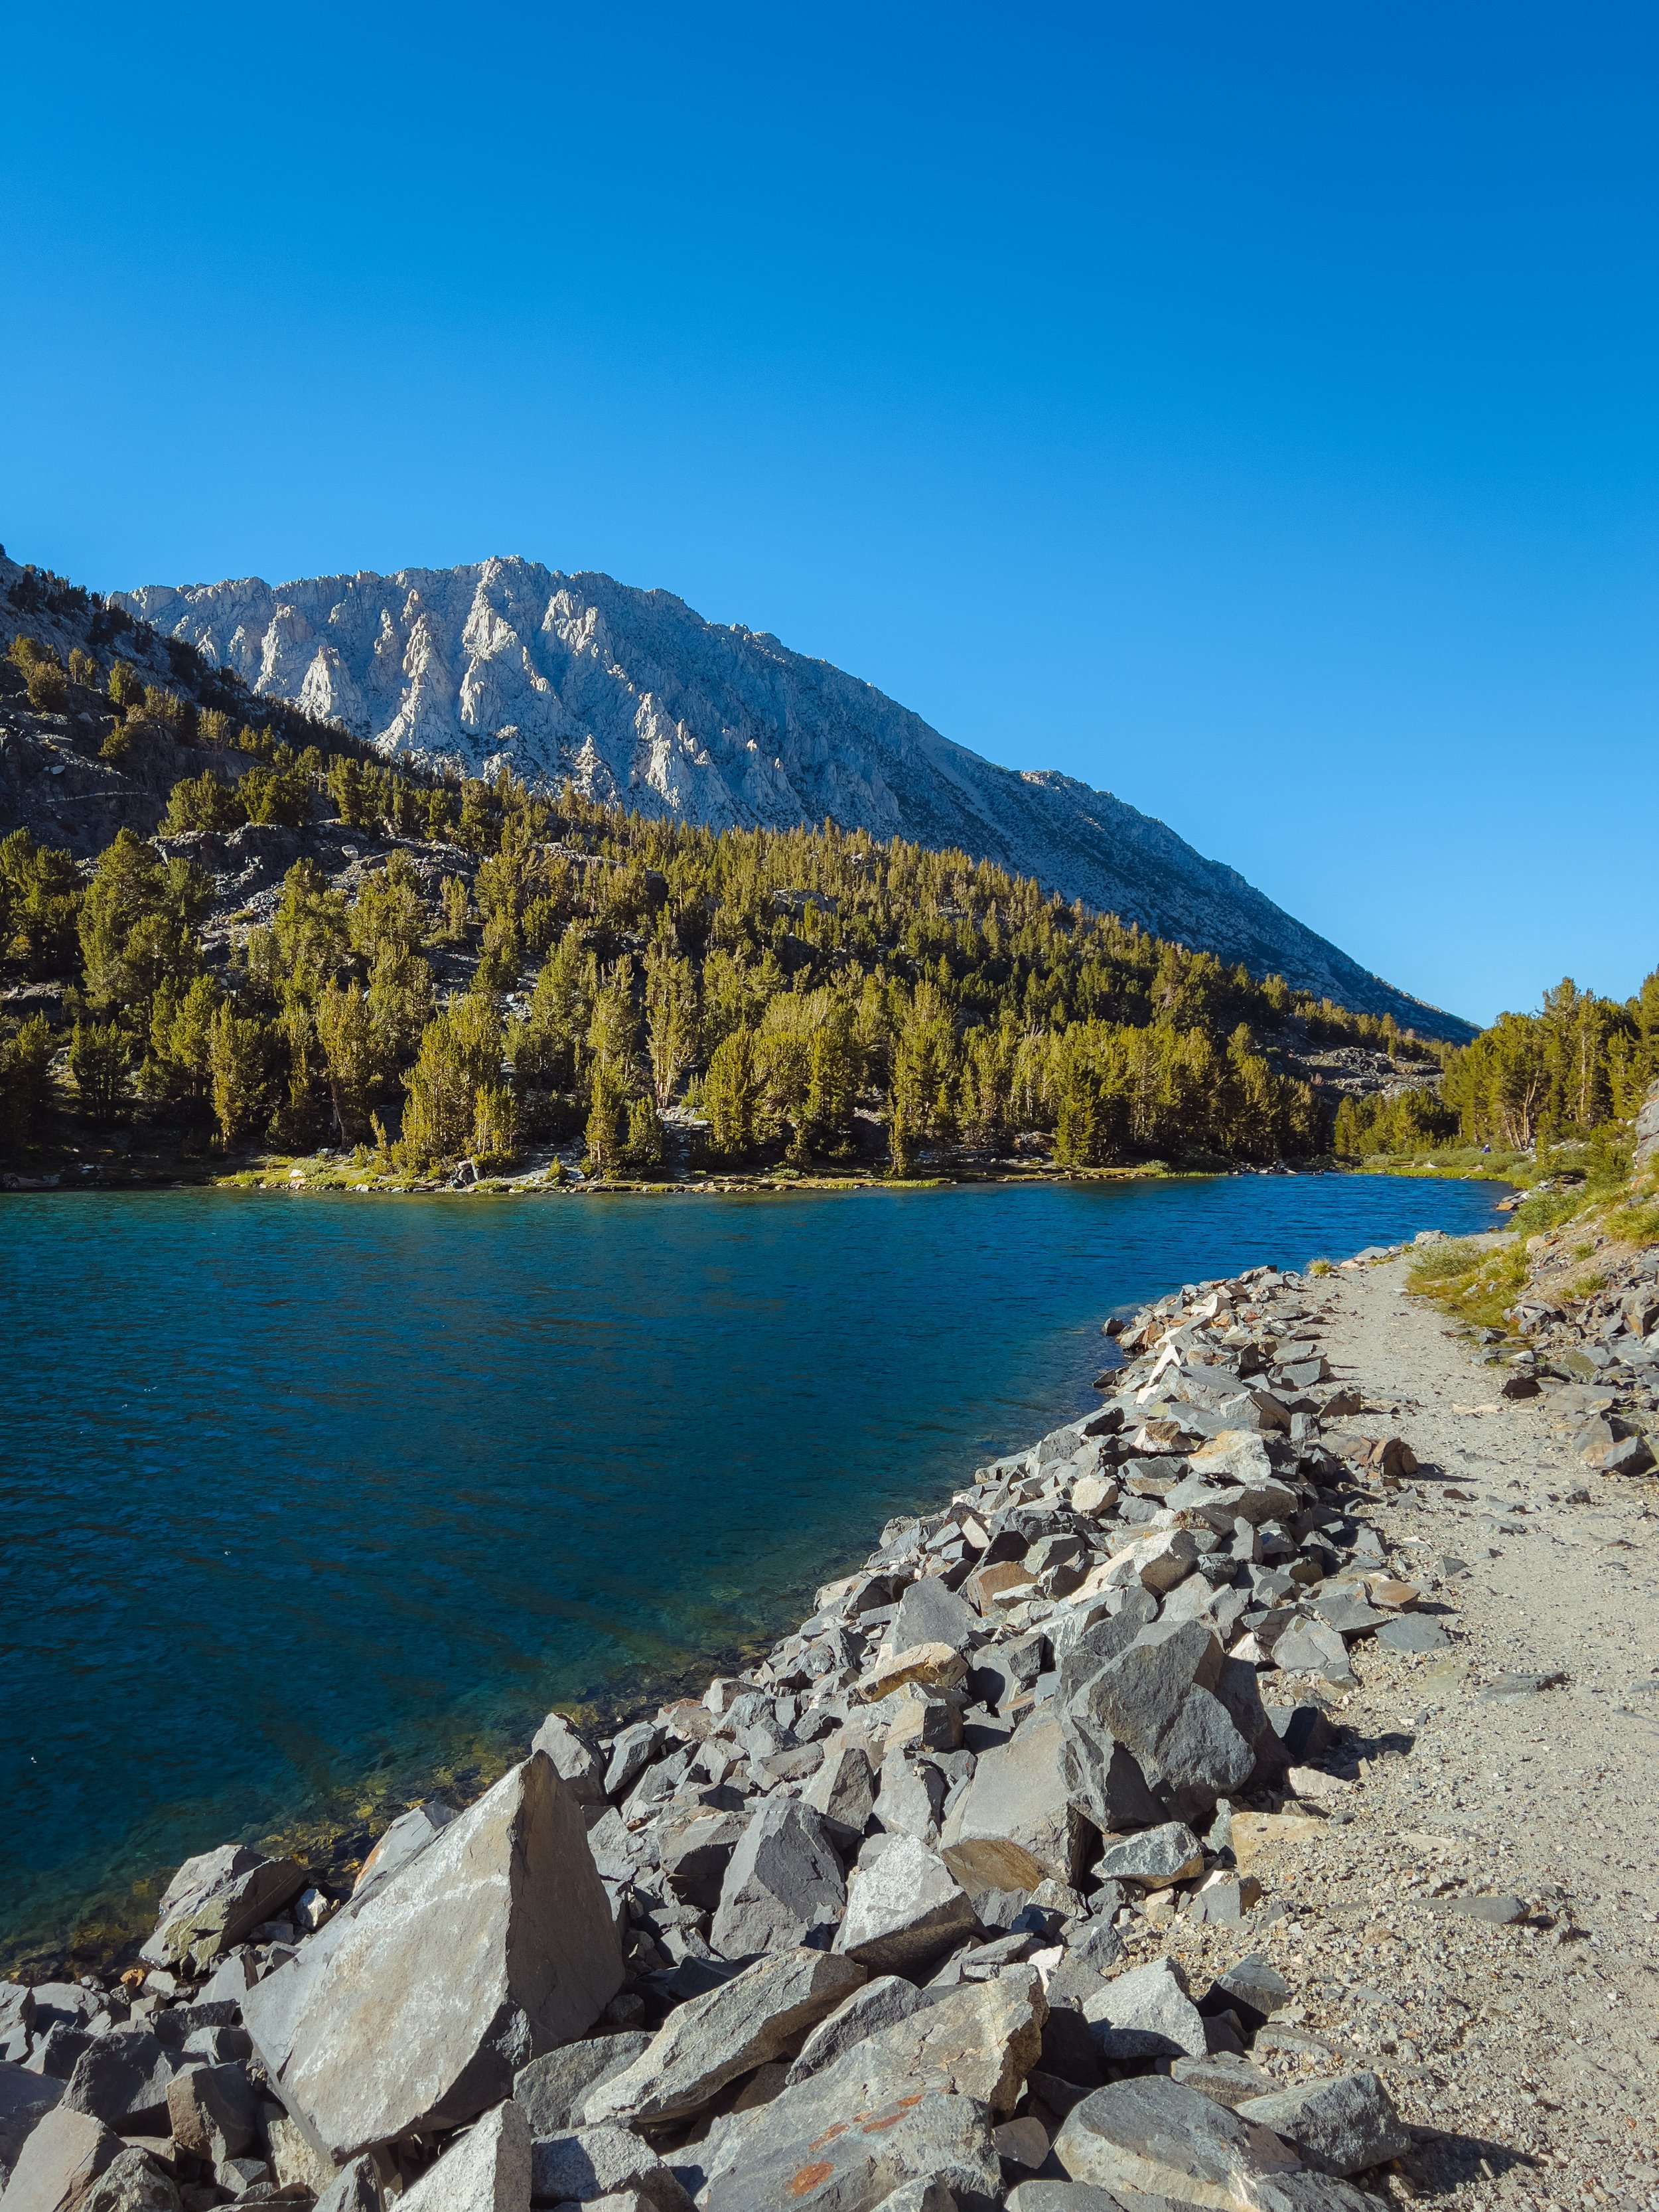
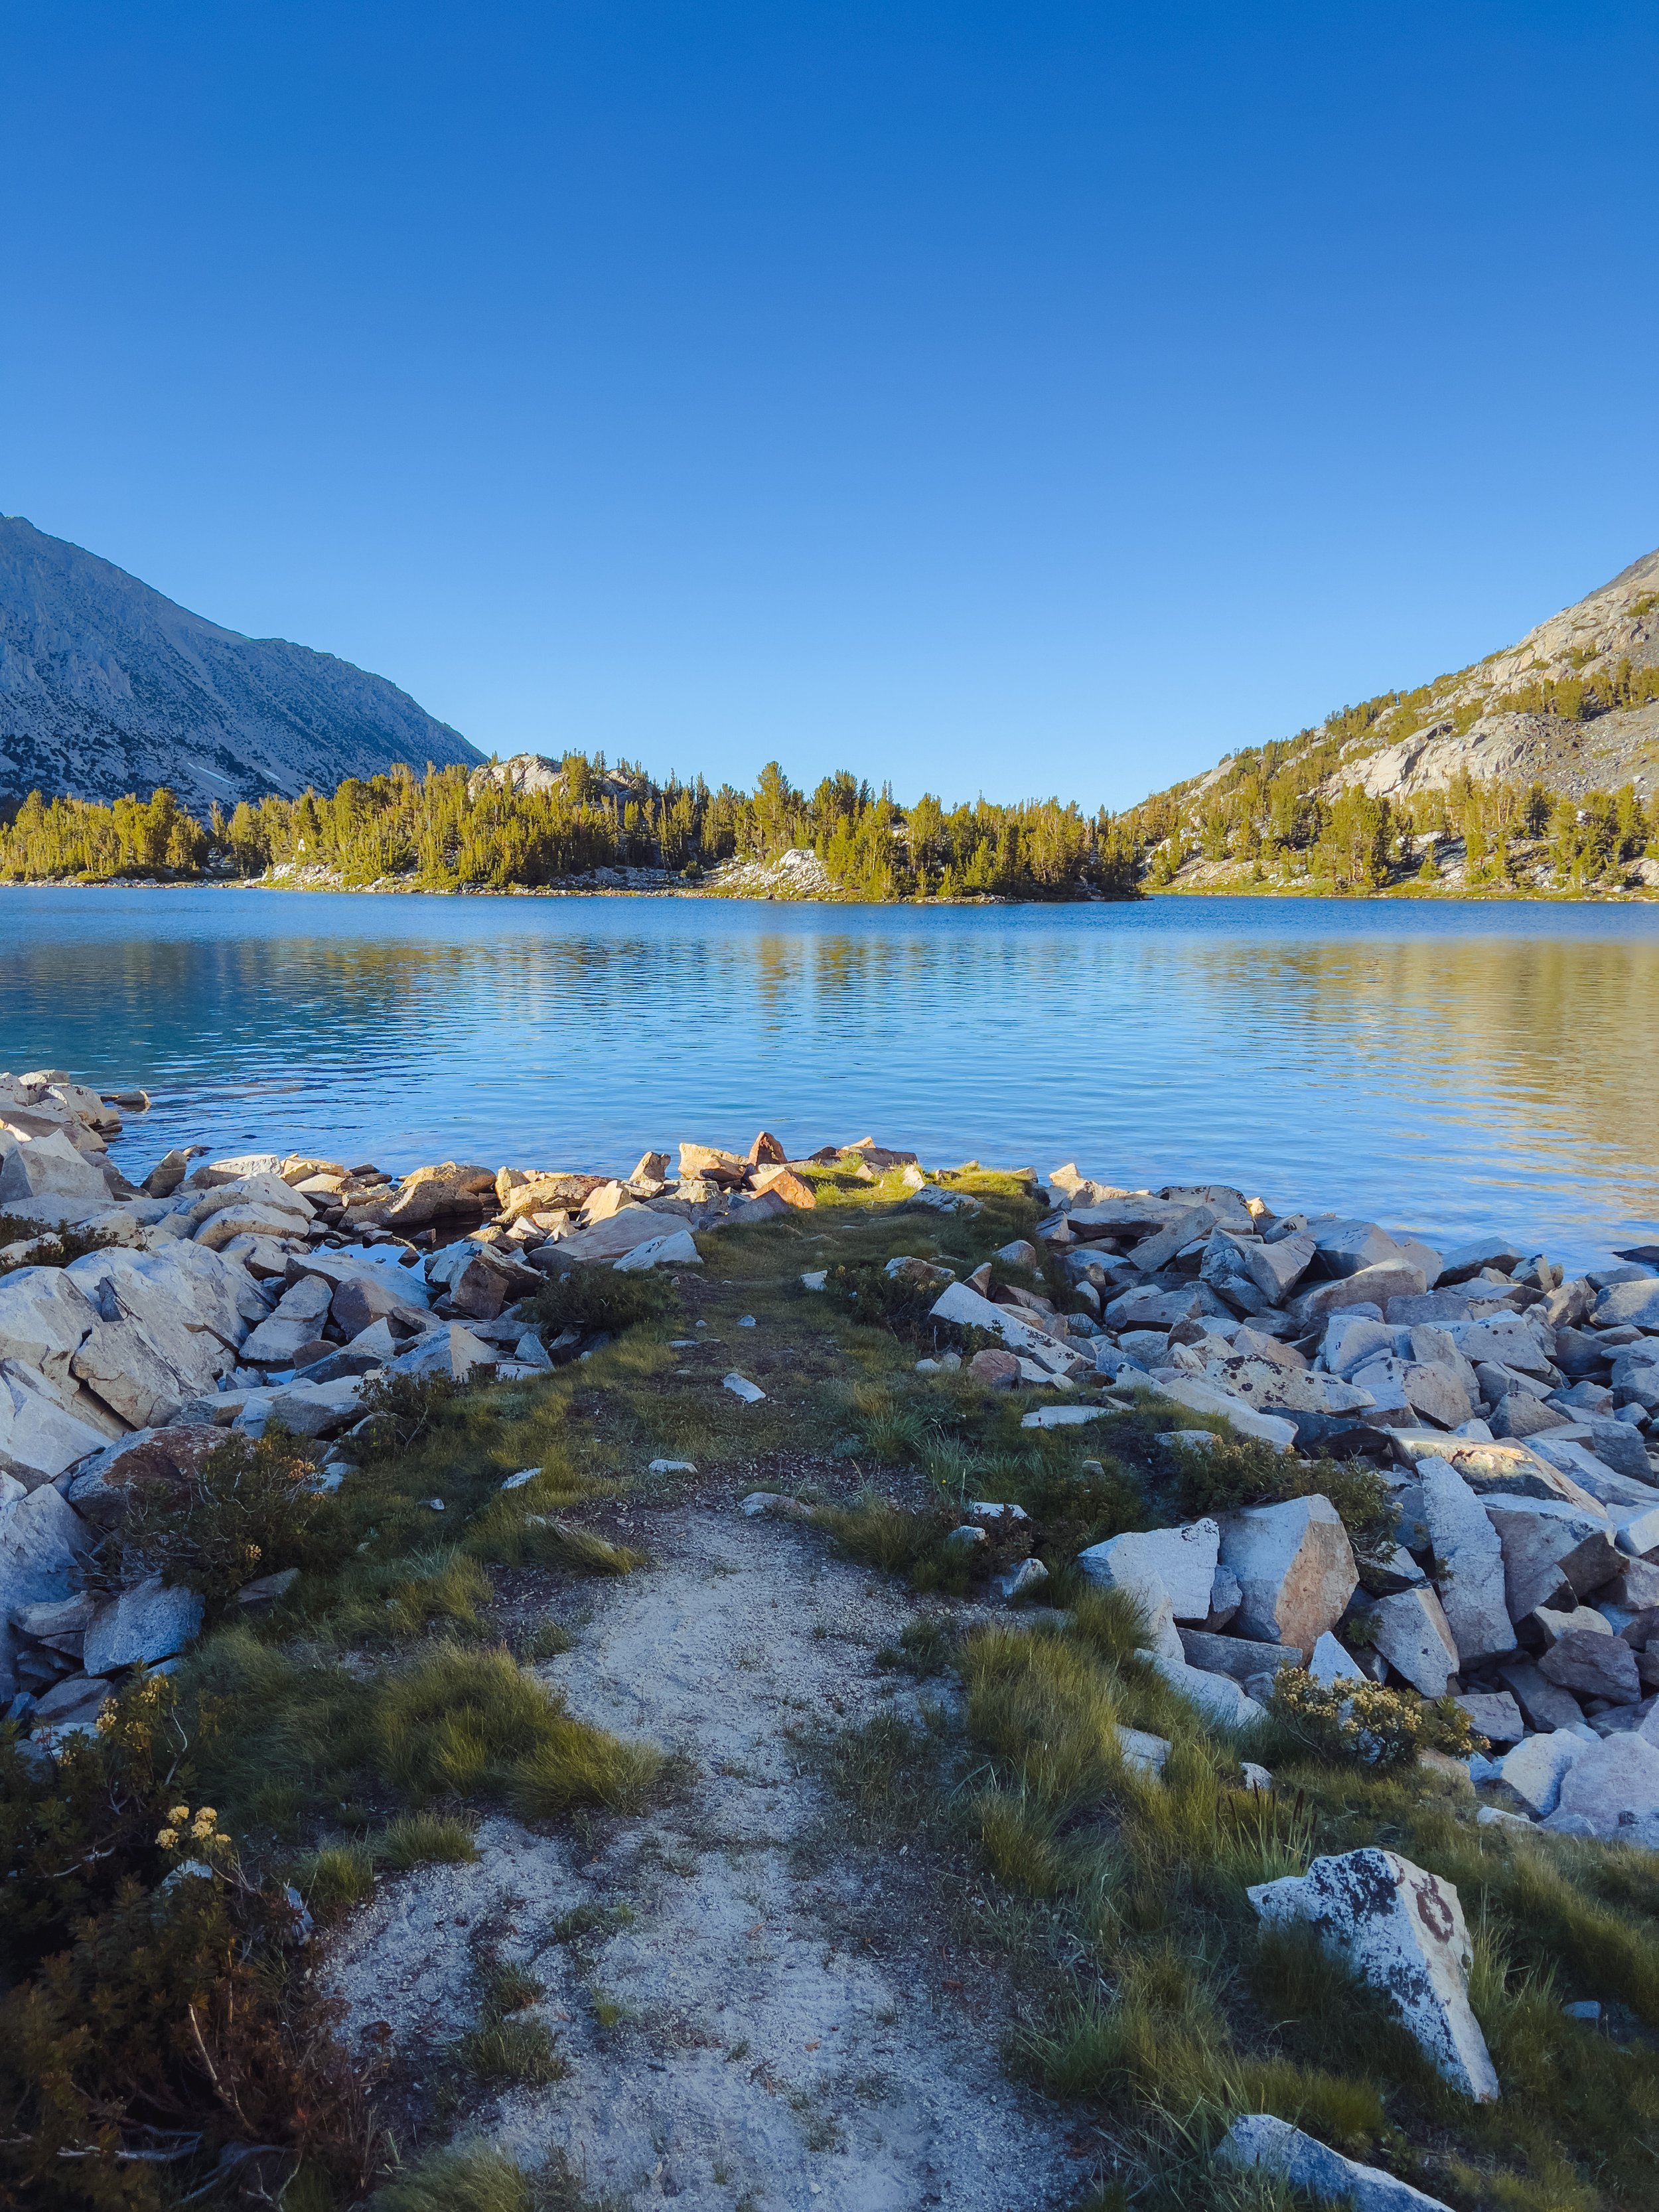
The hike in this next part is super easy and mostly flat as you make your way to Long Lake - and yes, it’s a long lake! Long Lake is another awesome spot for spending some time at. There’s a good break spot at the very beginning of the lake area, and as you walk along it’s length, you’ll see small social trails down to the lakeshore with nice areas for laying down and accessing the water for swimming or fishing.
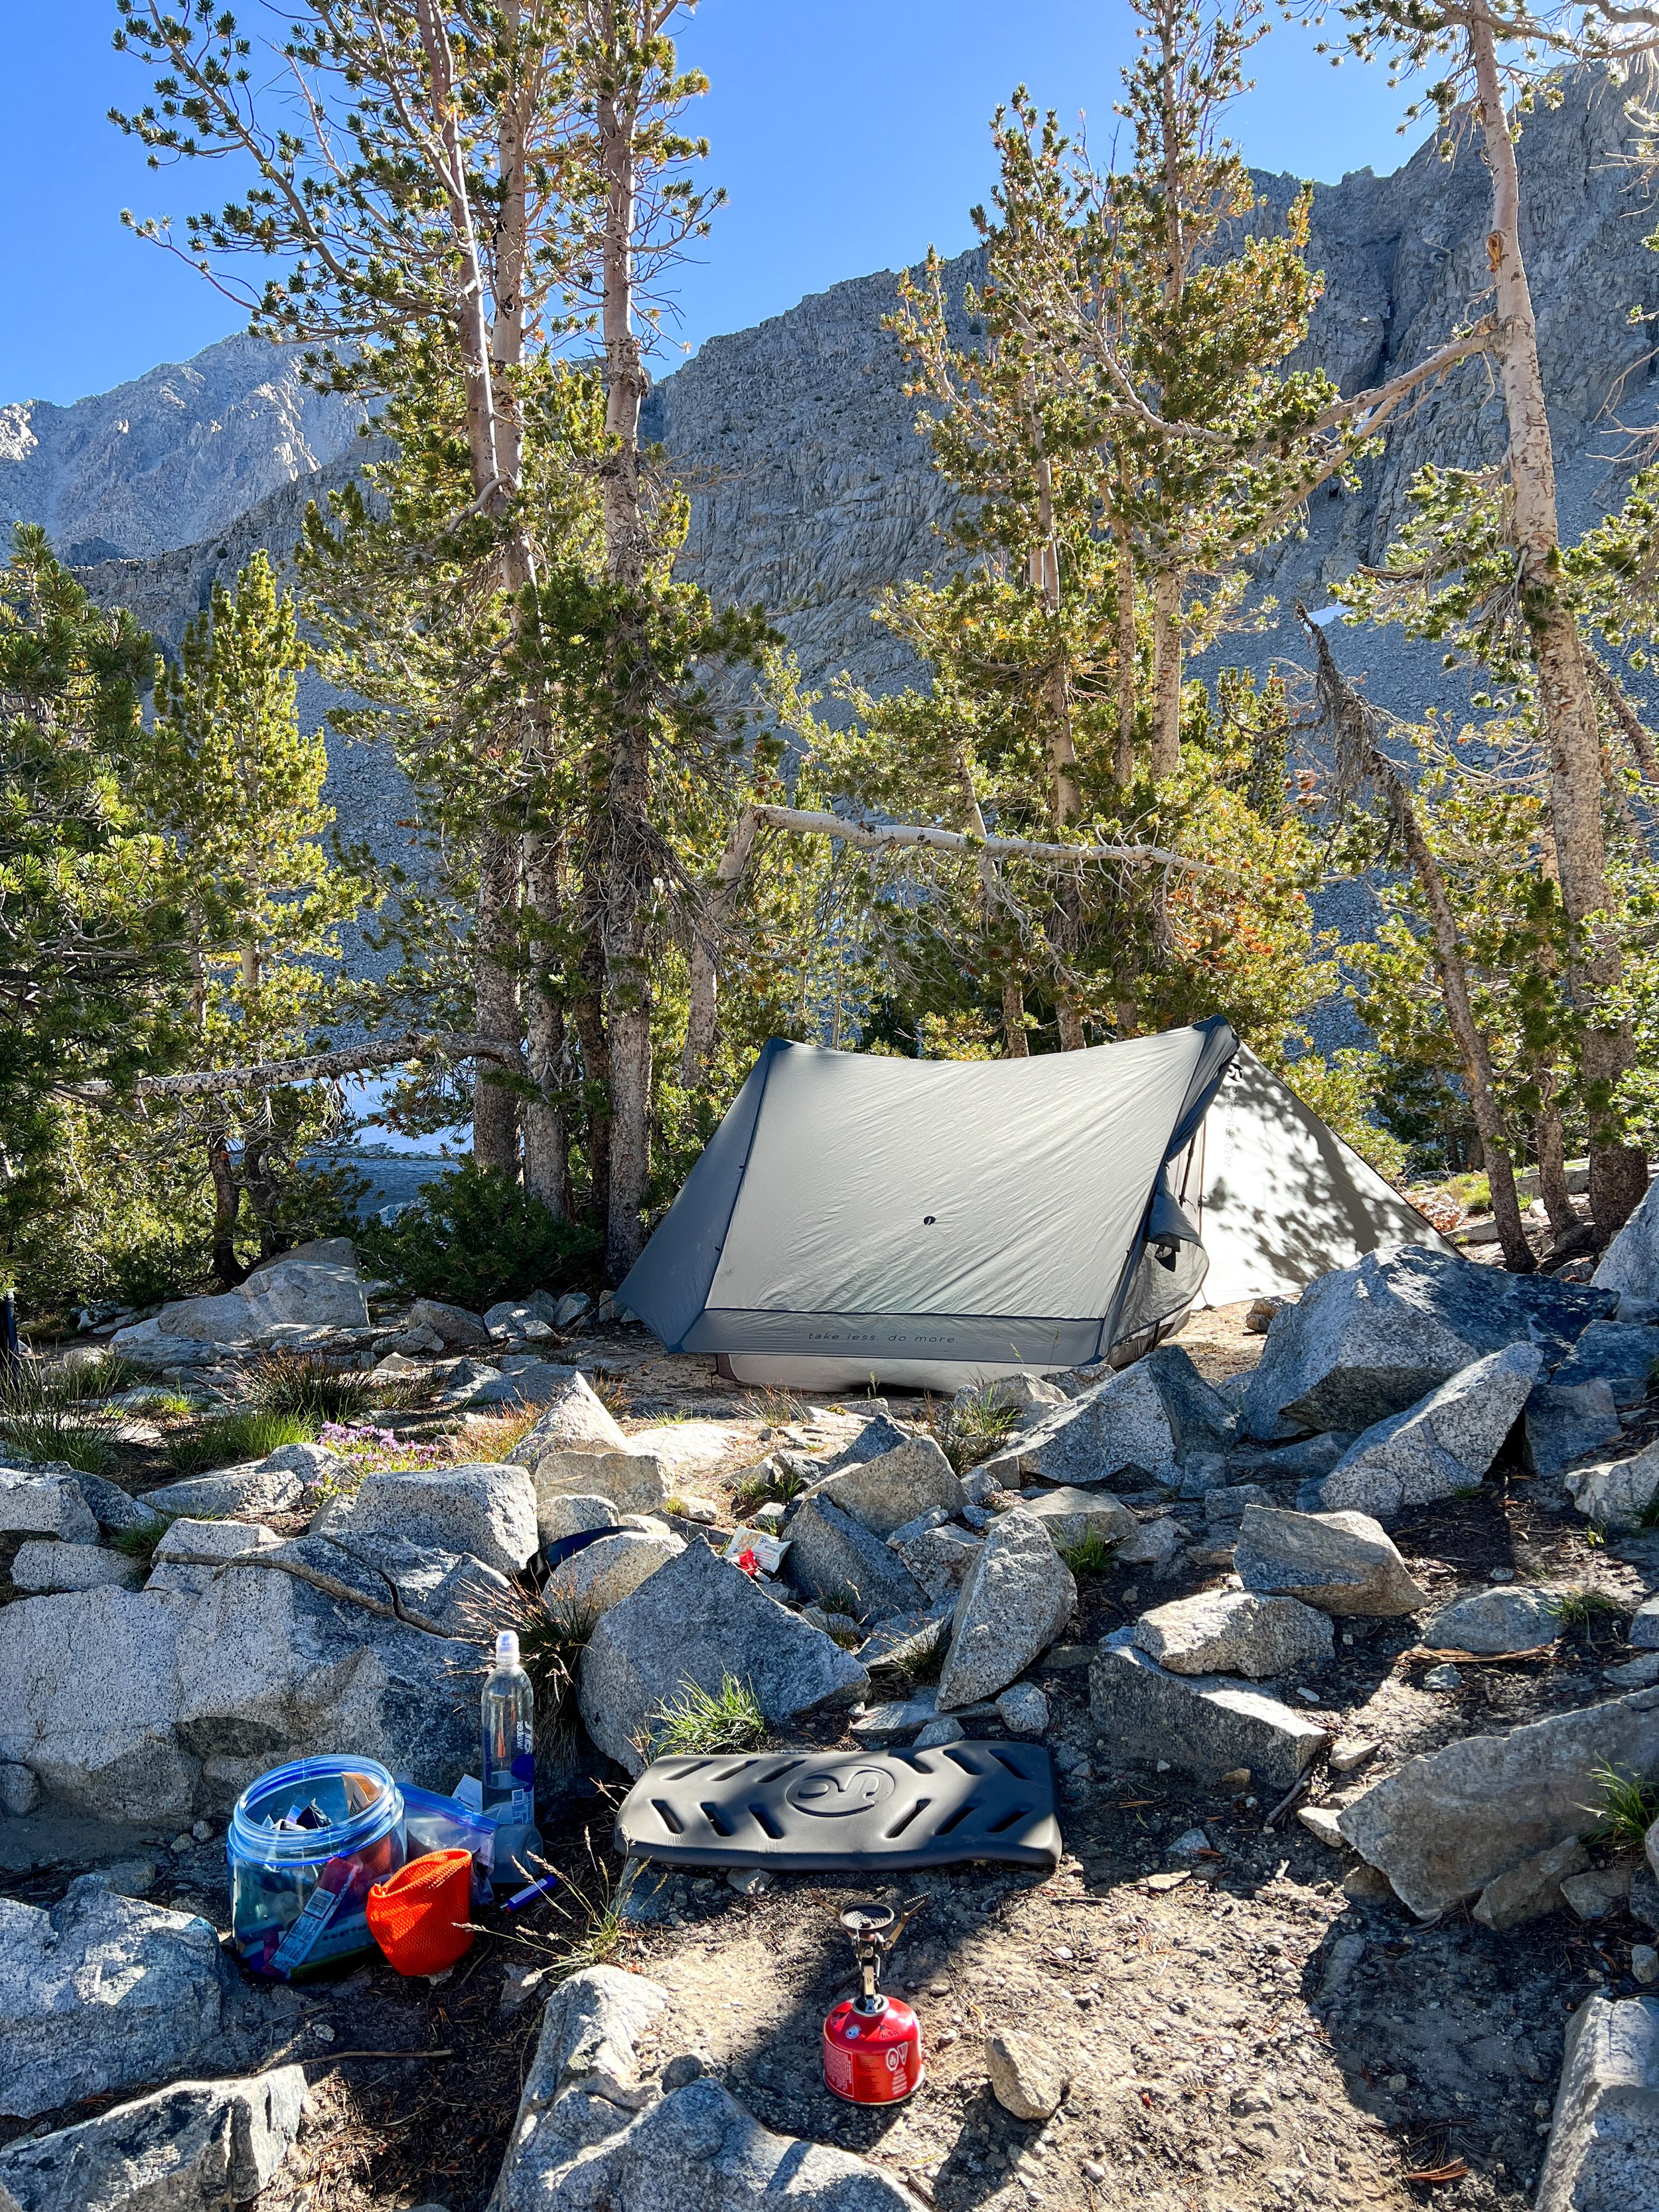
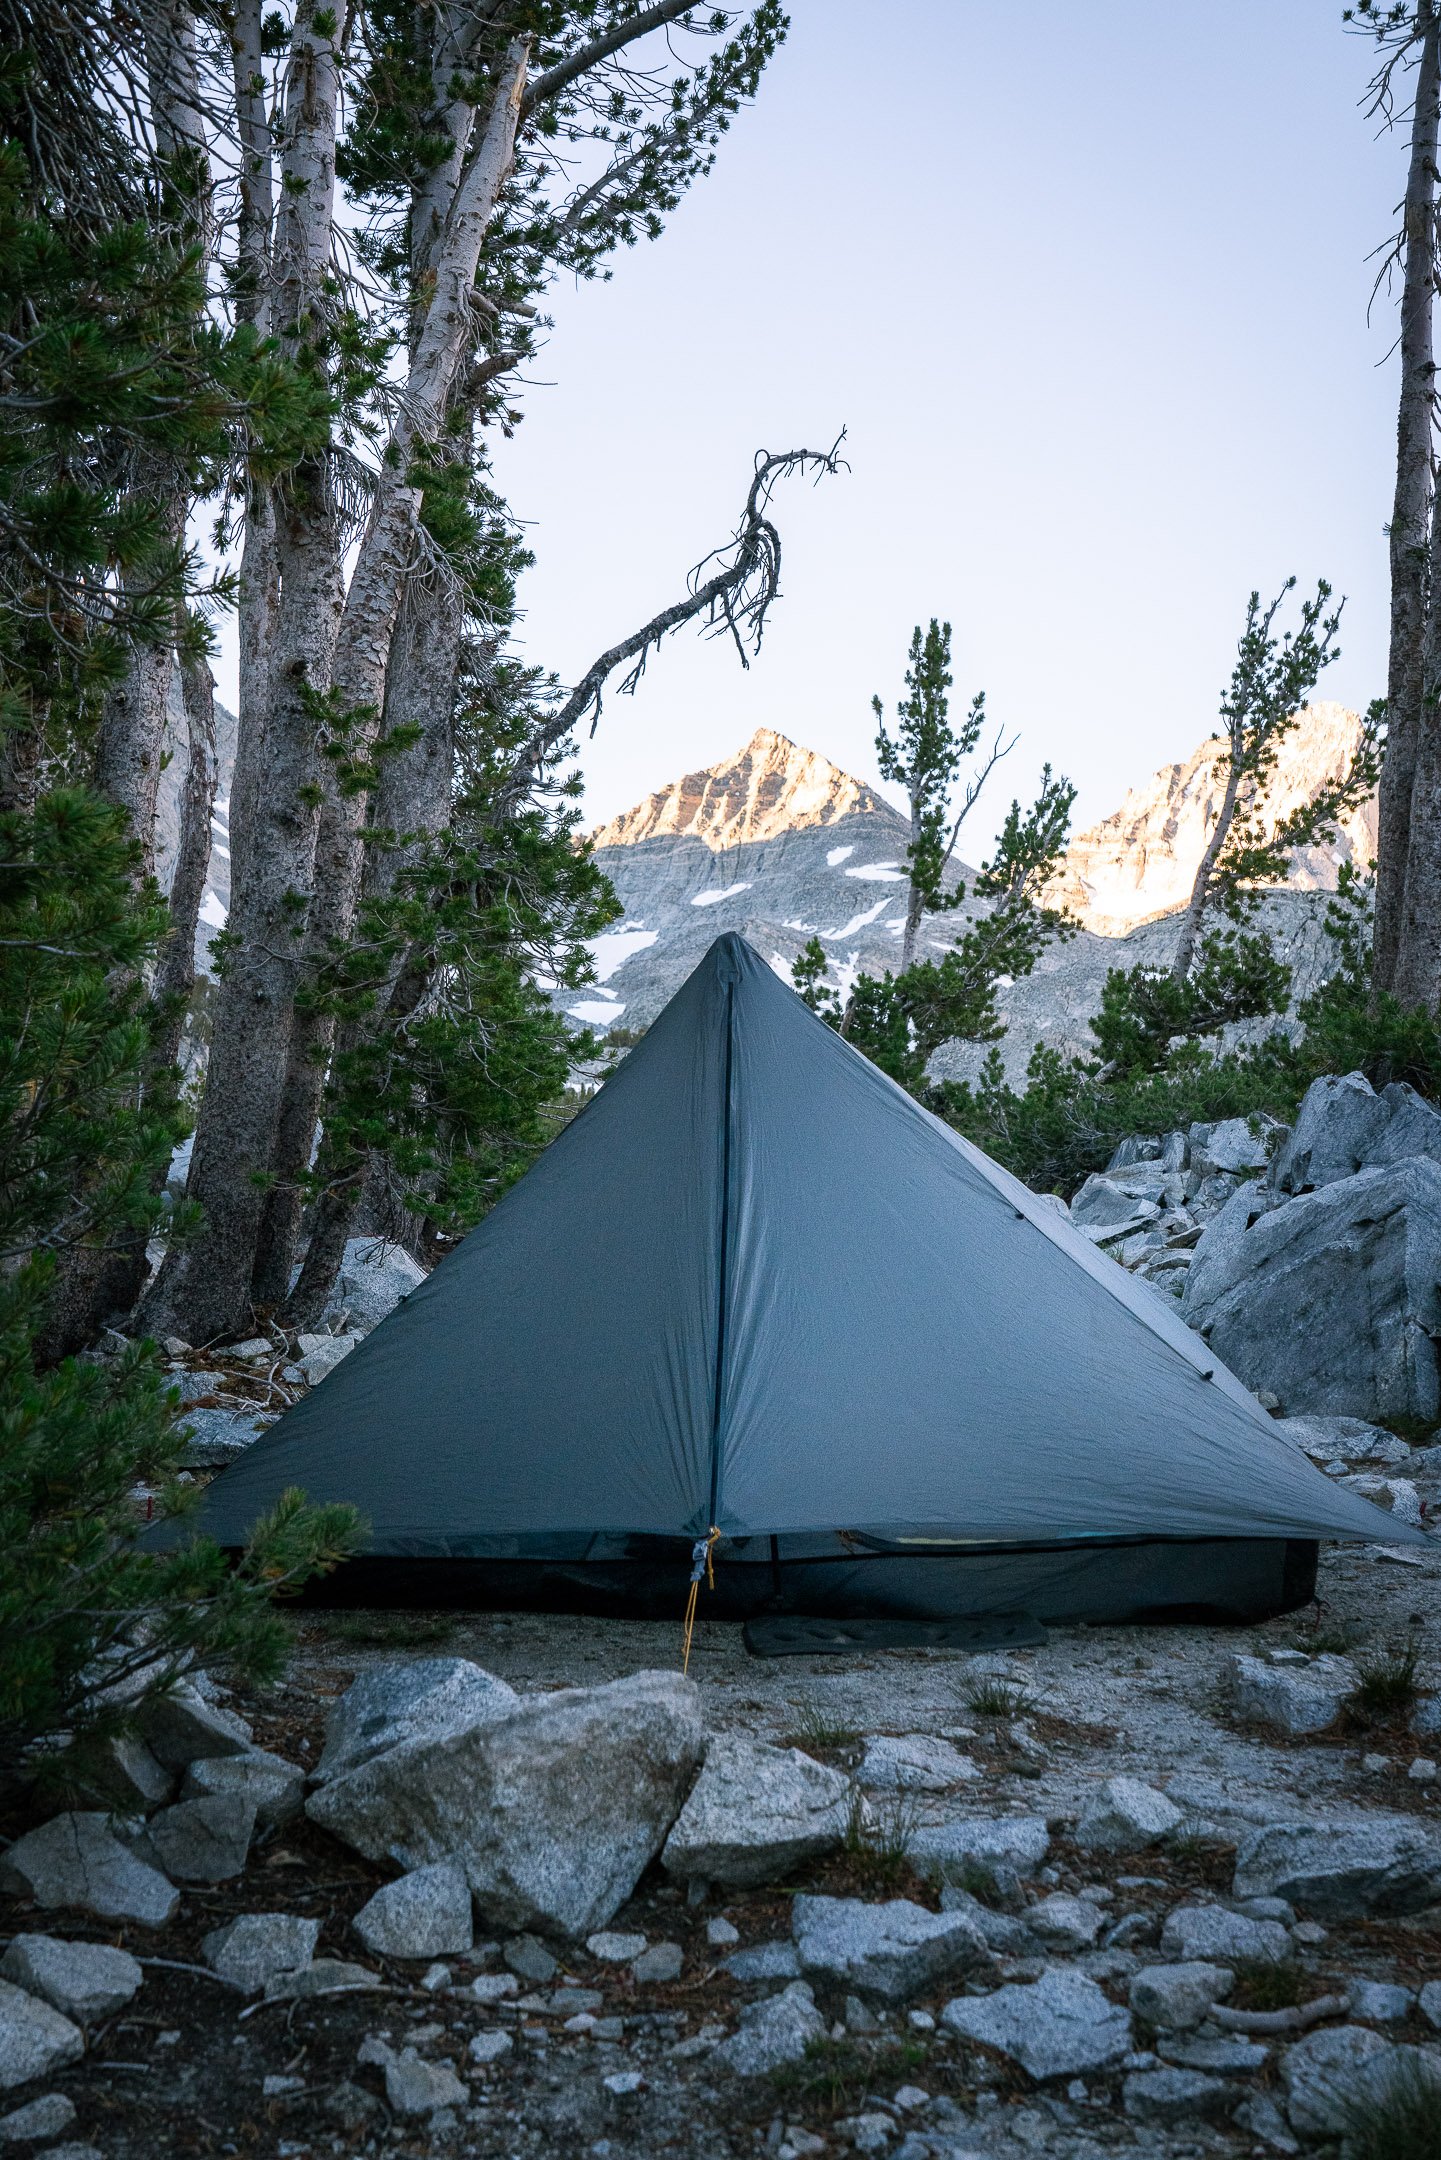
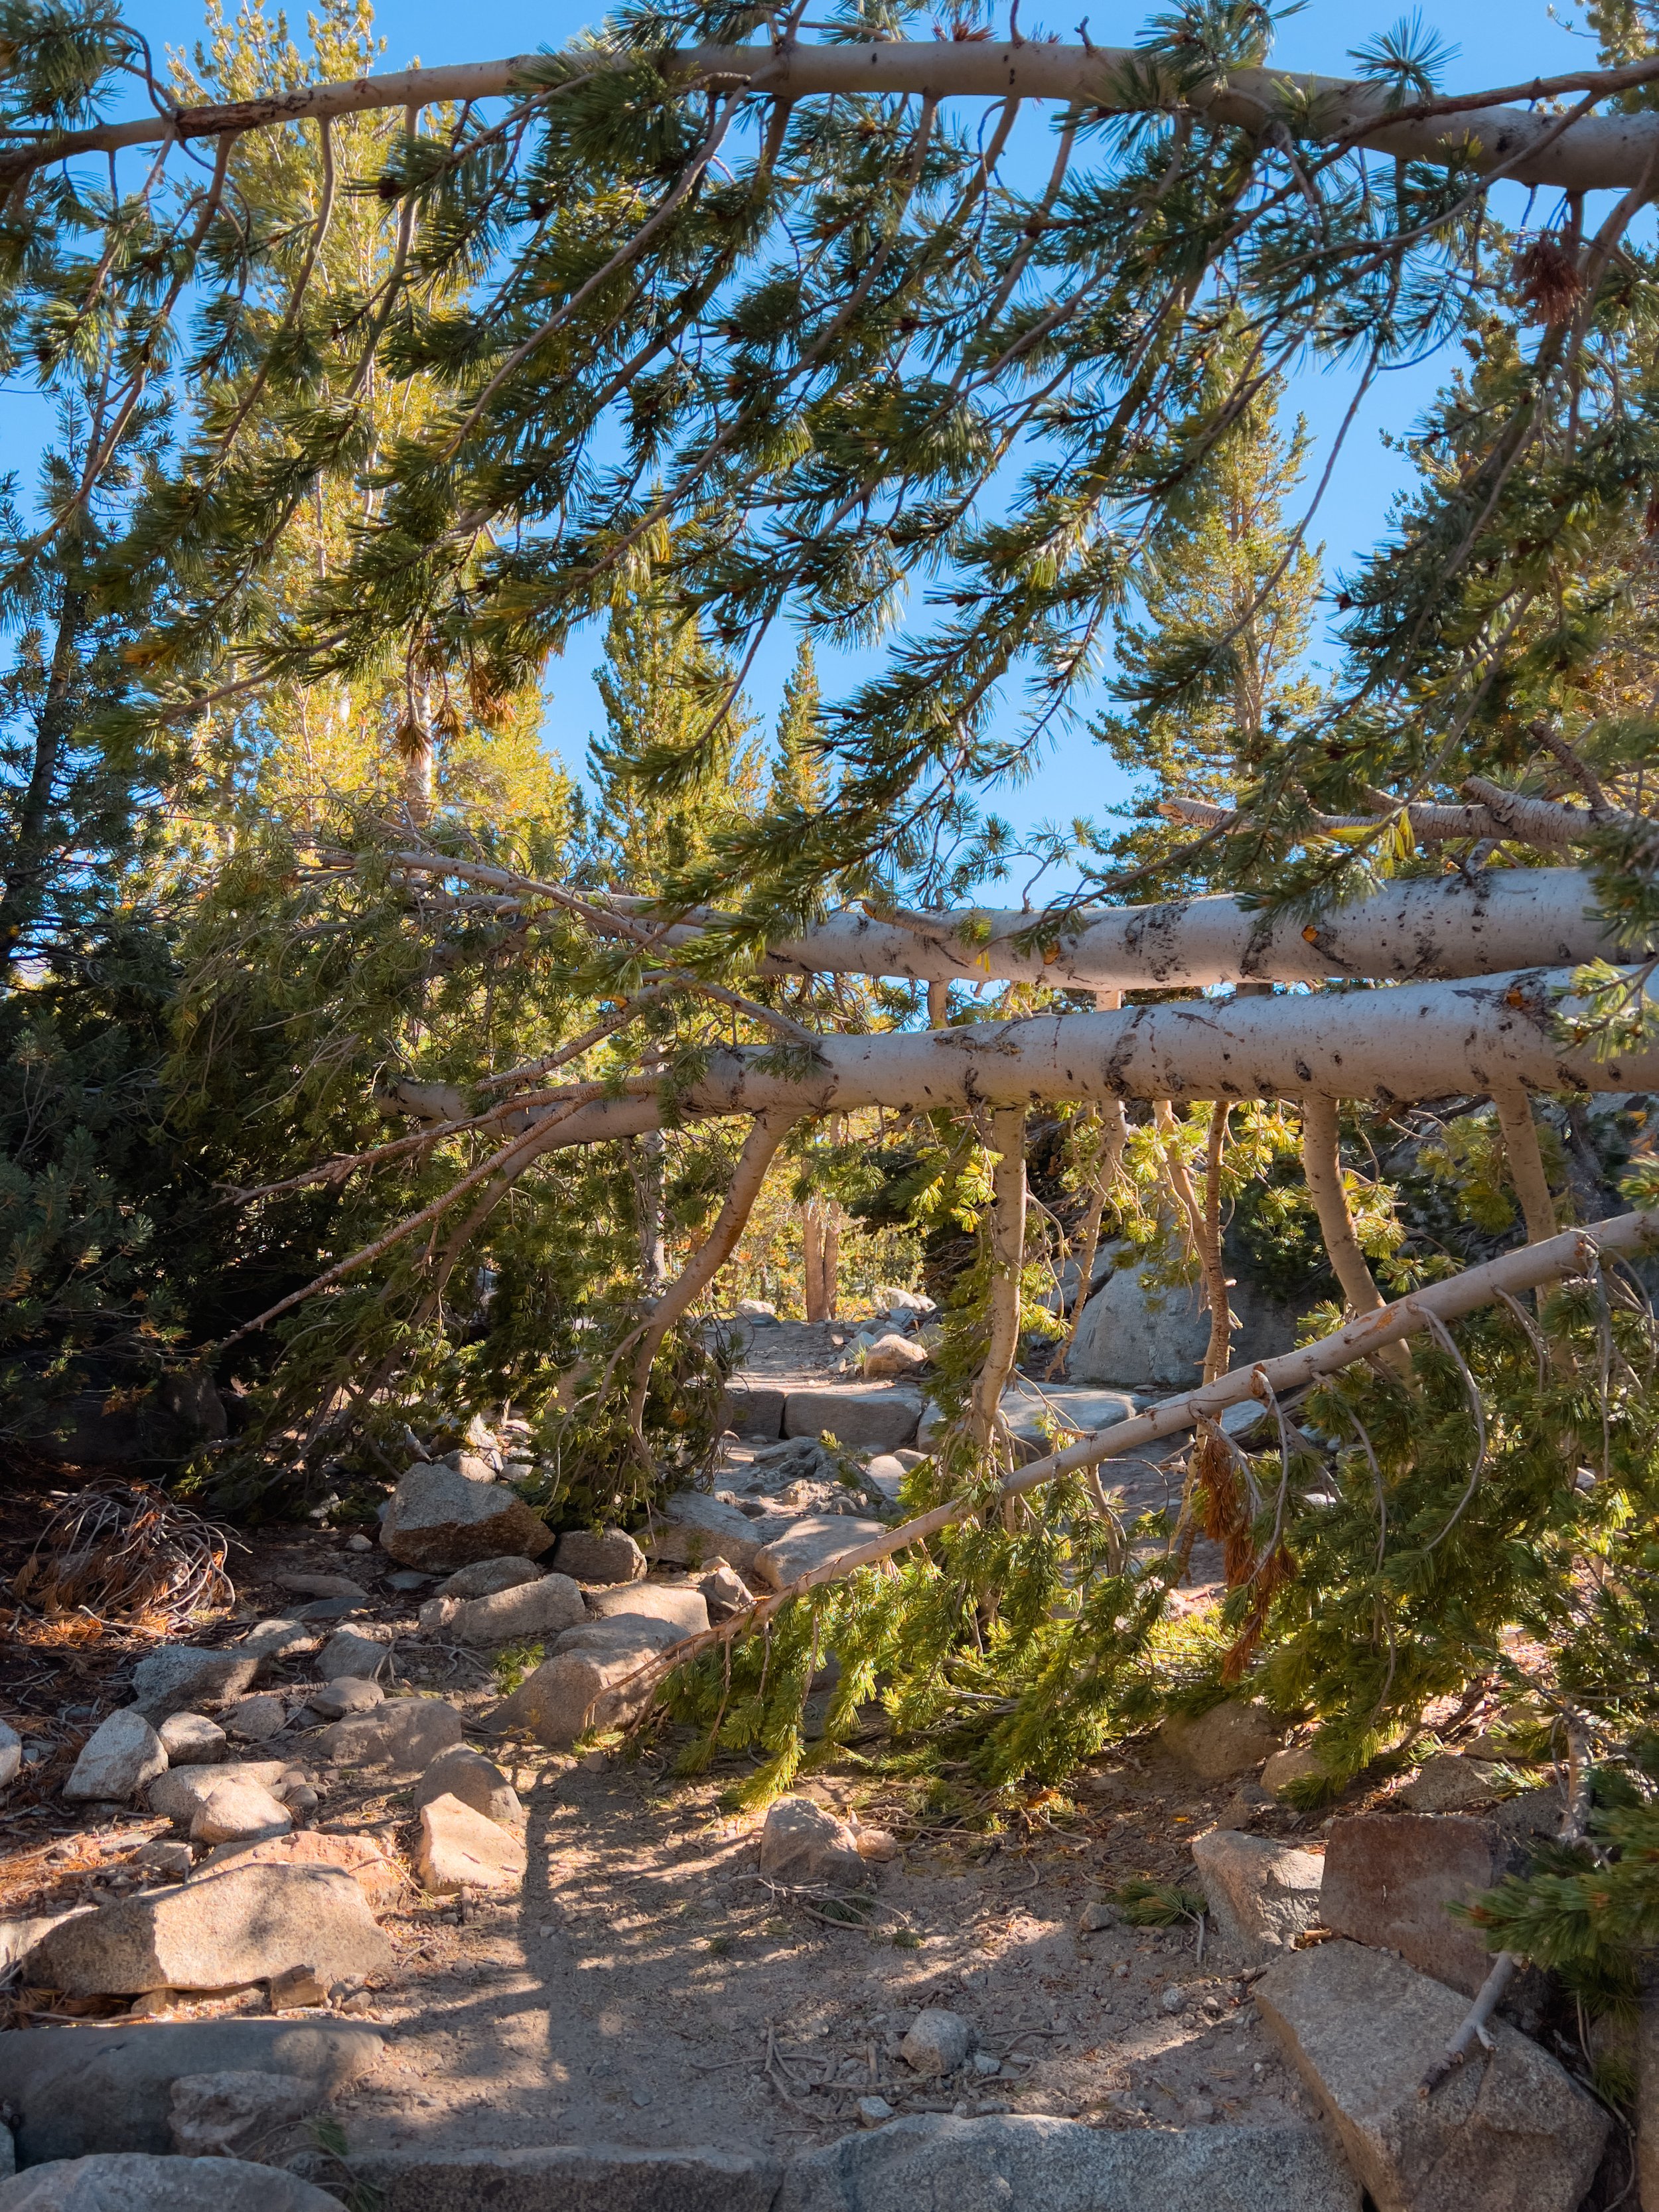
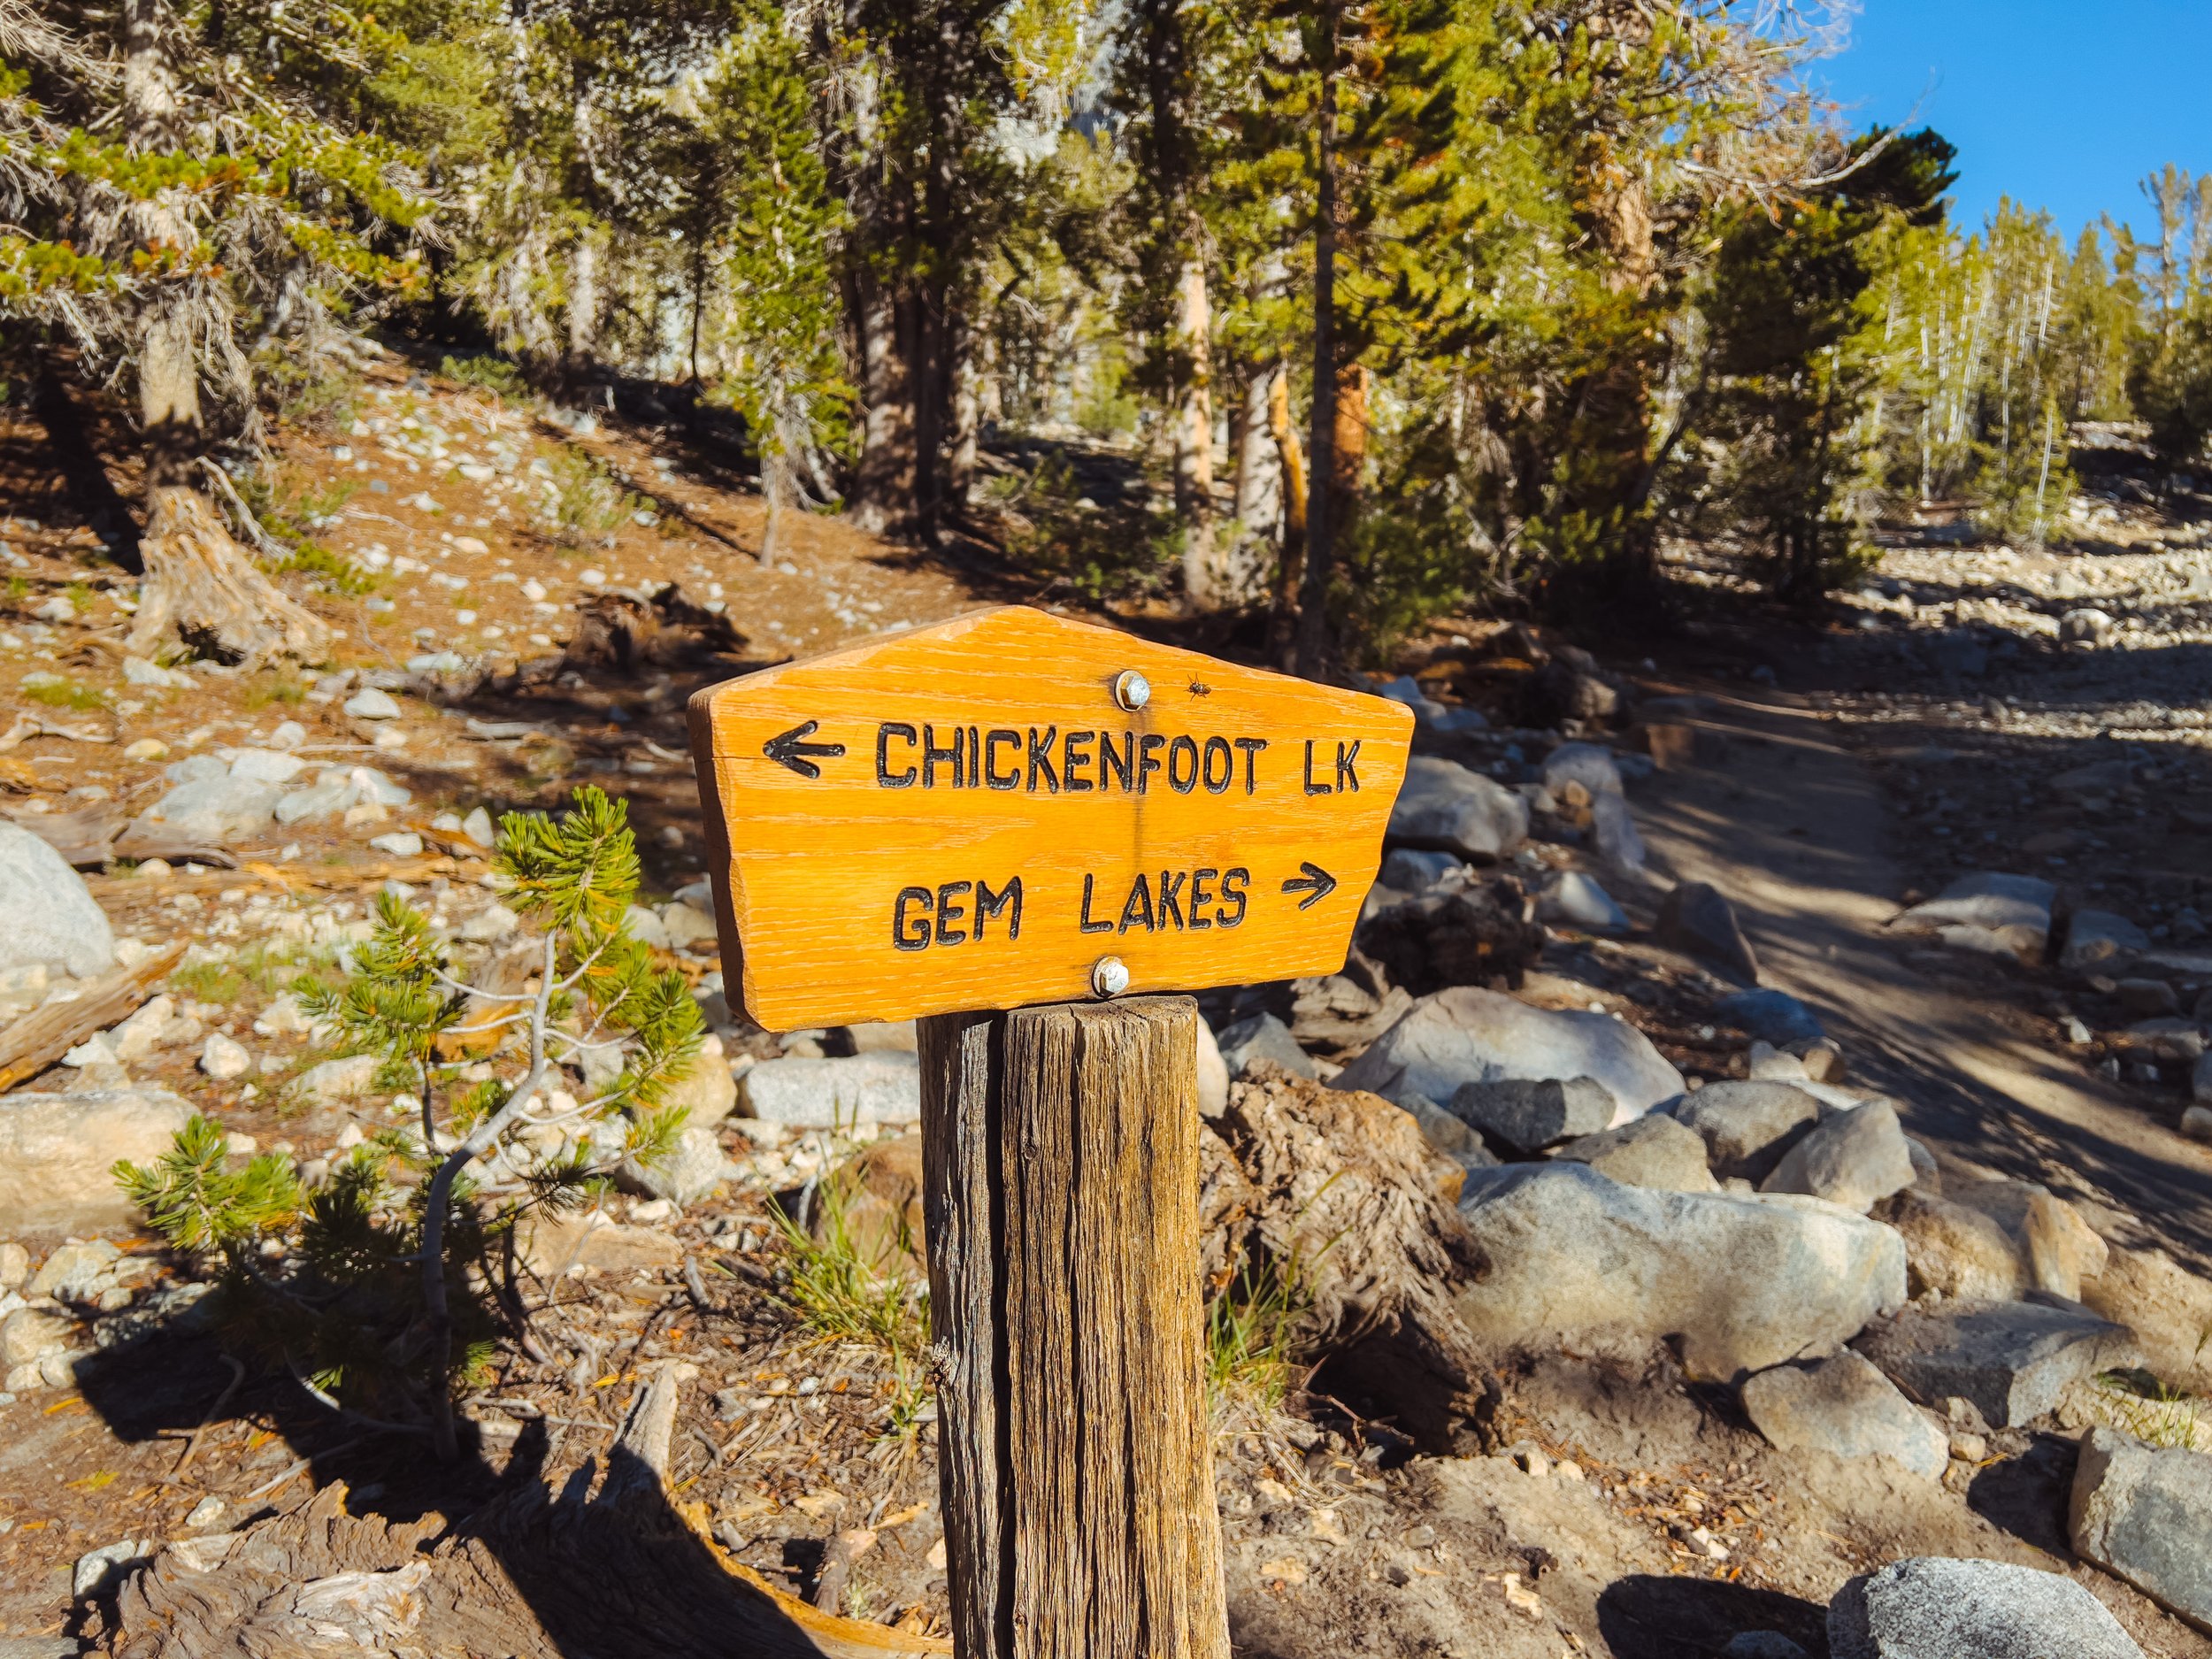
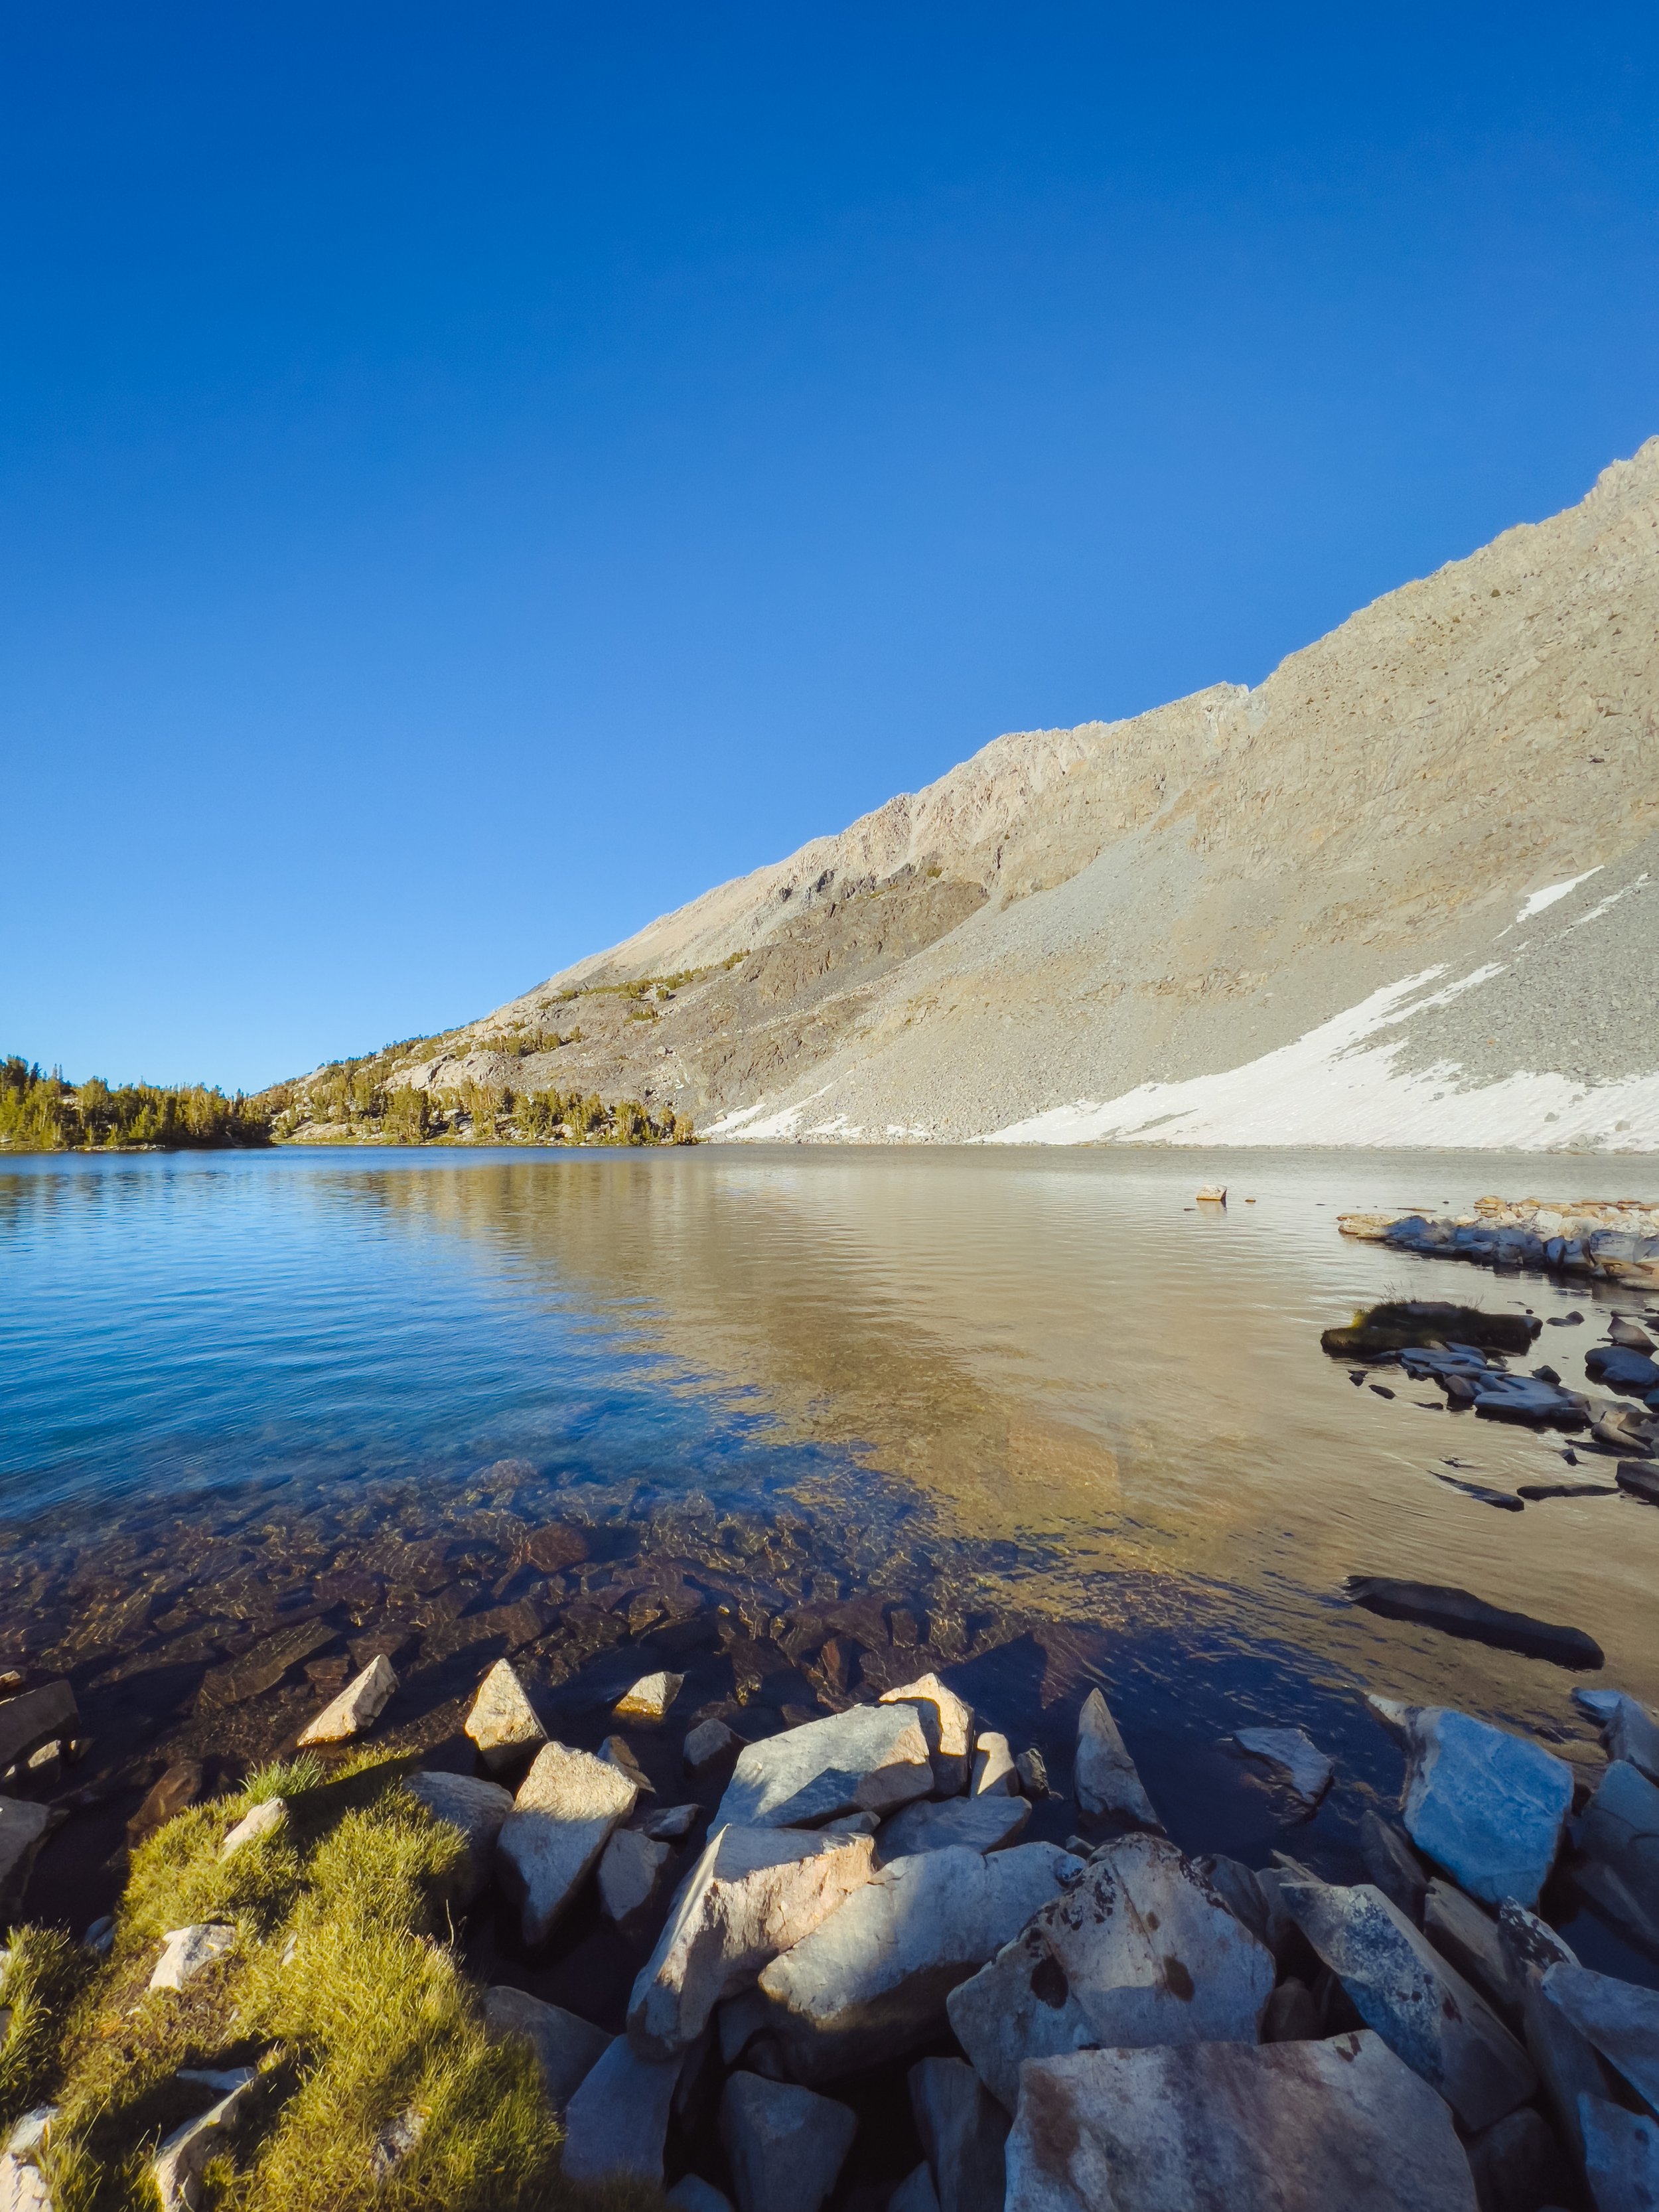
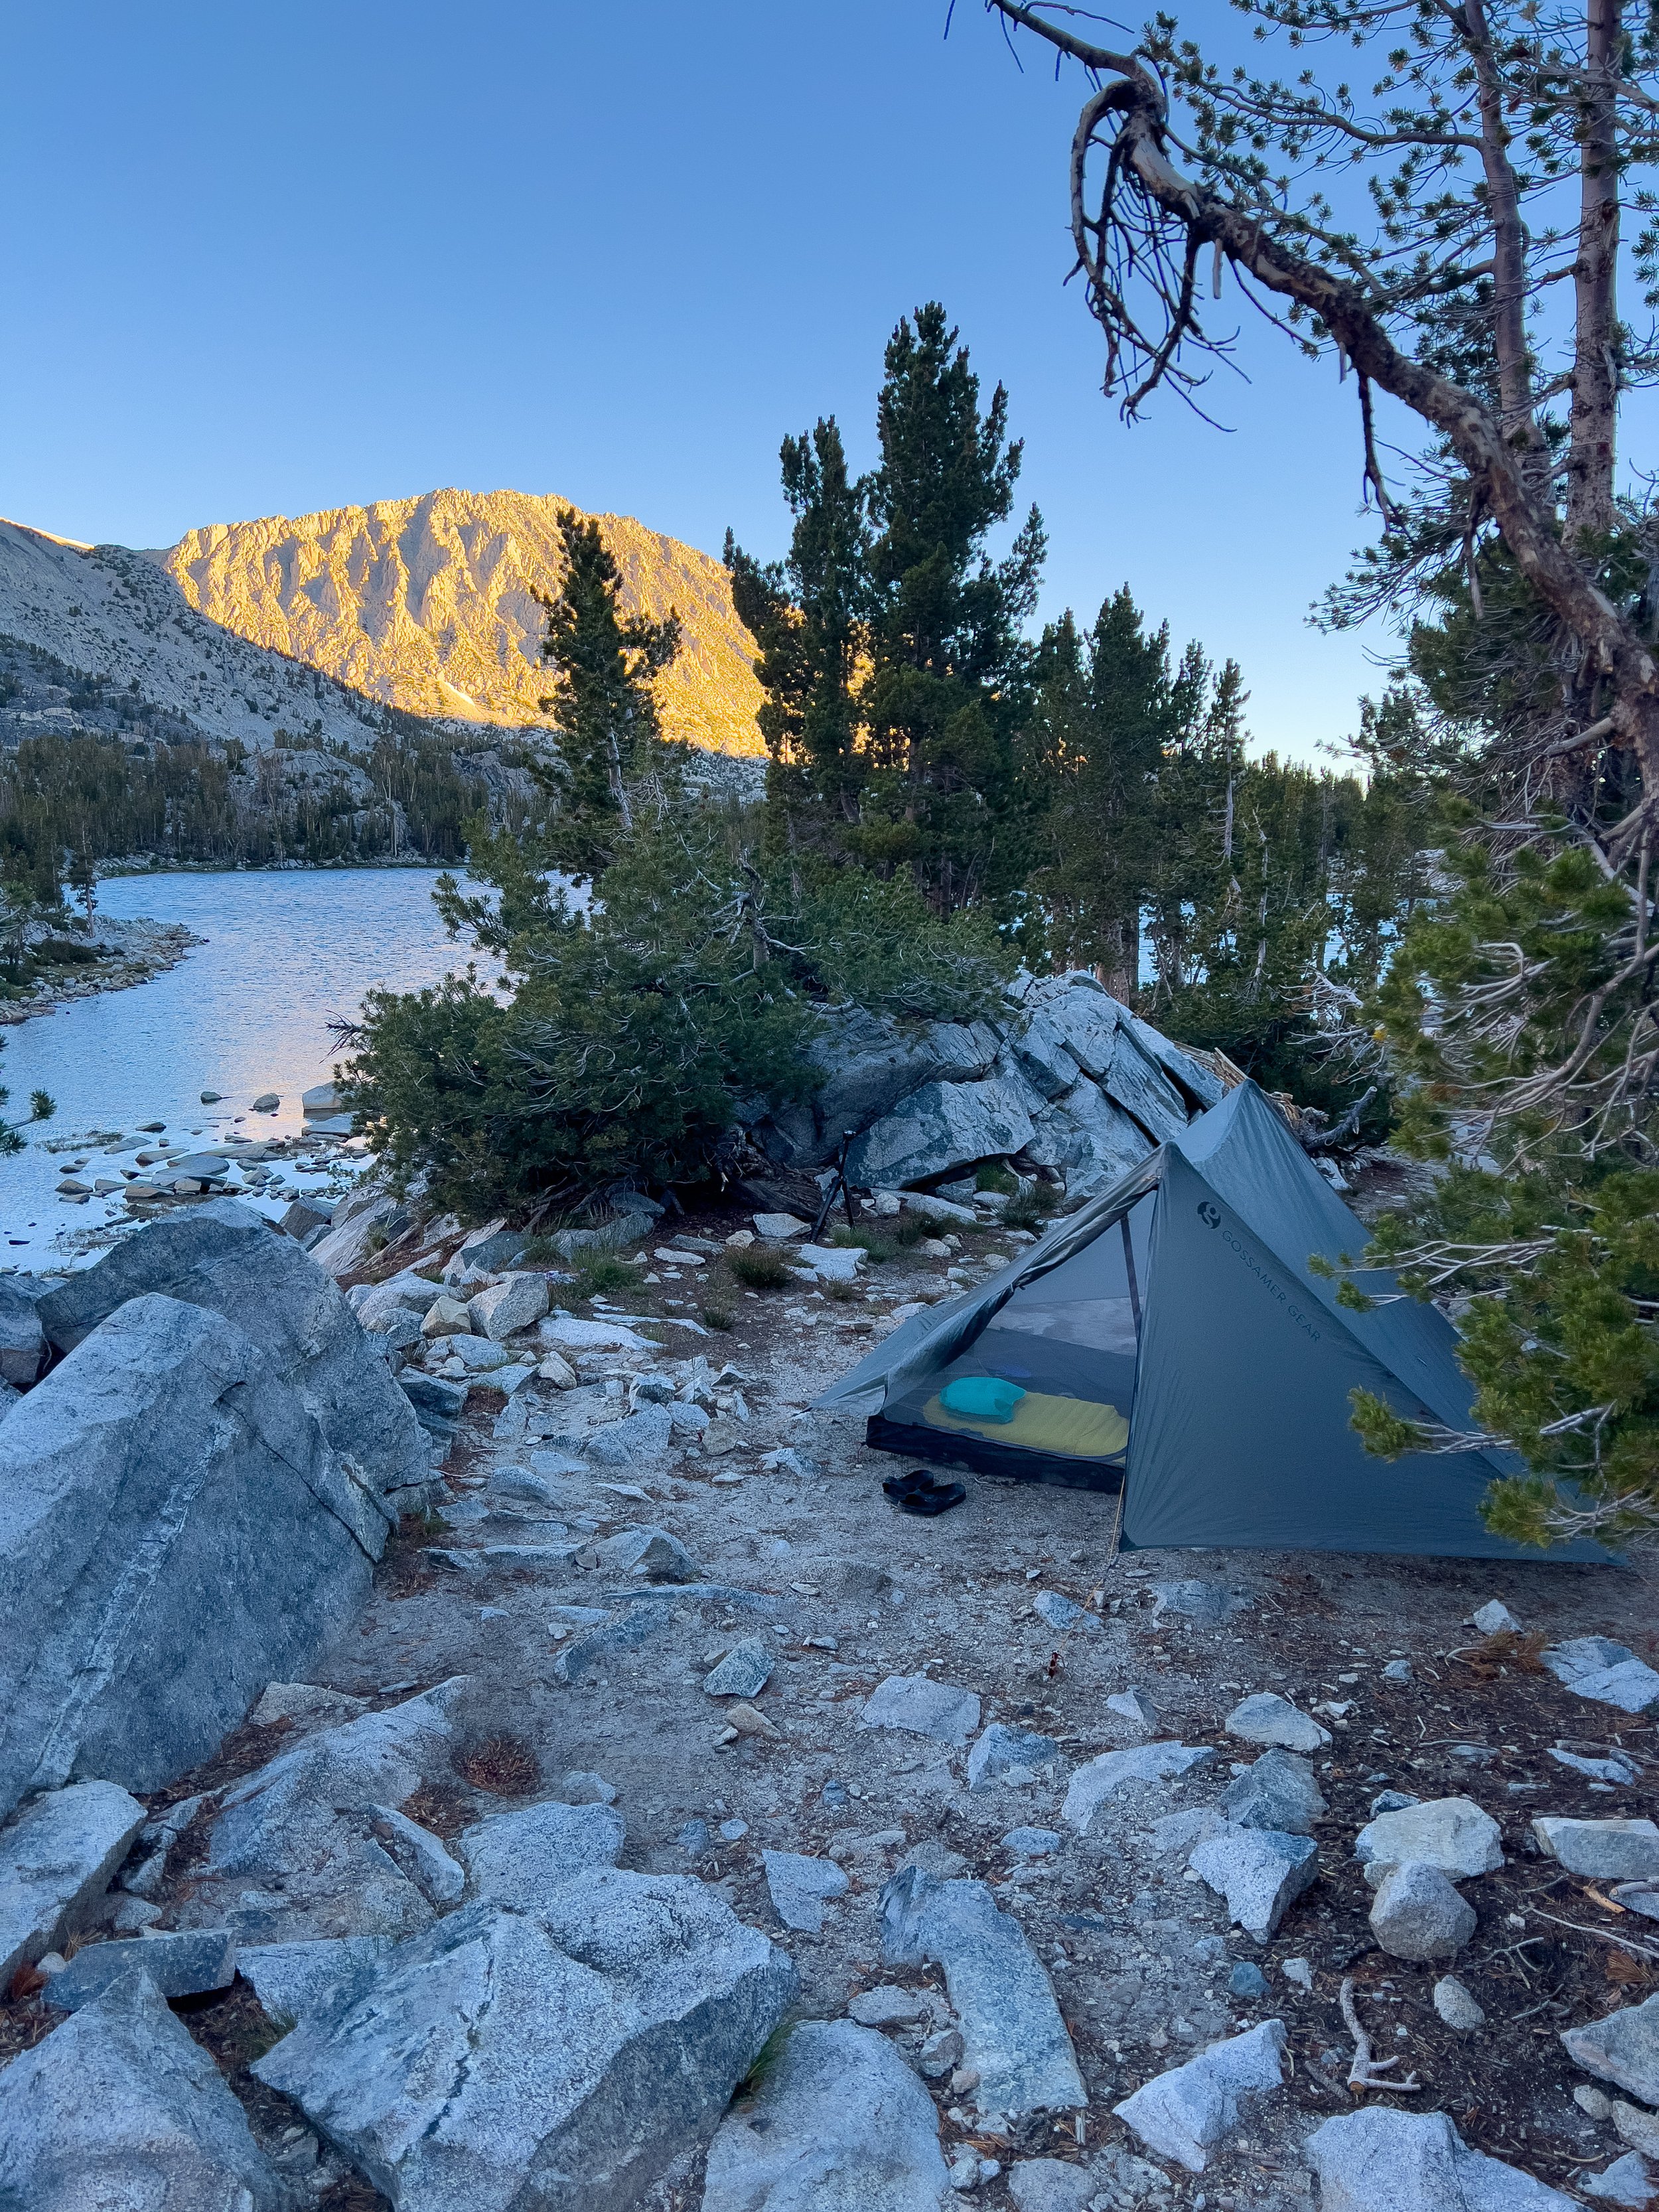
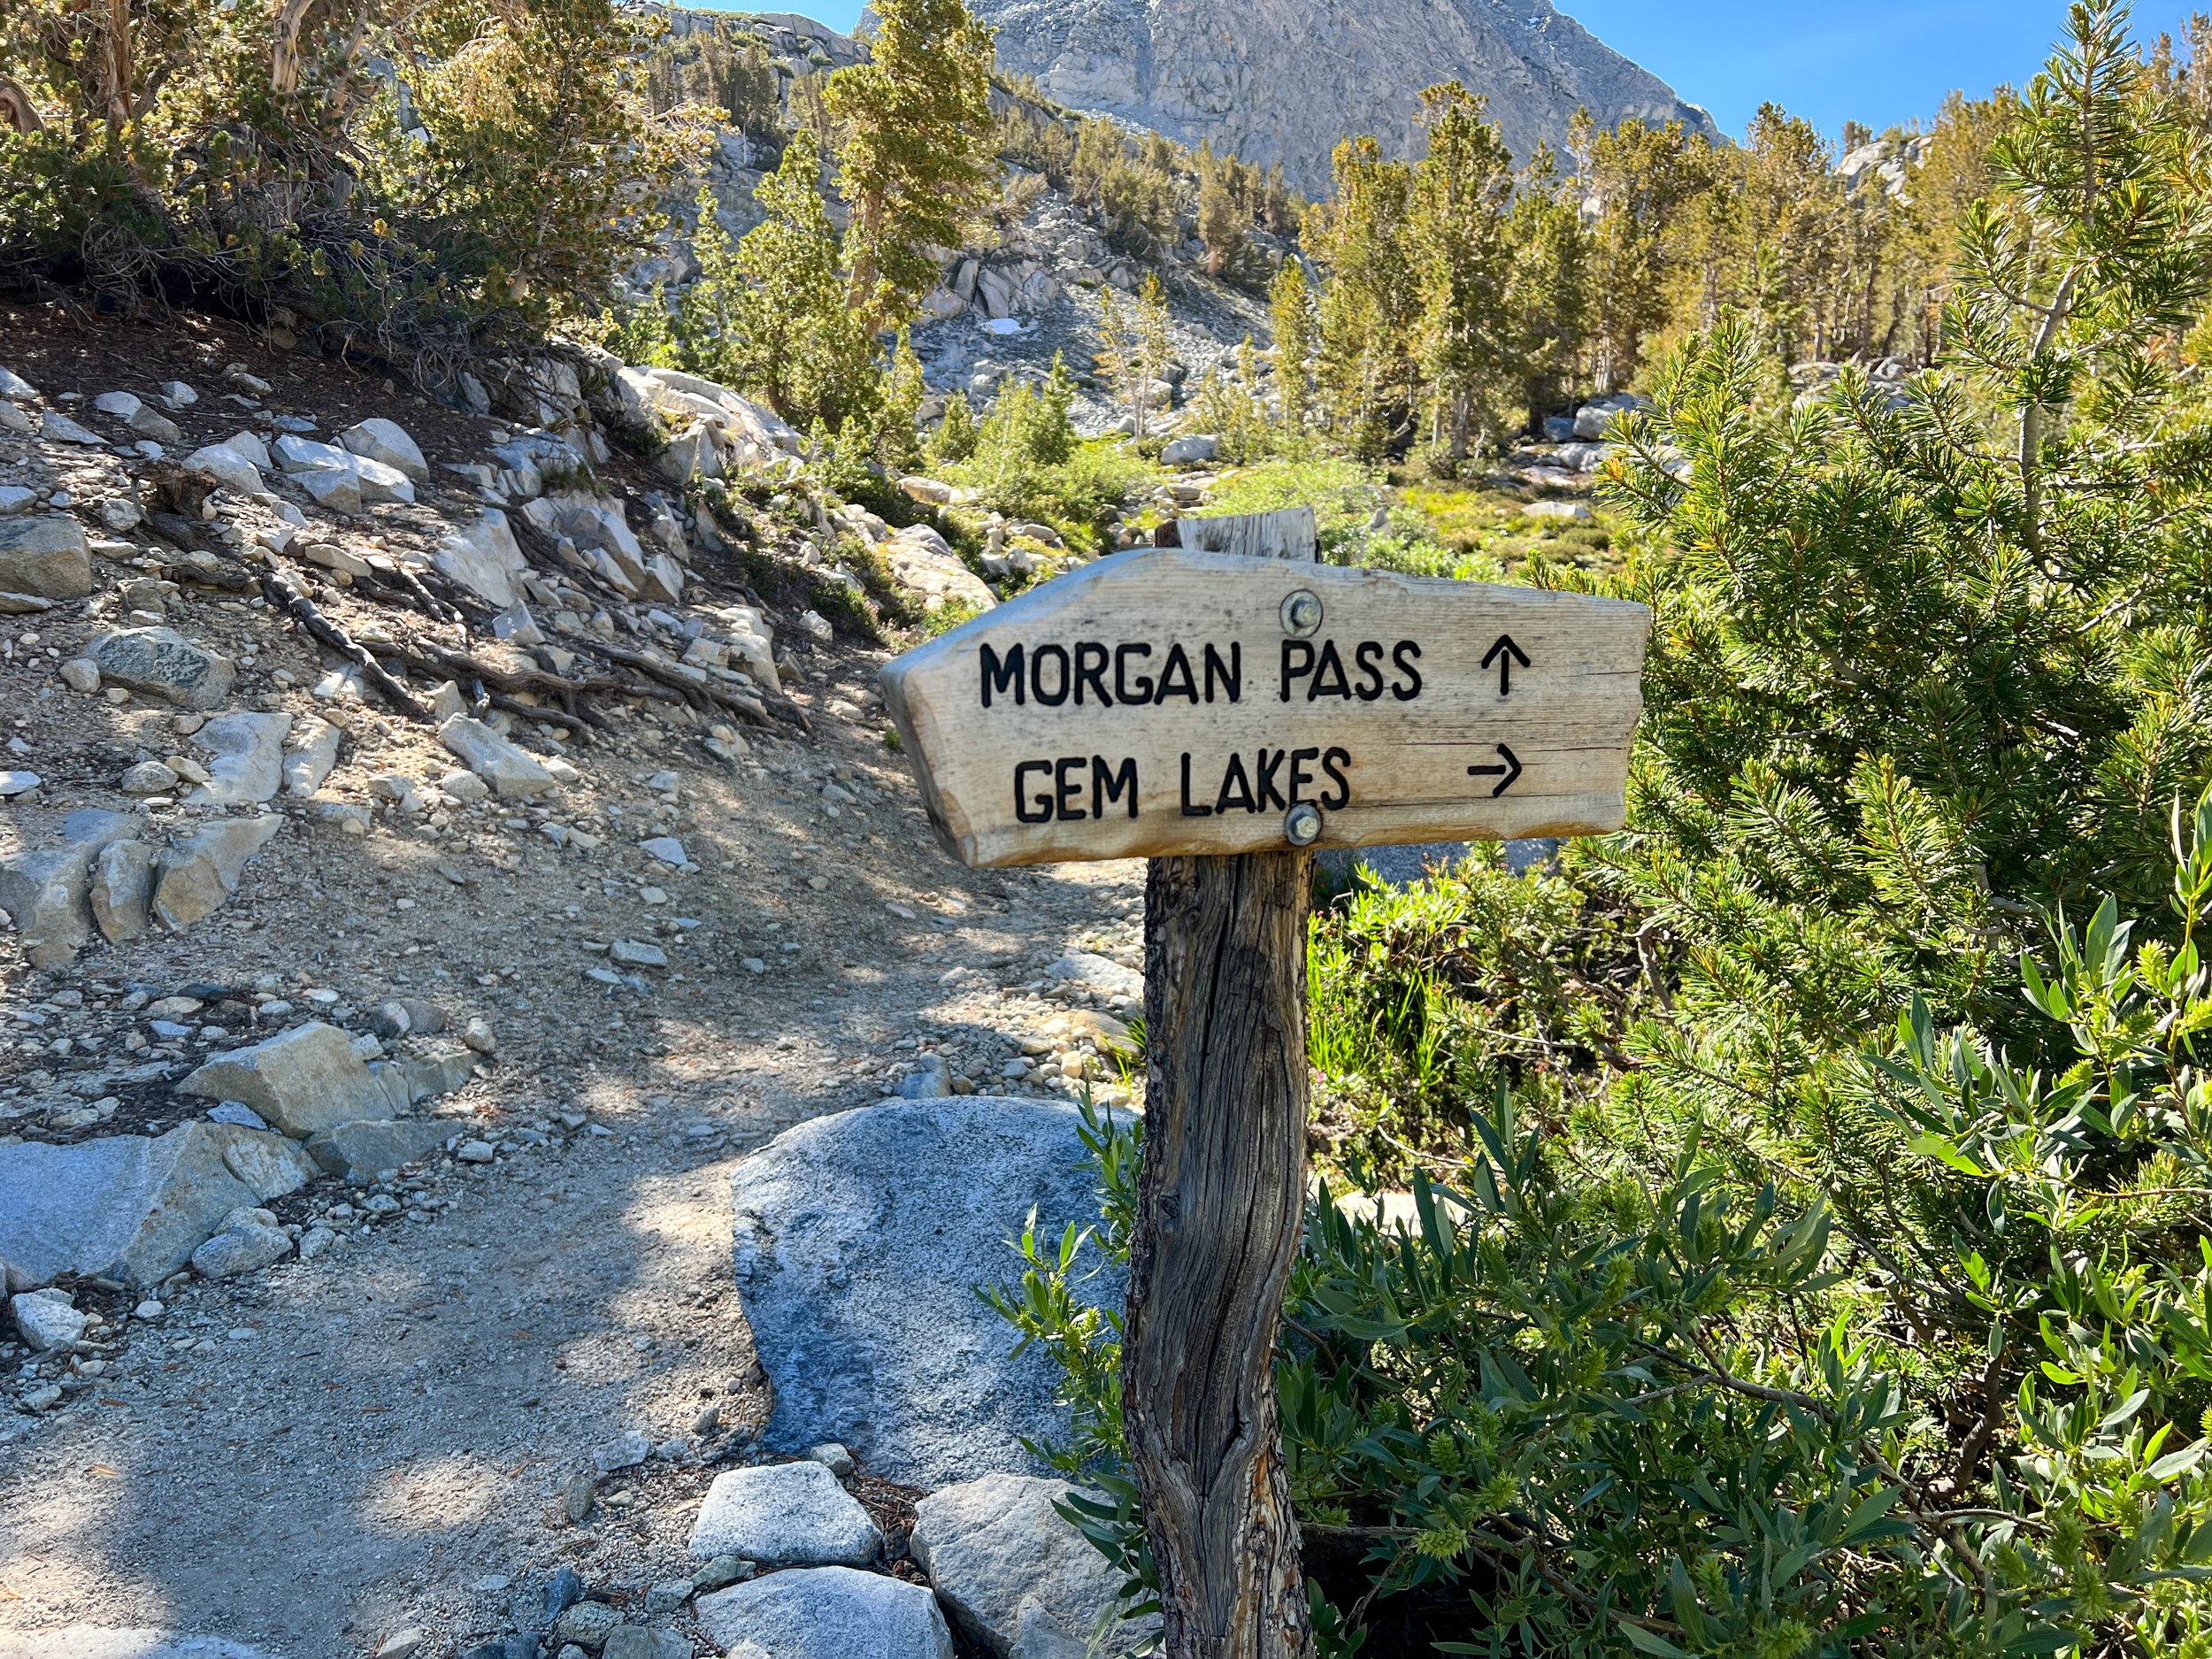
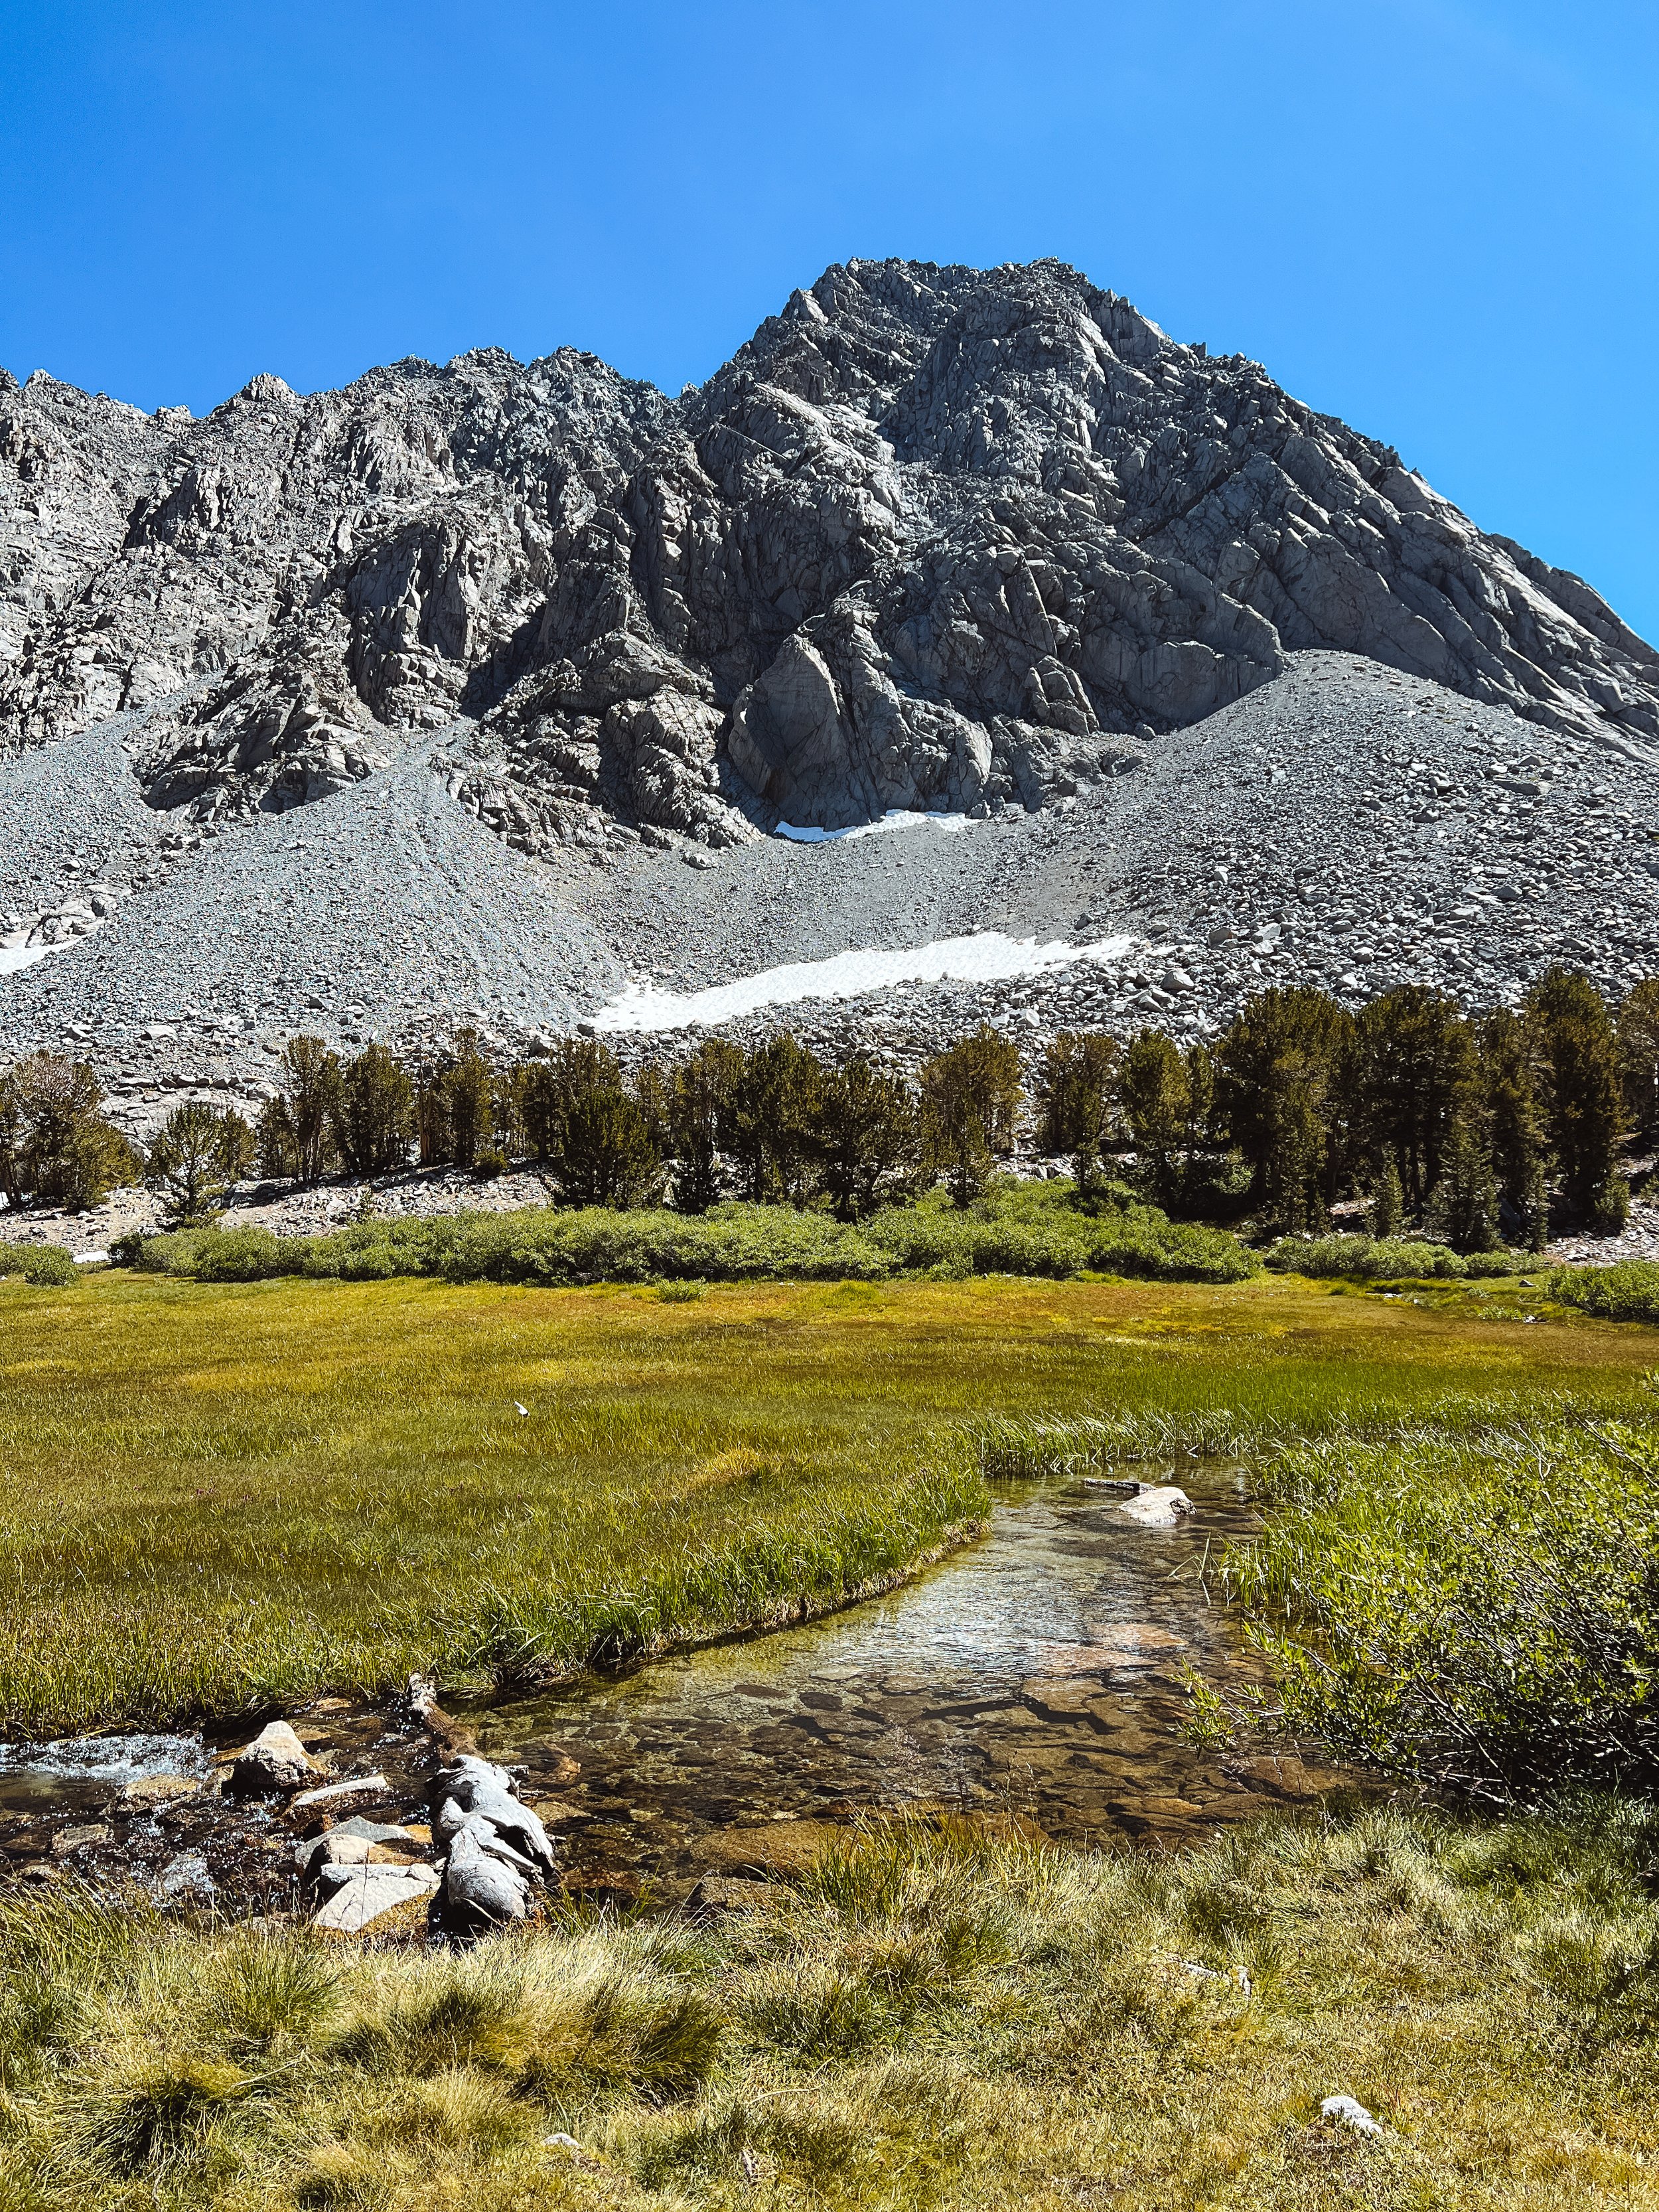
After Long Lake, the flat trail stops, and you’ve got to put in a little more effort on this uphill to reach Chickenfoot and Gem Lakes. My day ends at Chickenfoot Lake, which is about a half mile hike from the end of Long Lake, mostly uphill. The short trail to Chickenfoot is signed at the junction. The trail is a little hard to follow through the sandy terrain, but it’s doable - just pay attention! The trail ends at the southern end of Chickenfoot Lake. There is a good amount of camping in the trees just next to the inlet stream, and I’m sure there are sites on the north-eastern side as well, but there is not a designated trail to that side of the lake, and you’ll probably want to leave the Chickenfoot Lake trail earlier to get to those off-trail sites. Reminder to be a good steward and not camp in the meadows that surround the lake and creek area!
Day Two: Chickenfoot Lake to Morgan Pass & Gem Lakes and back to the trailhead.
3 miles, +/- 400 feet RT from Chickenfoot to Gem Lakes & Morgan Pass, 3 miles, +50 feet from Chickenfoot to trailhead. 6 miles total.
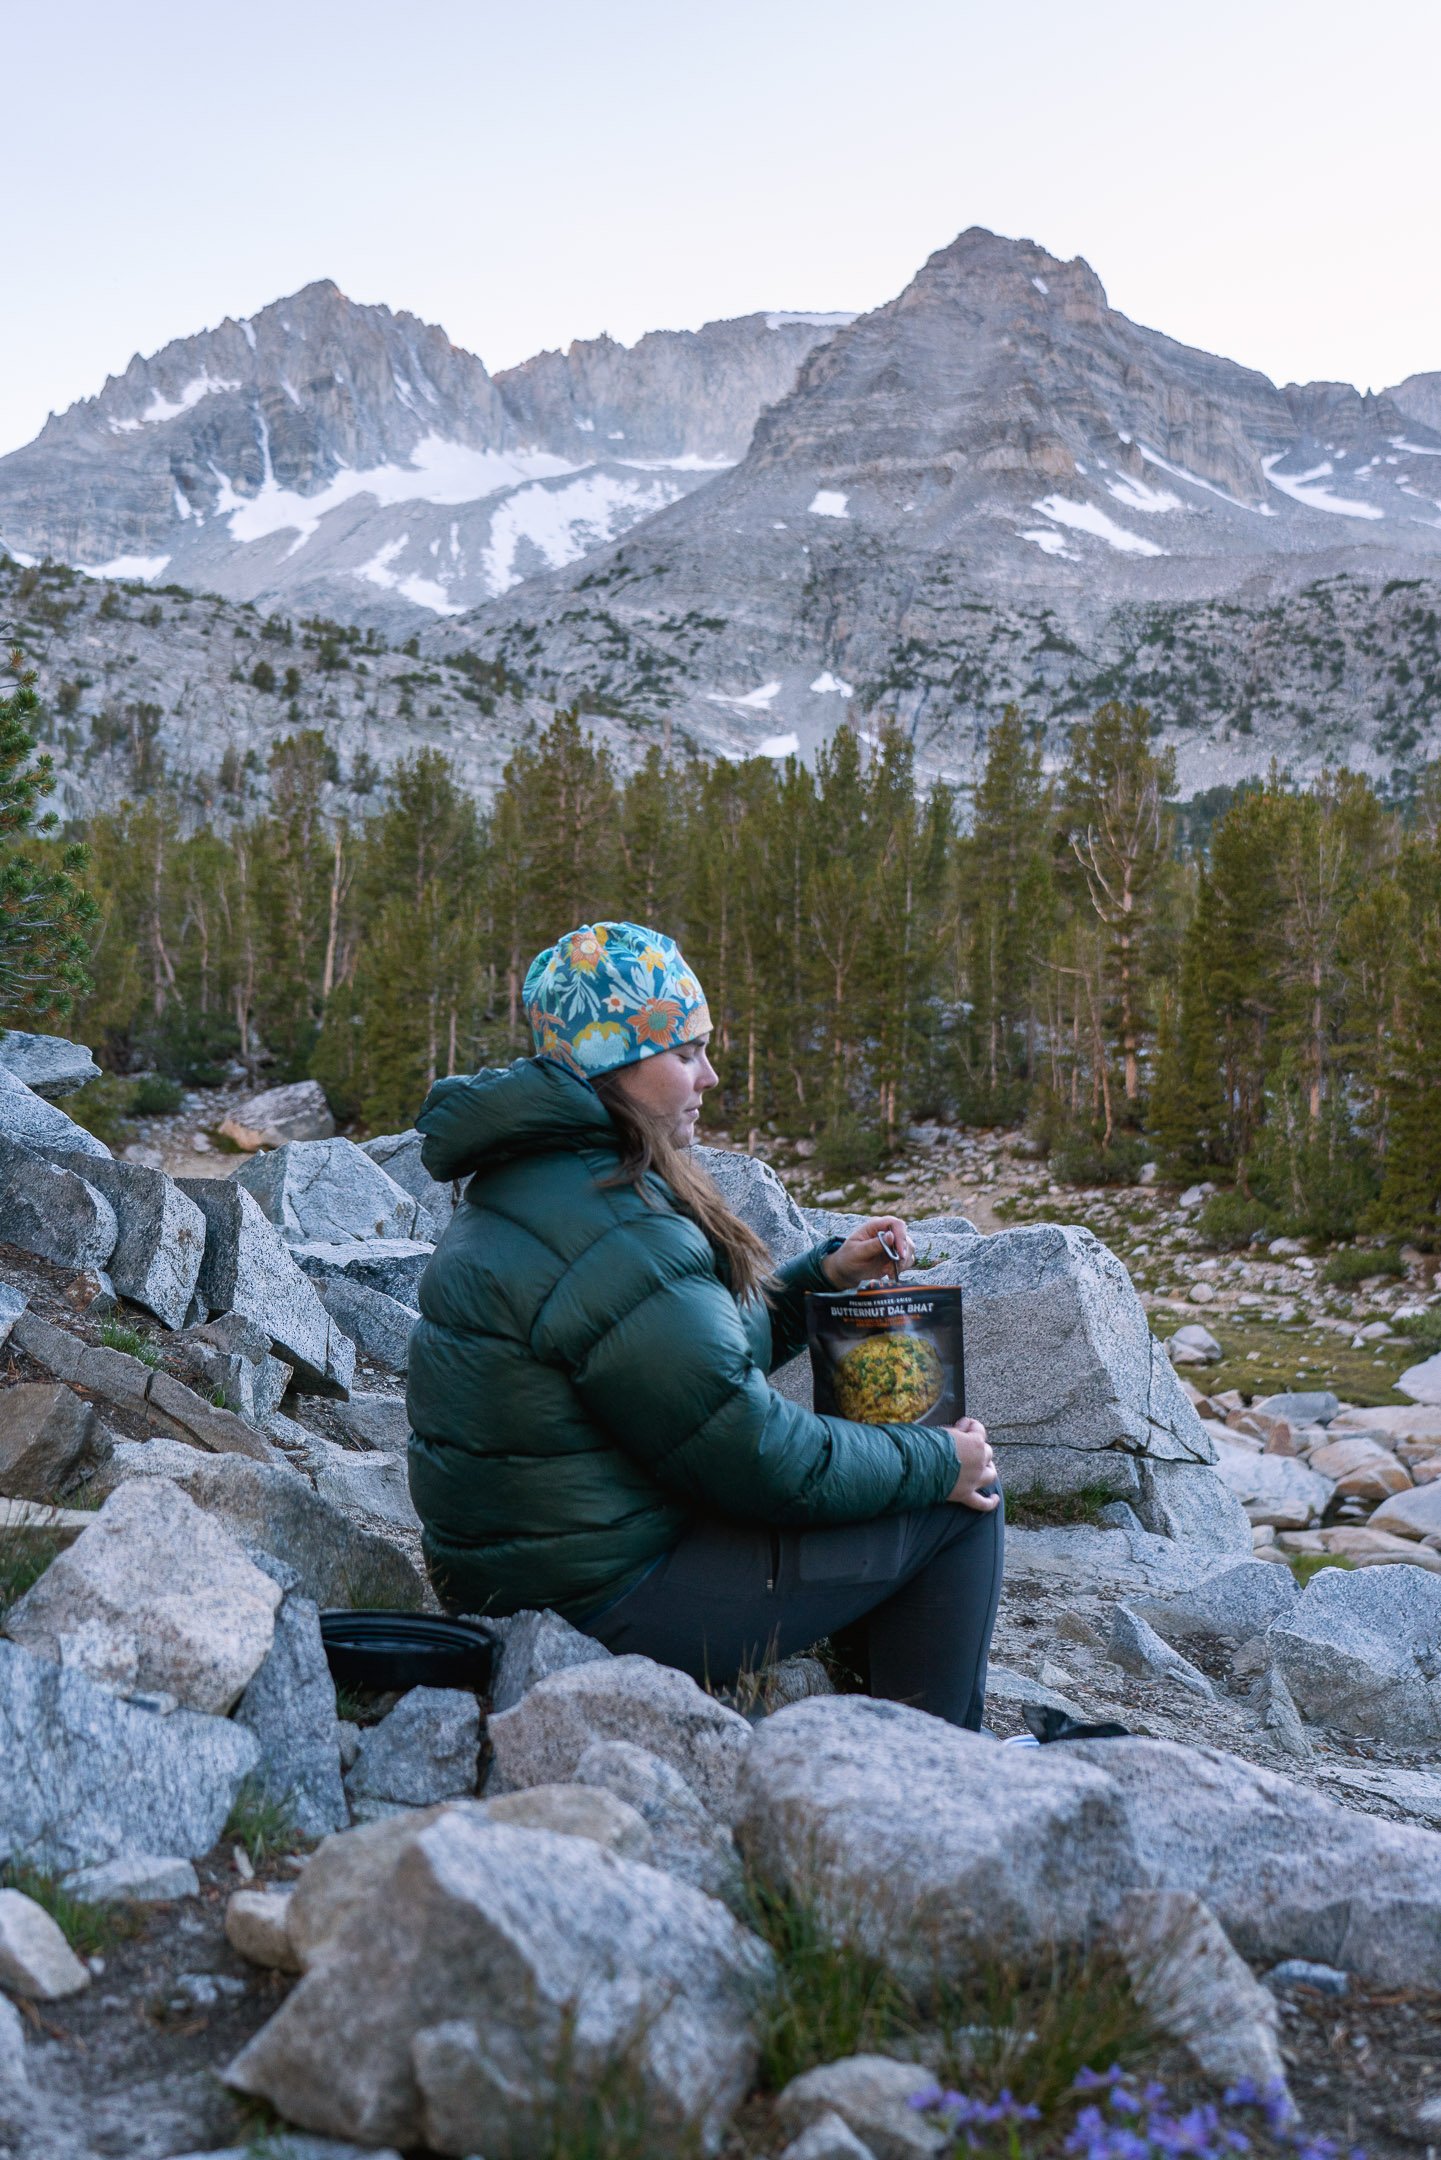
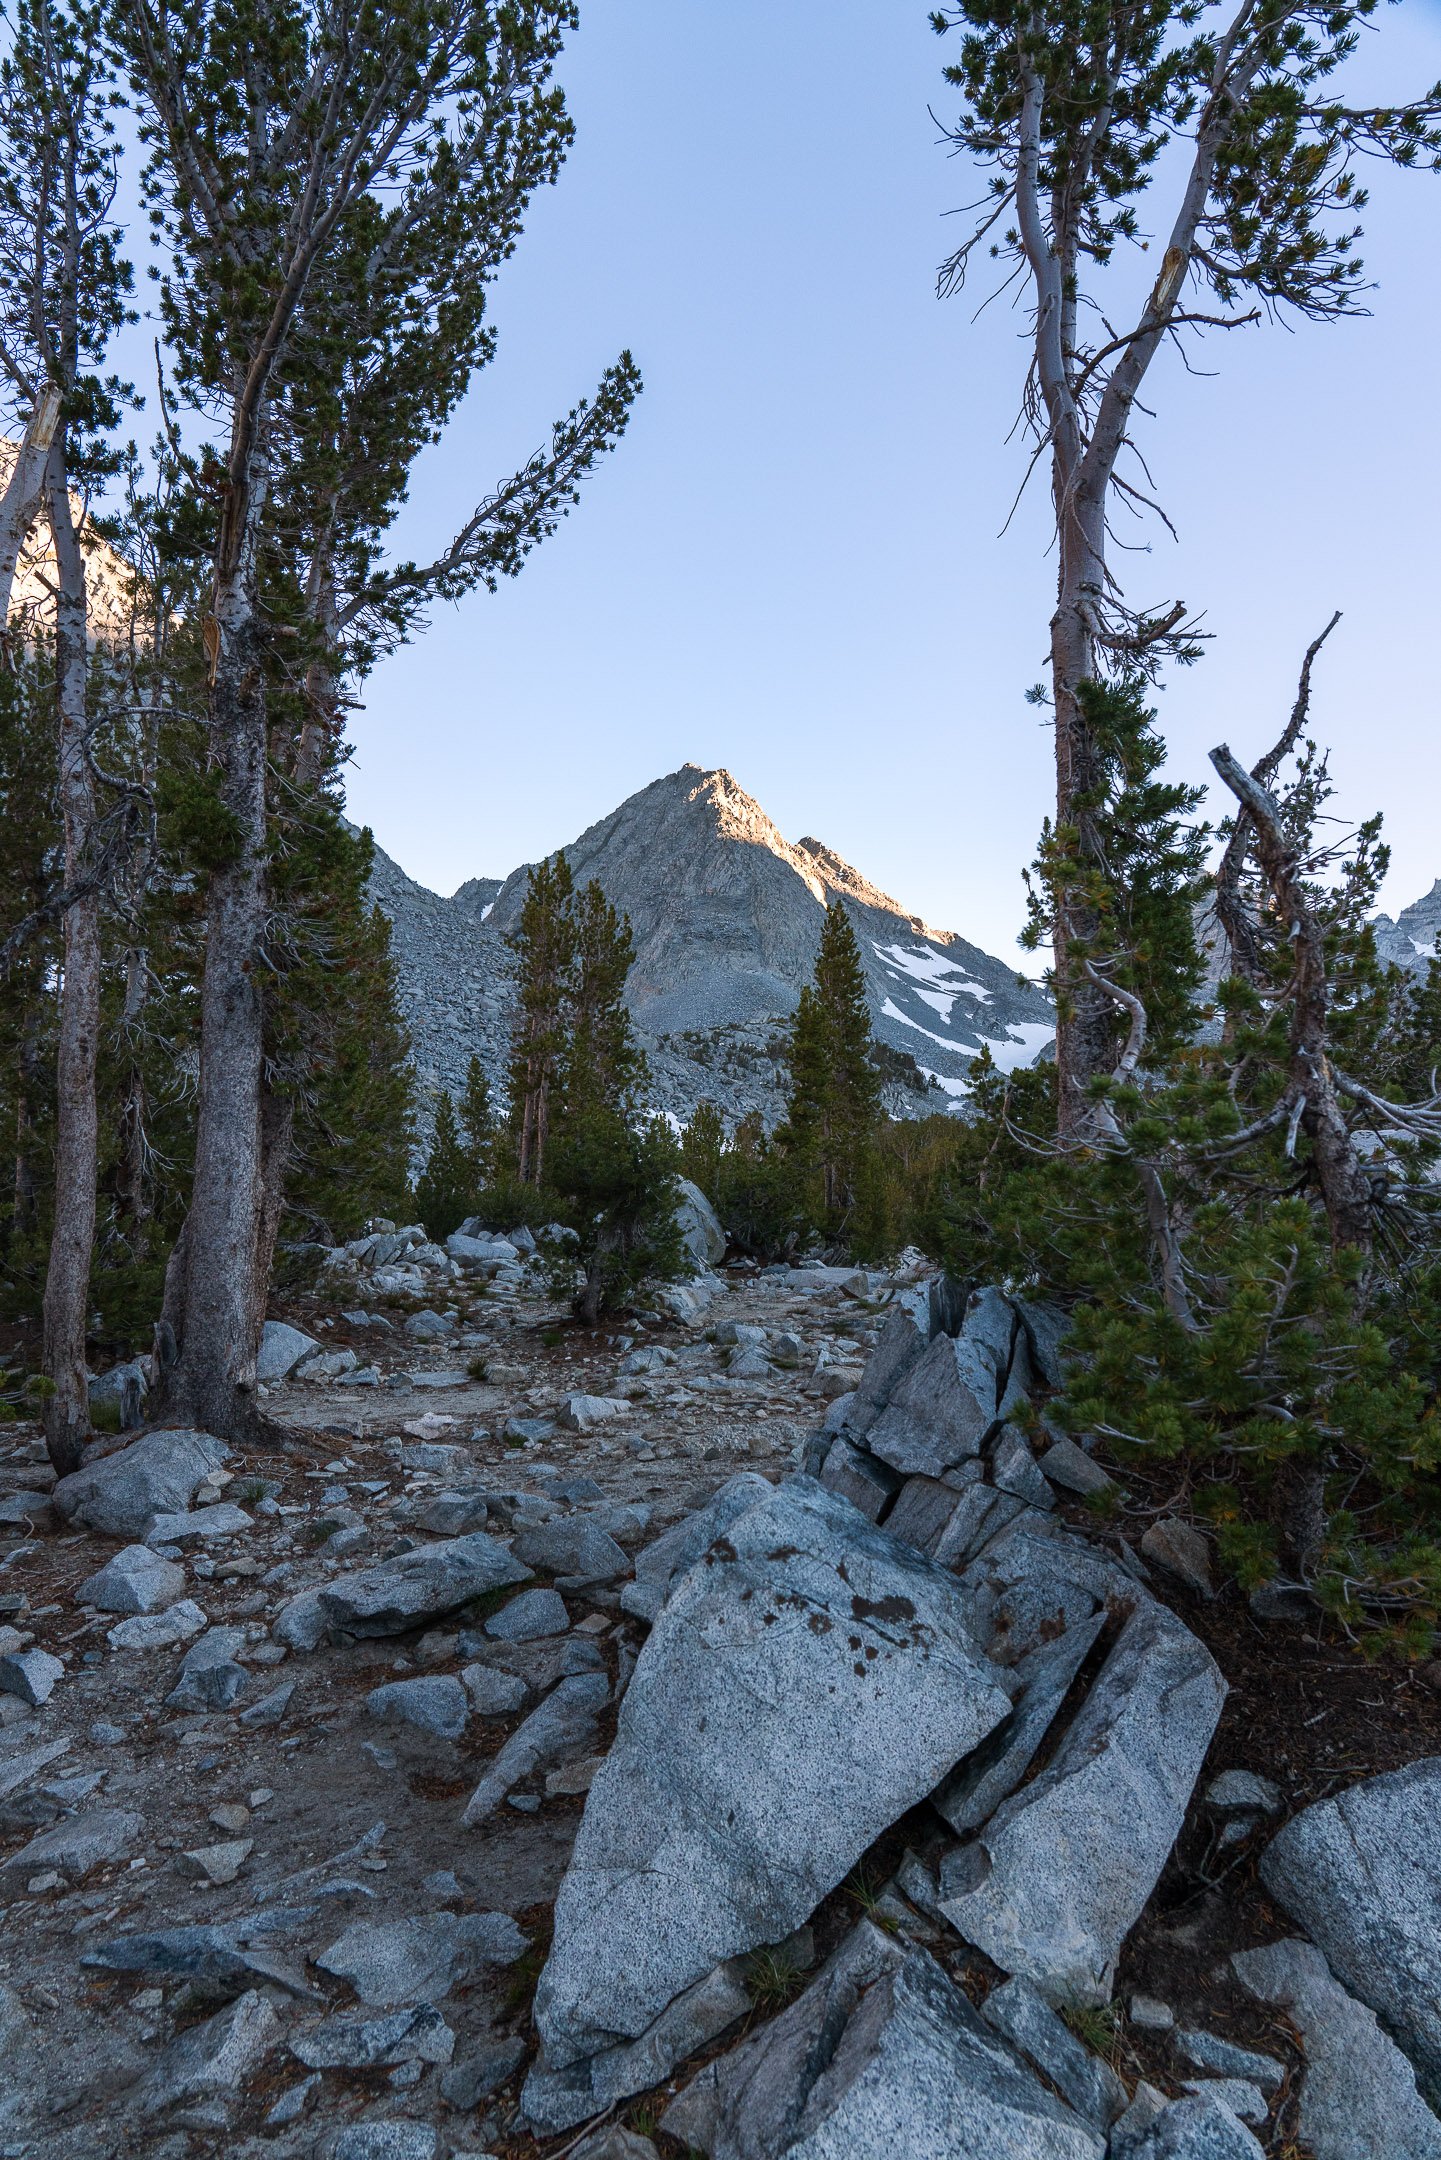
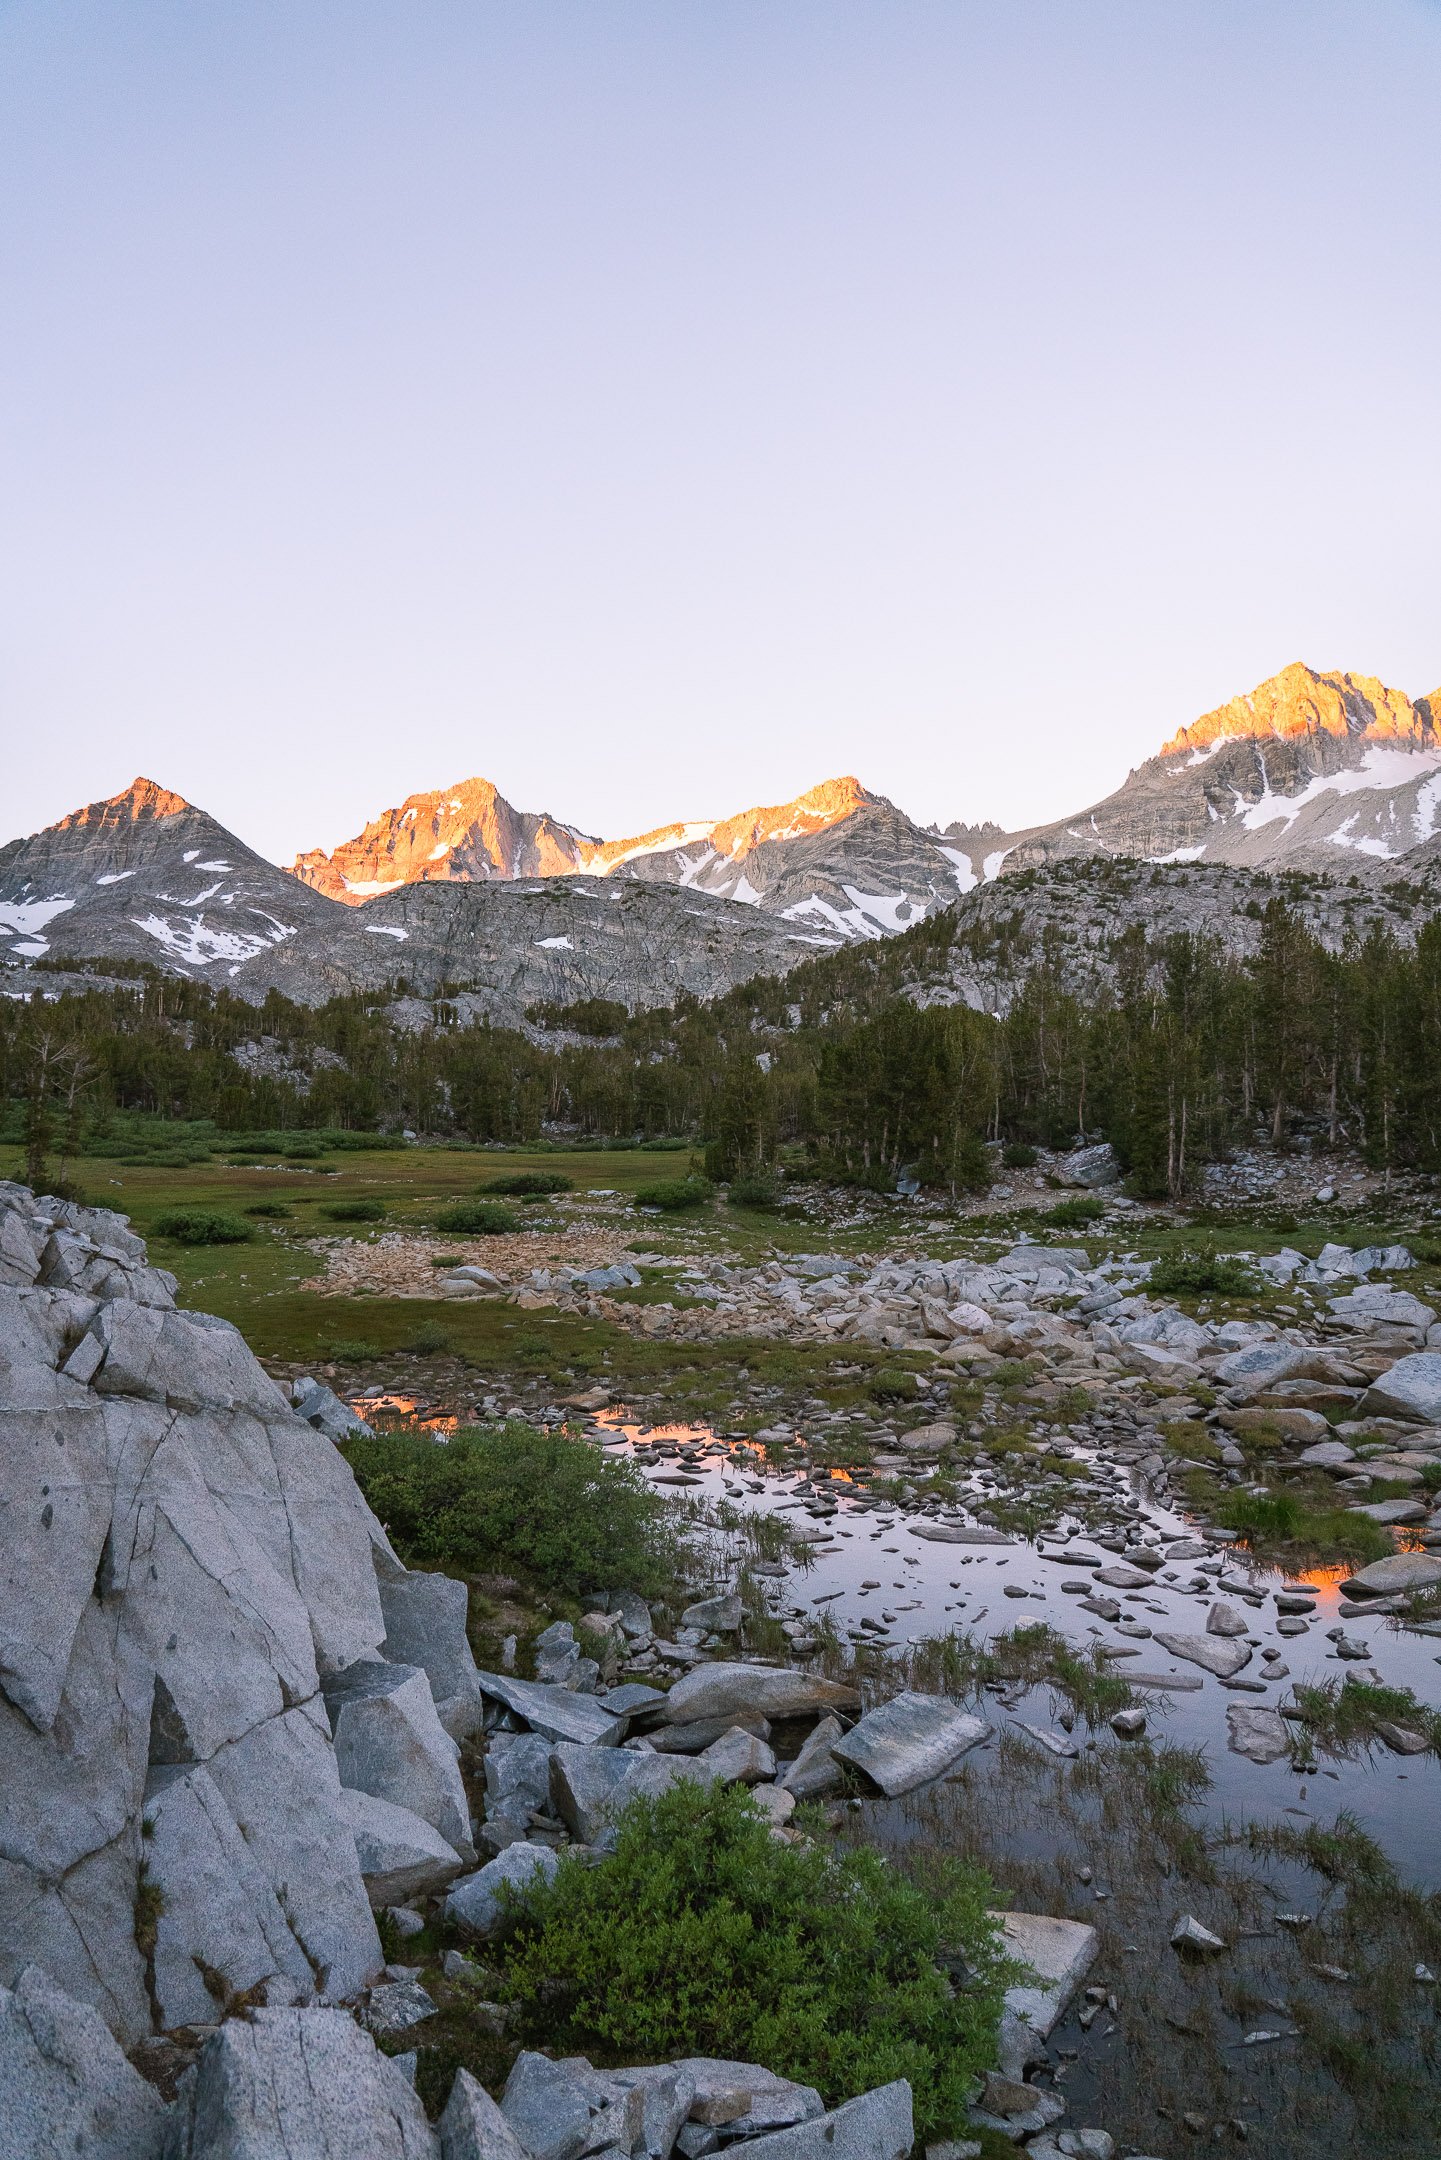
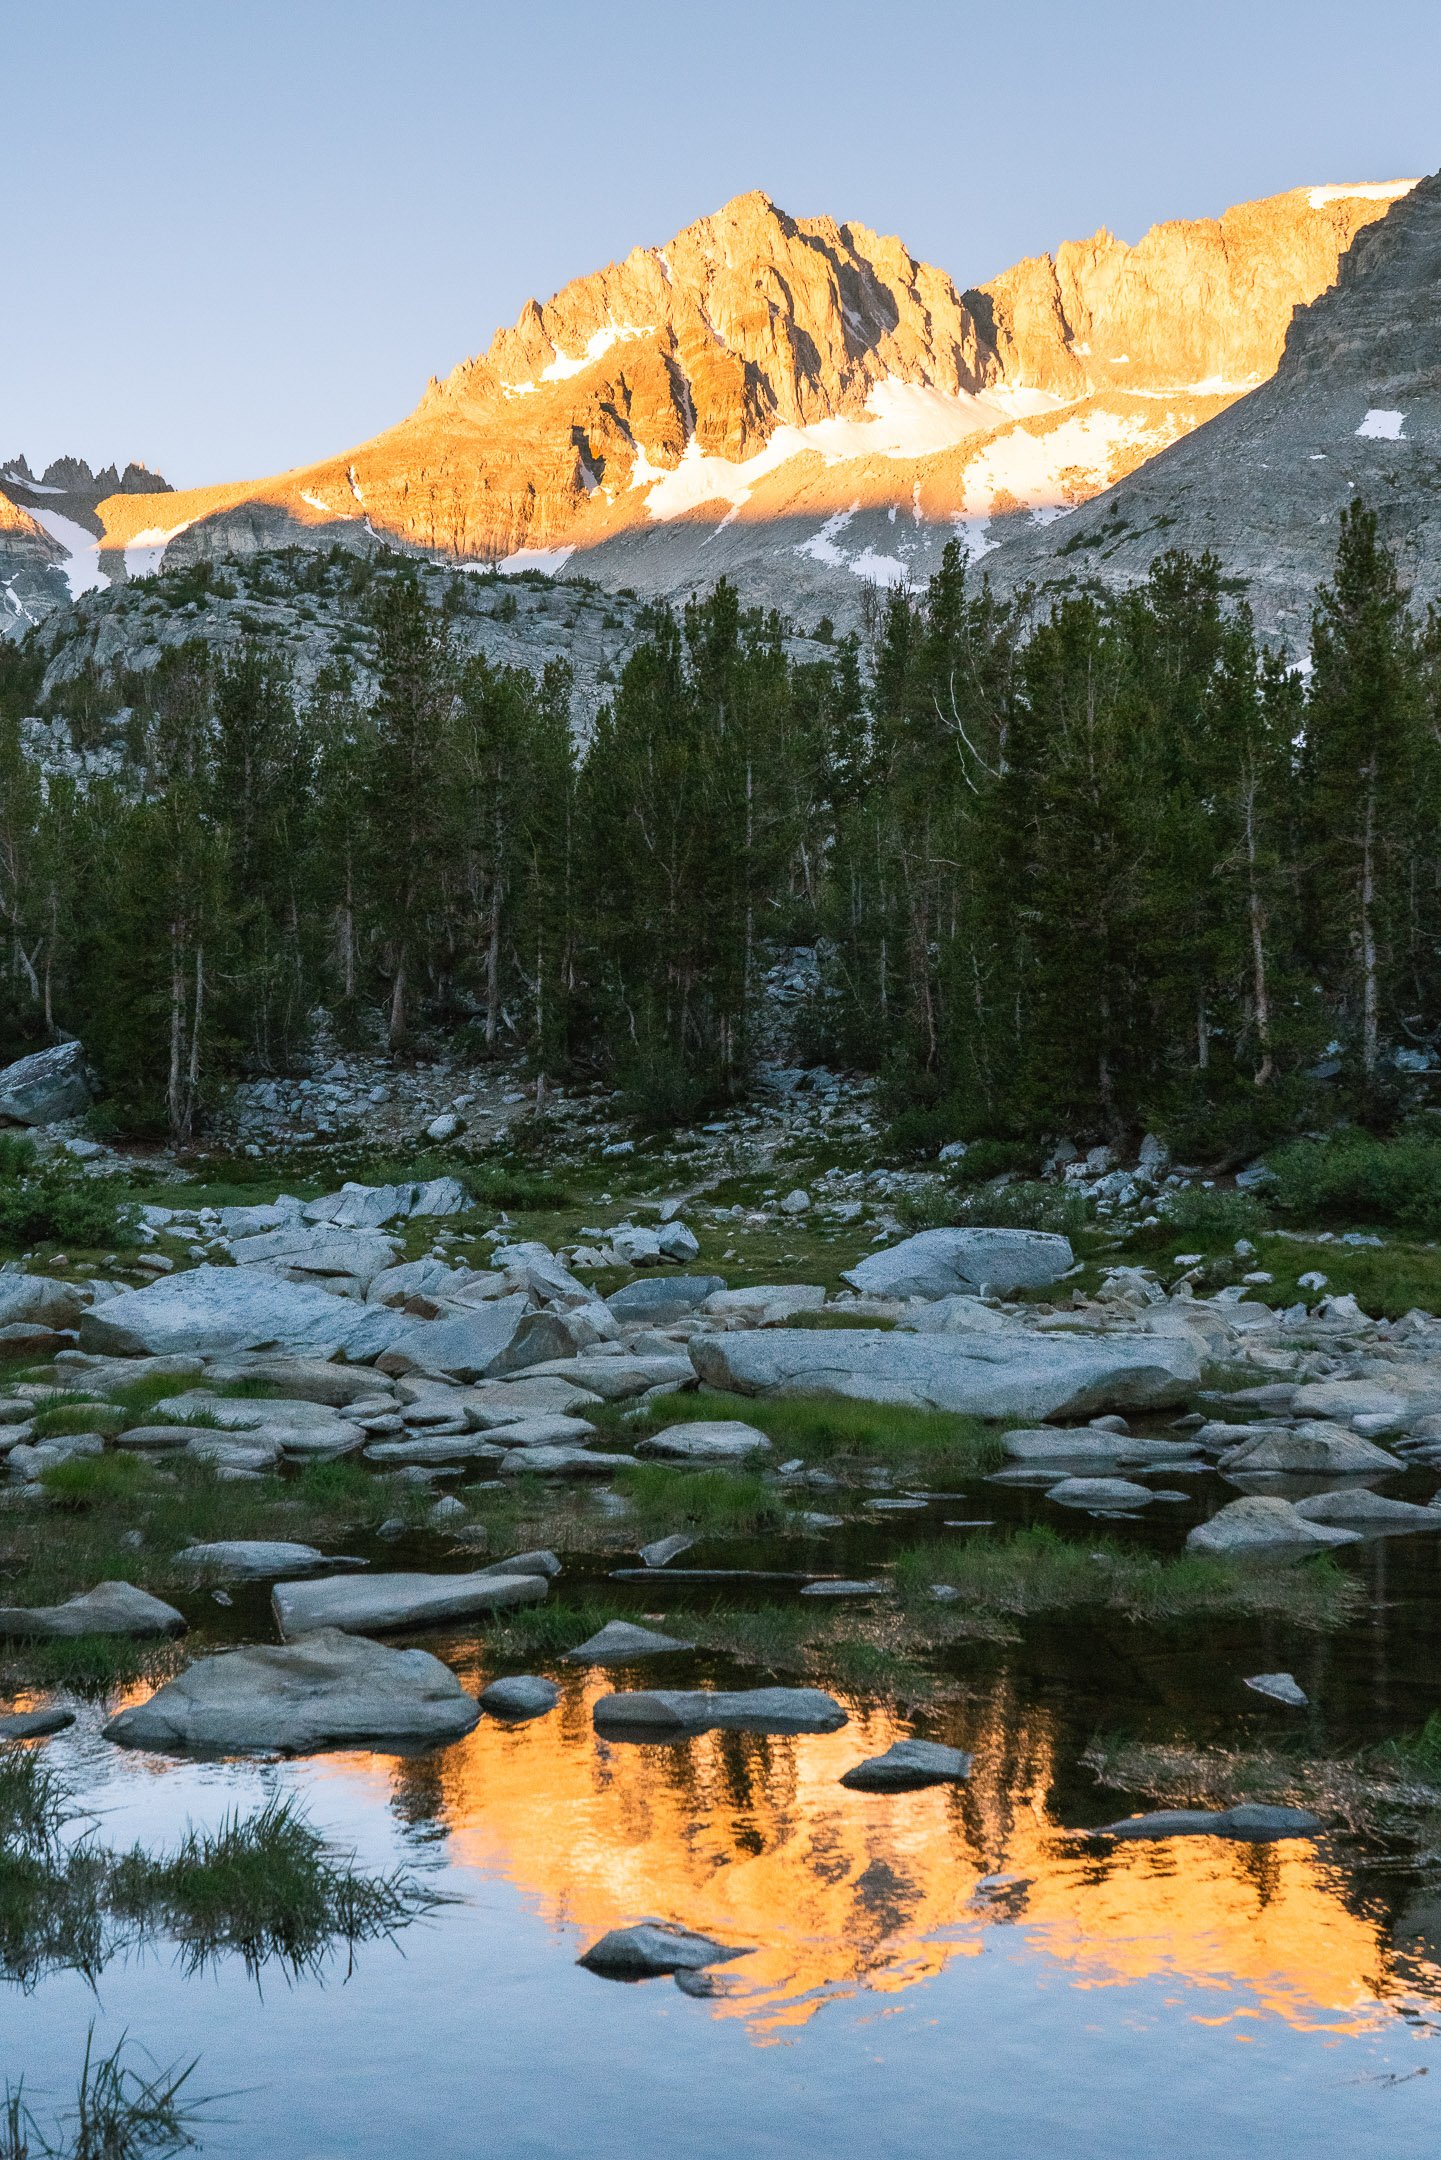
Hiking up to Morgan Pass and Gem Lakes is a really nice day hike from Chickenfoot Lake. I had a very leisurely morning watching and photographing the sunrise, eating breakfast, and chilling out while packing my bag with just the day trip essentials. Still, even with my slow morning, I beat most of the day hikers to these further reaches of trail.

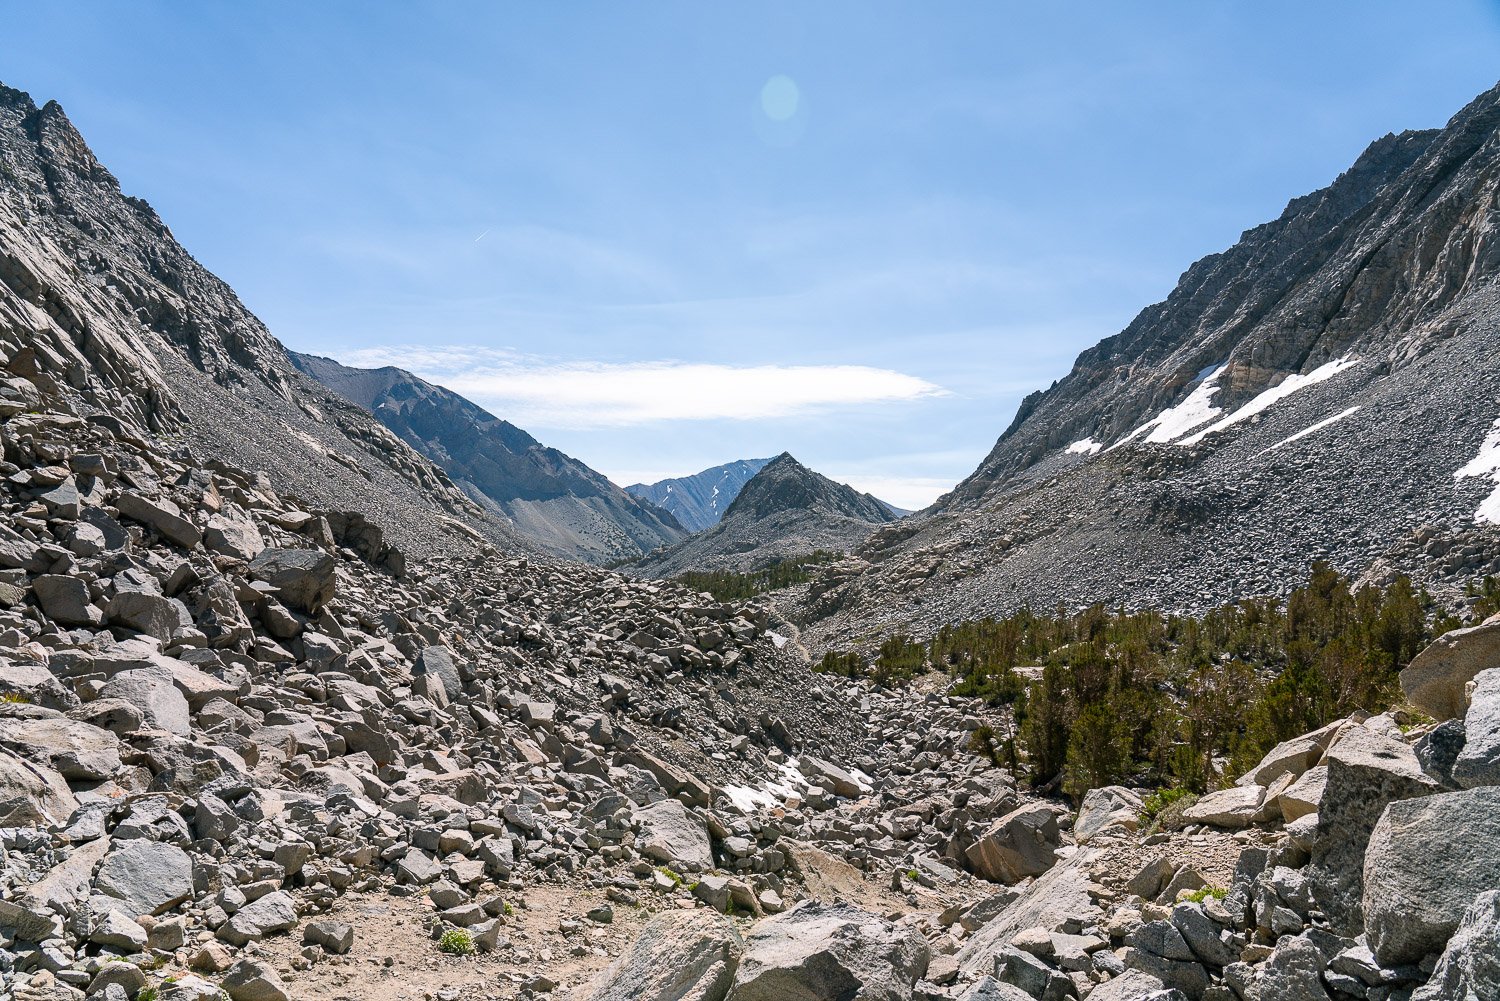
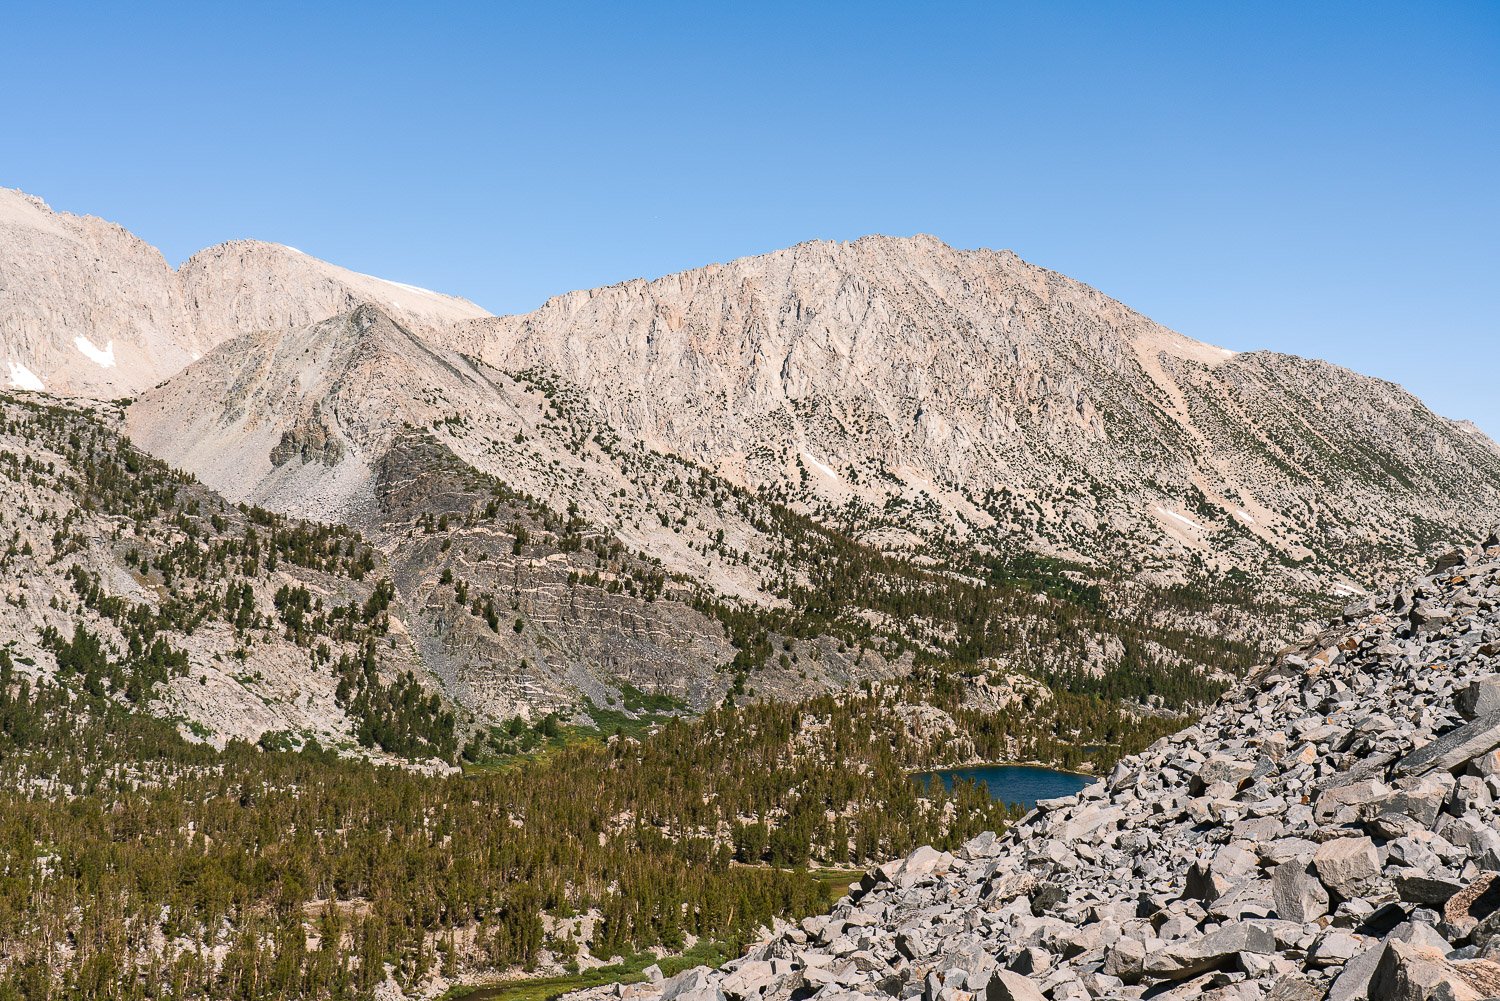
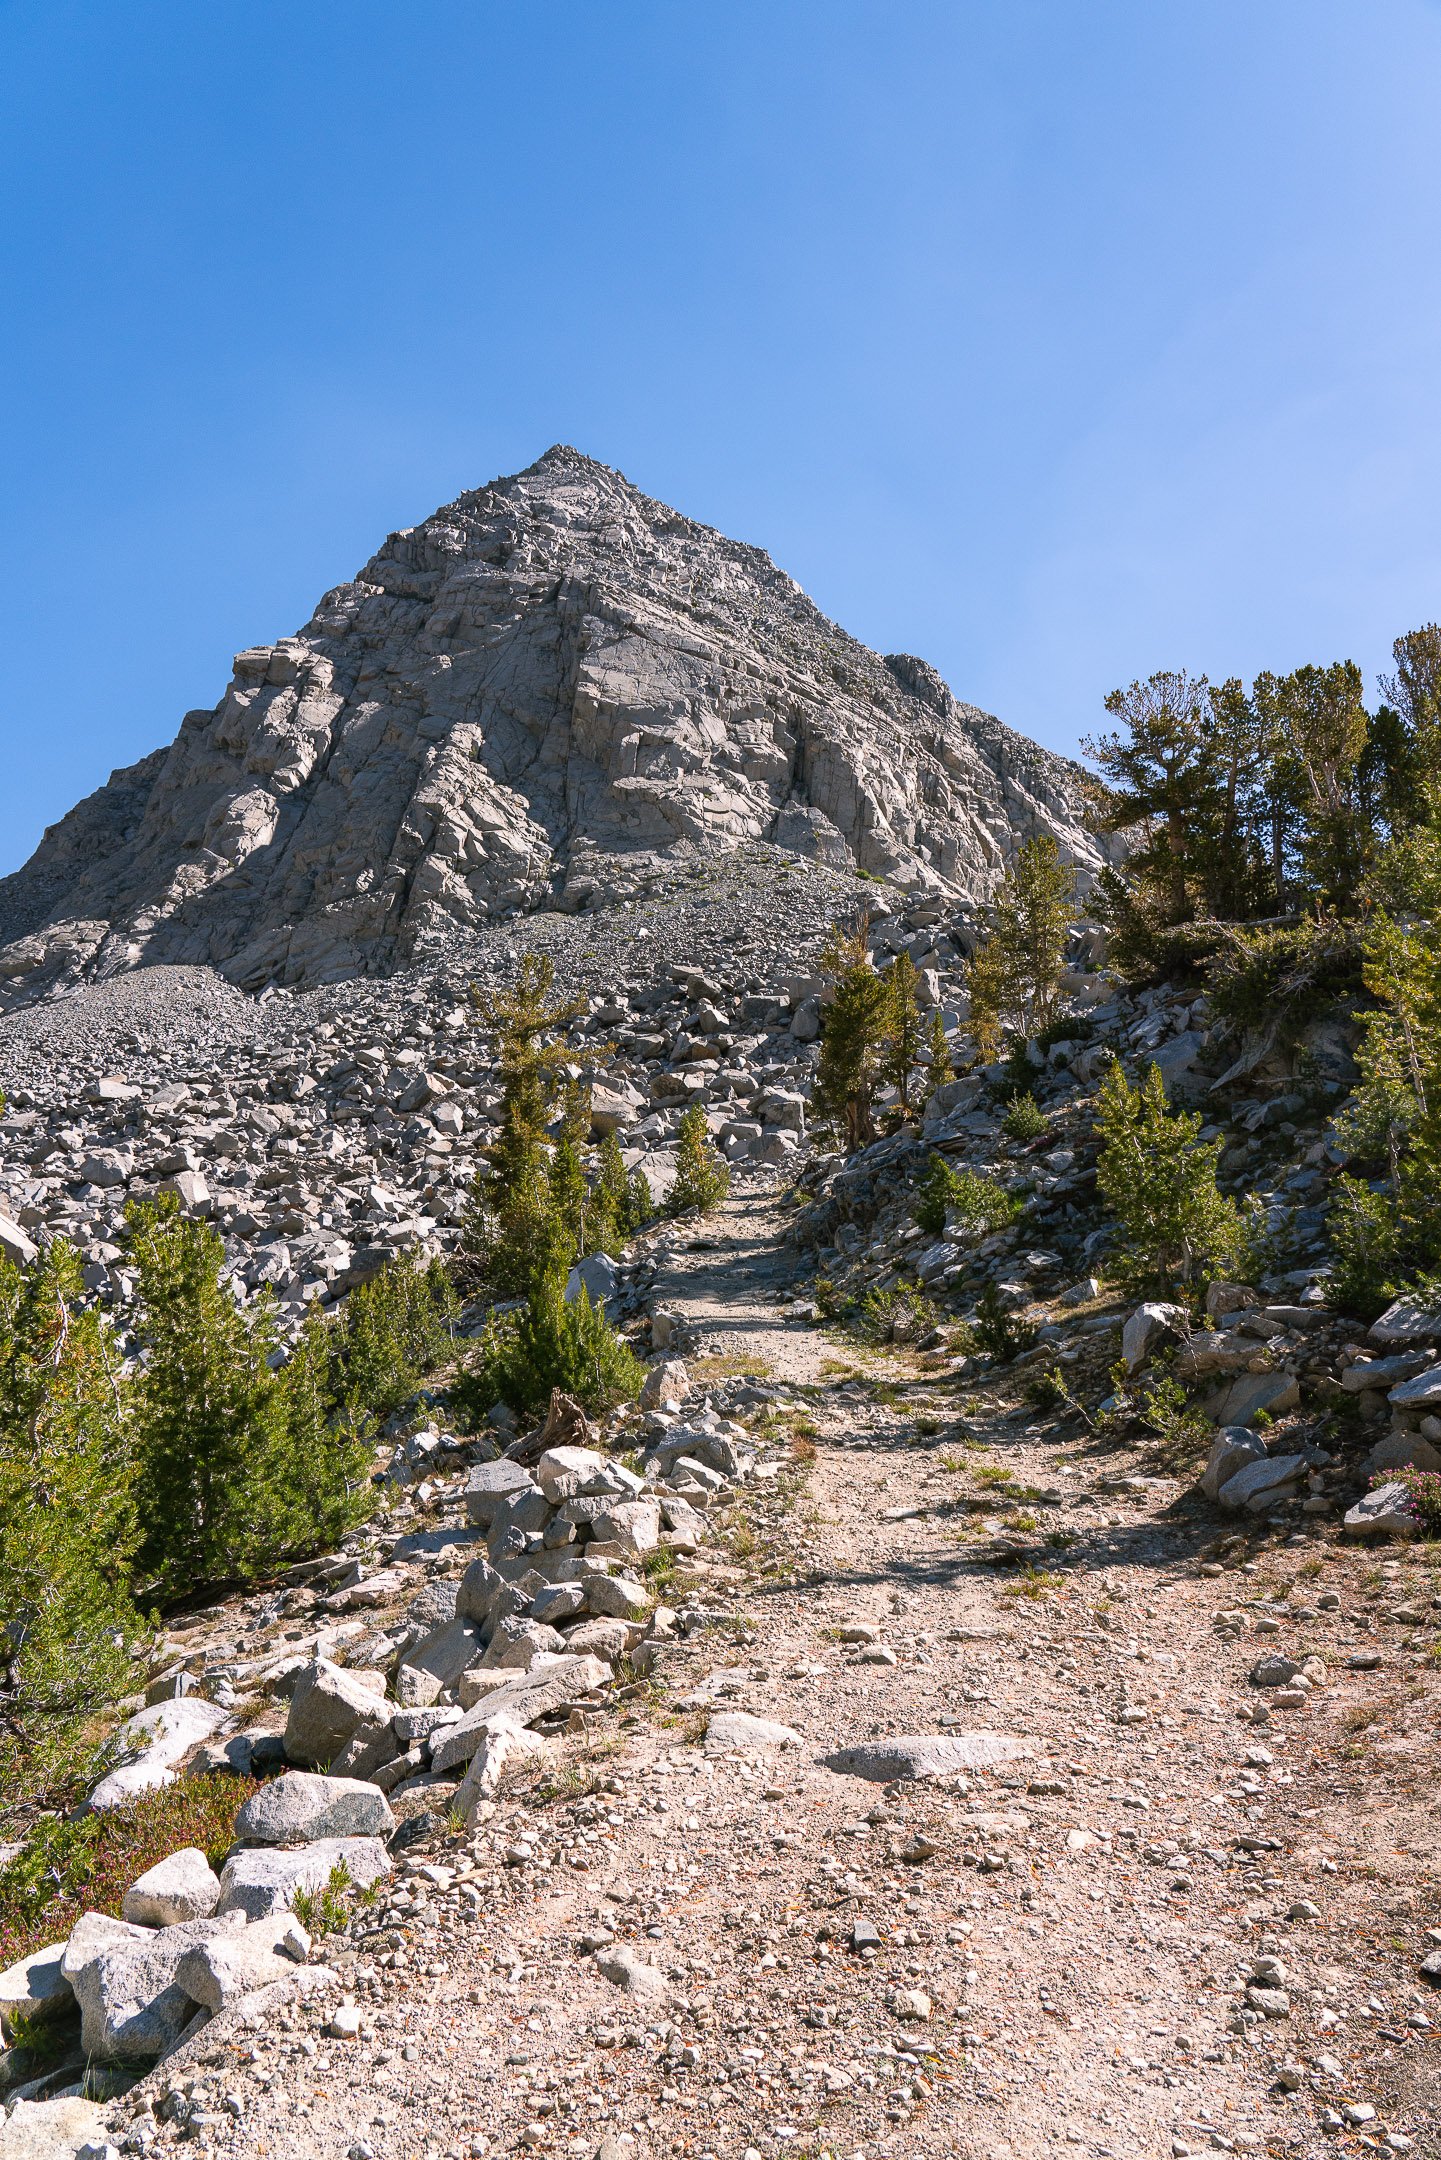
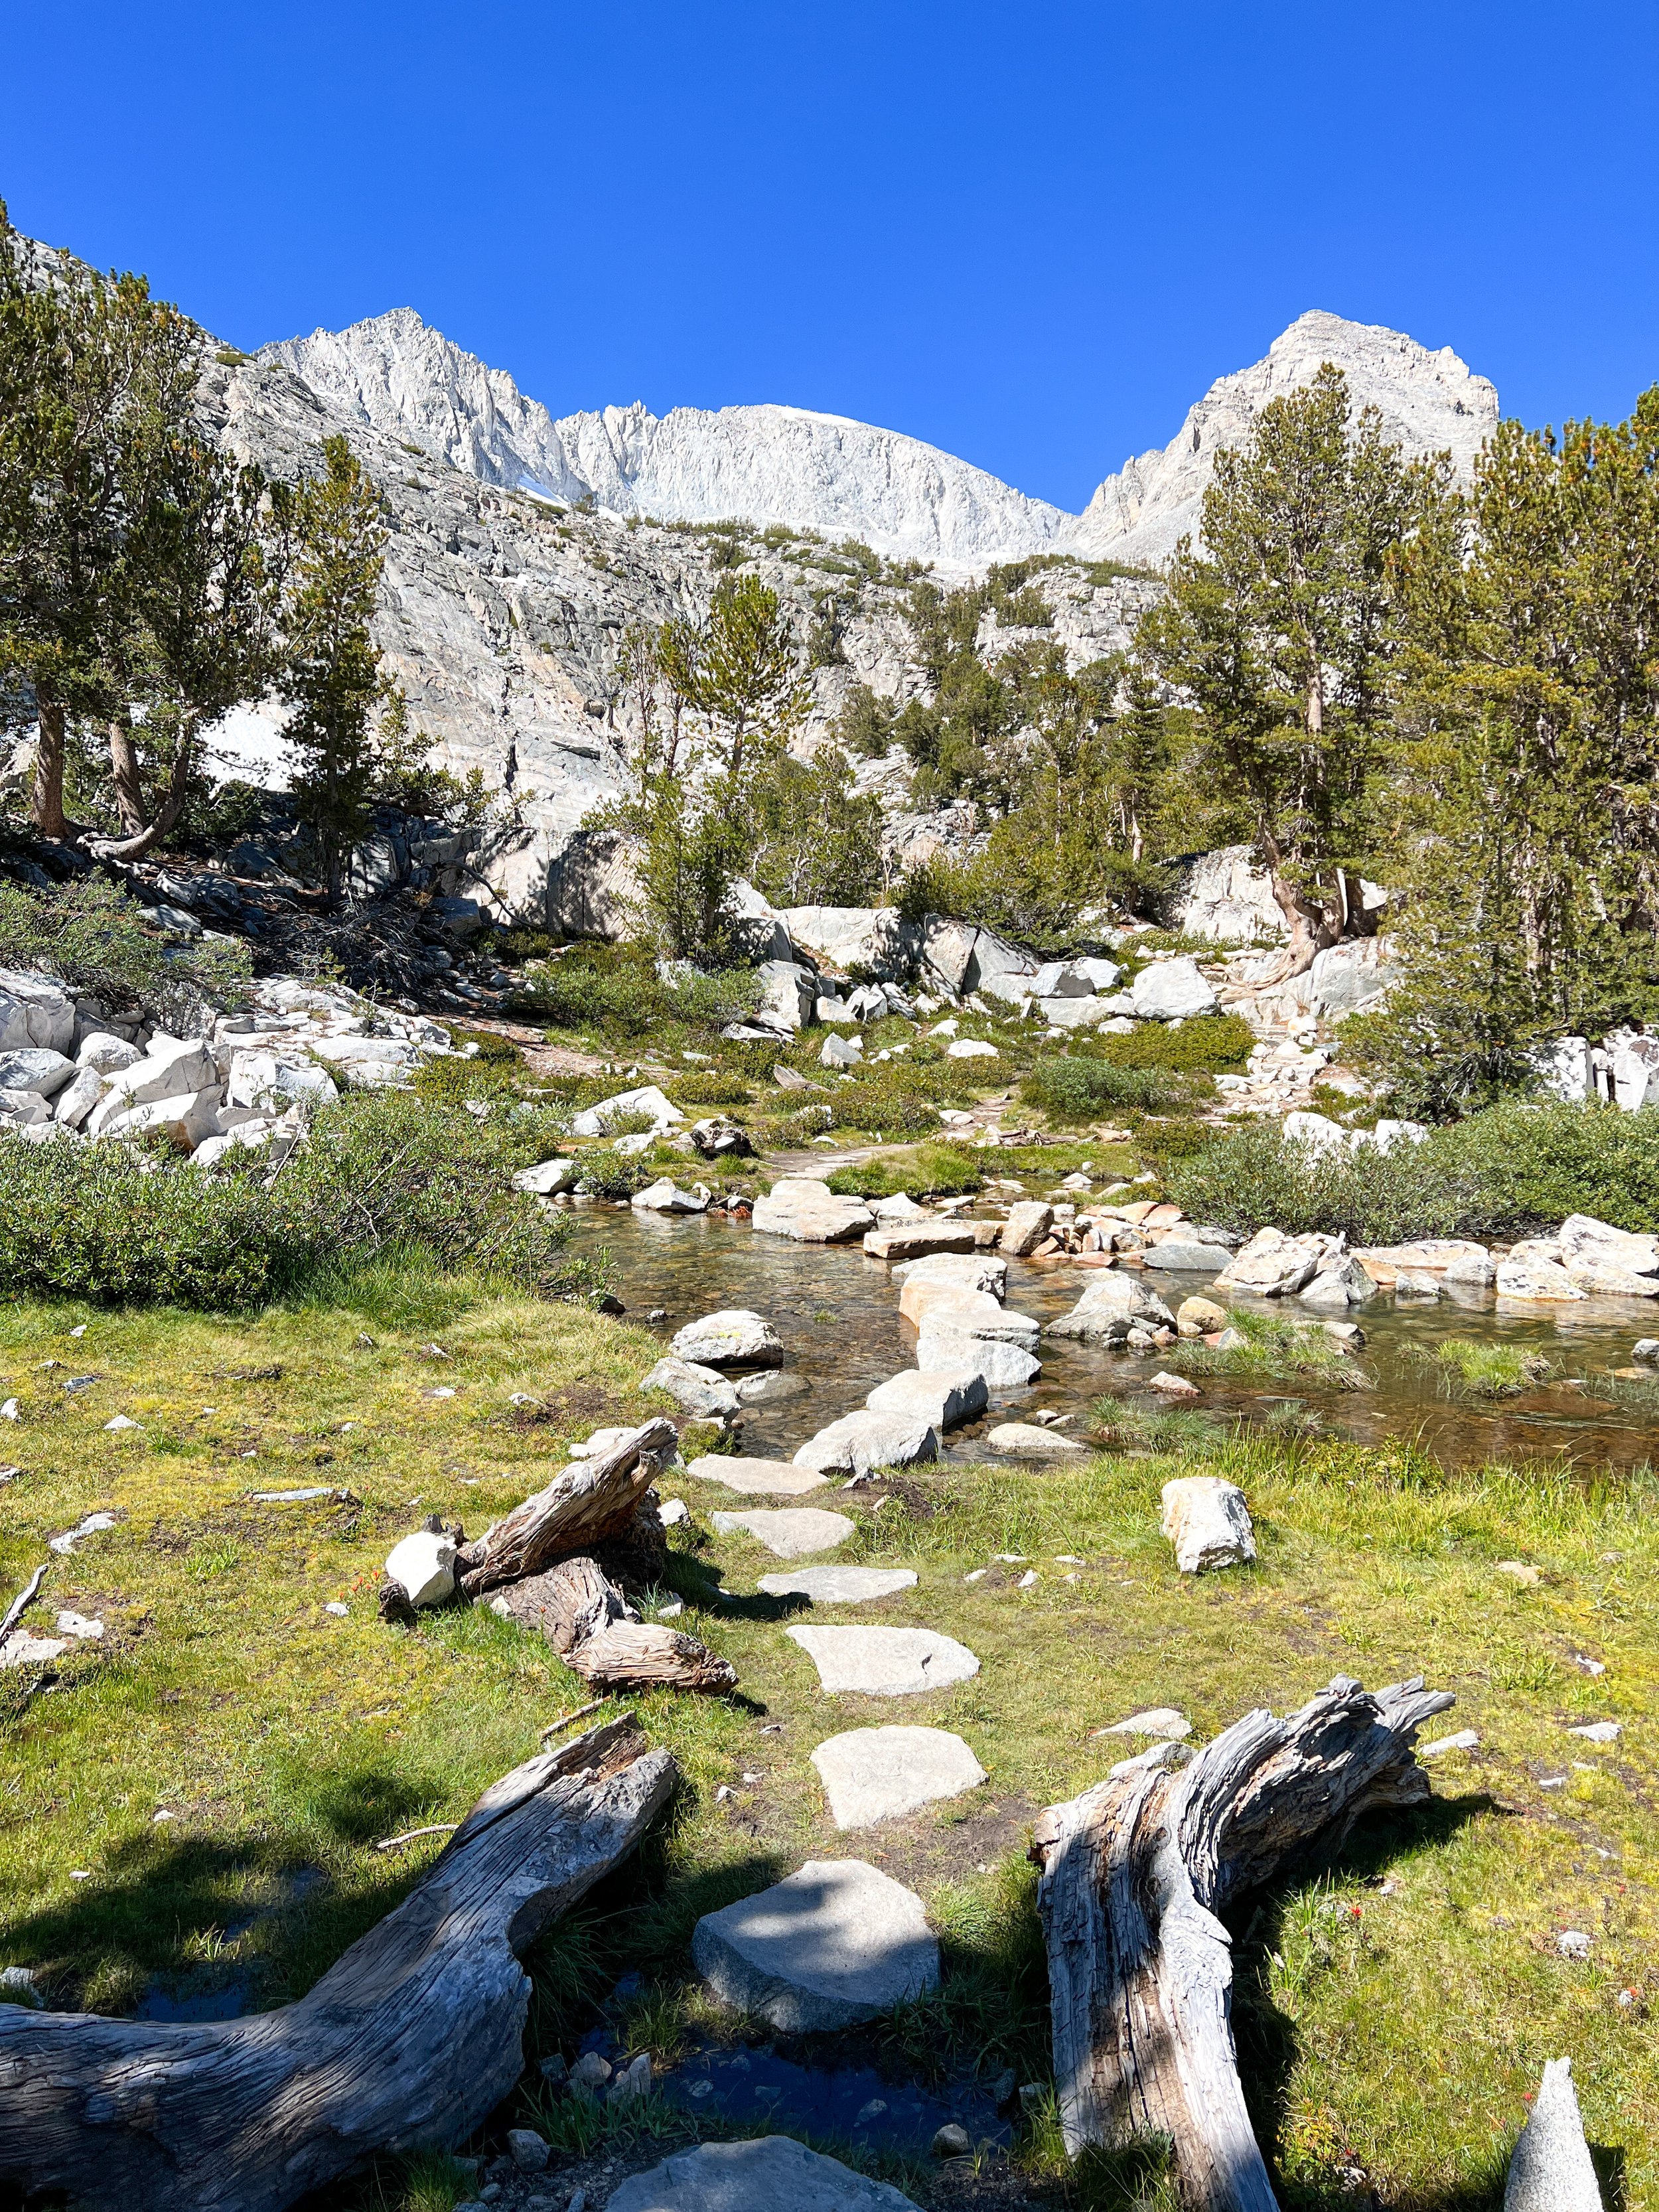
I started my hike with the uphill cardio portion, going straight for Morgan Pass. The trail is pretty mild until the junction to Gem Lakes, where the uphill really starts, switchbacking up the pass. Even though it felt hard, I reminded myself that this was probably the easiest pass in the Sierra that I have ever climbed up. It’s all relative, right? The views going up to Morgan Pass were awesome. It was nice to get a different vantage point of the mountains I was looking at 500 feet below. I was almost wishing I hiked up here for sunrise! Sadly, there is no view of Morgan Lakes from the top of the pass. And since I was on a bit of a time crunch, I opted to turn around after enjoying the pass and head down to Gem Lakes instead of descending into the Morgan Lakes basin.
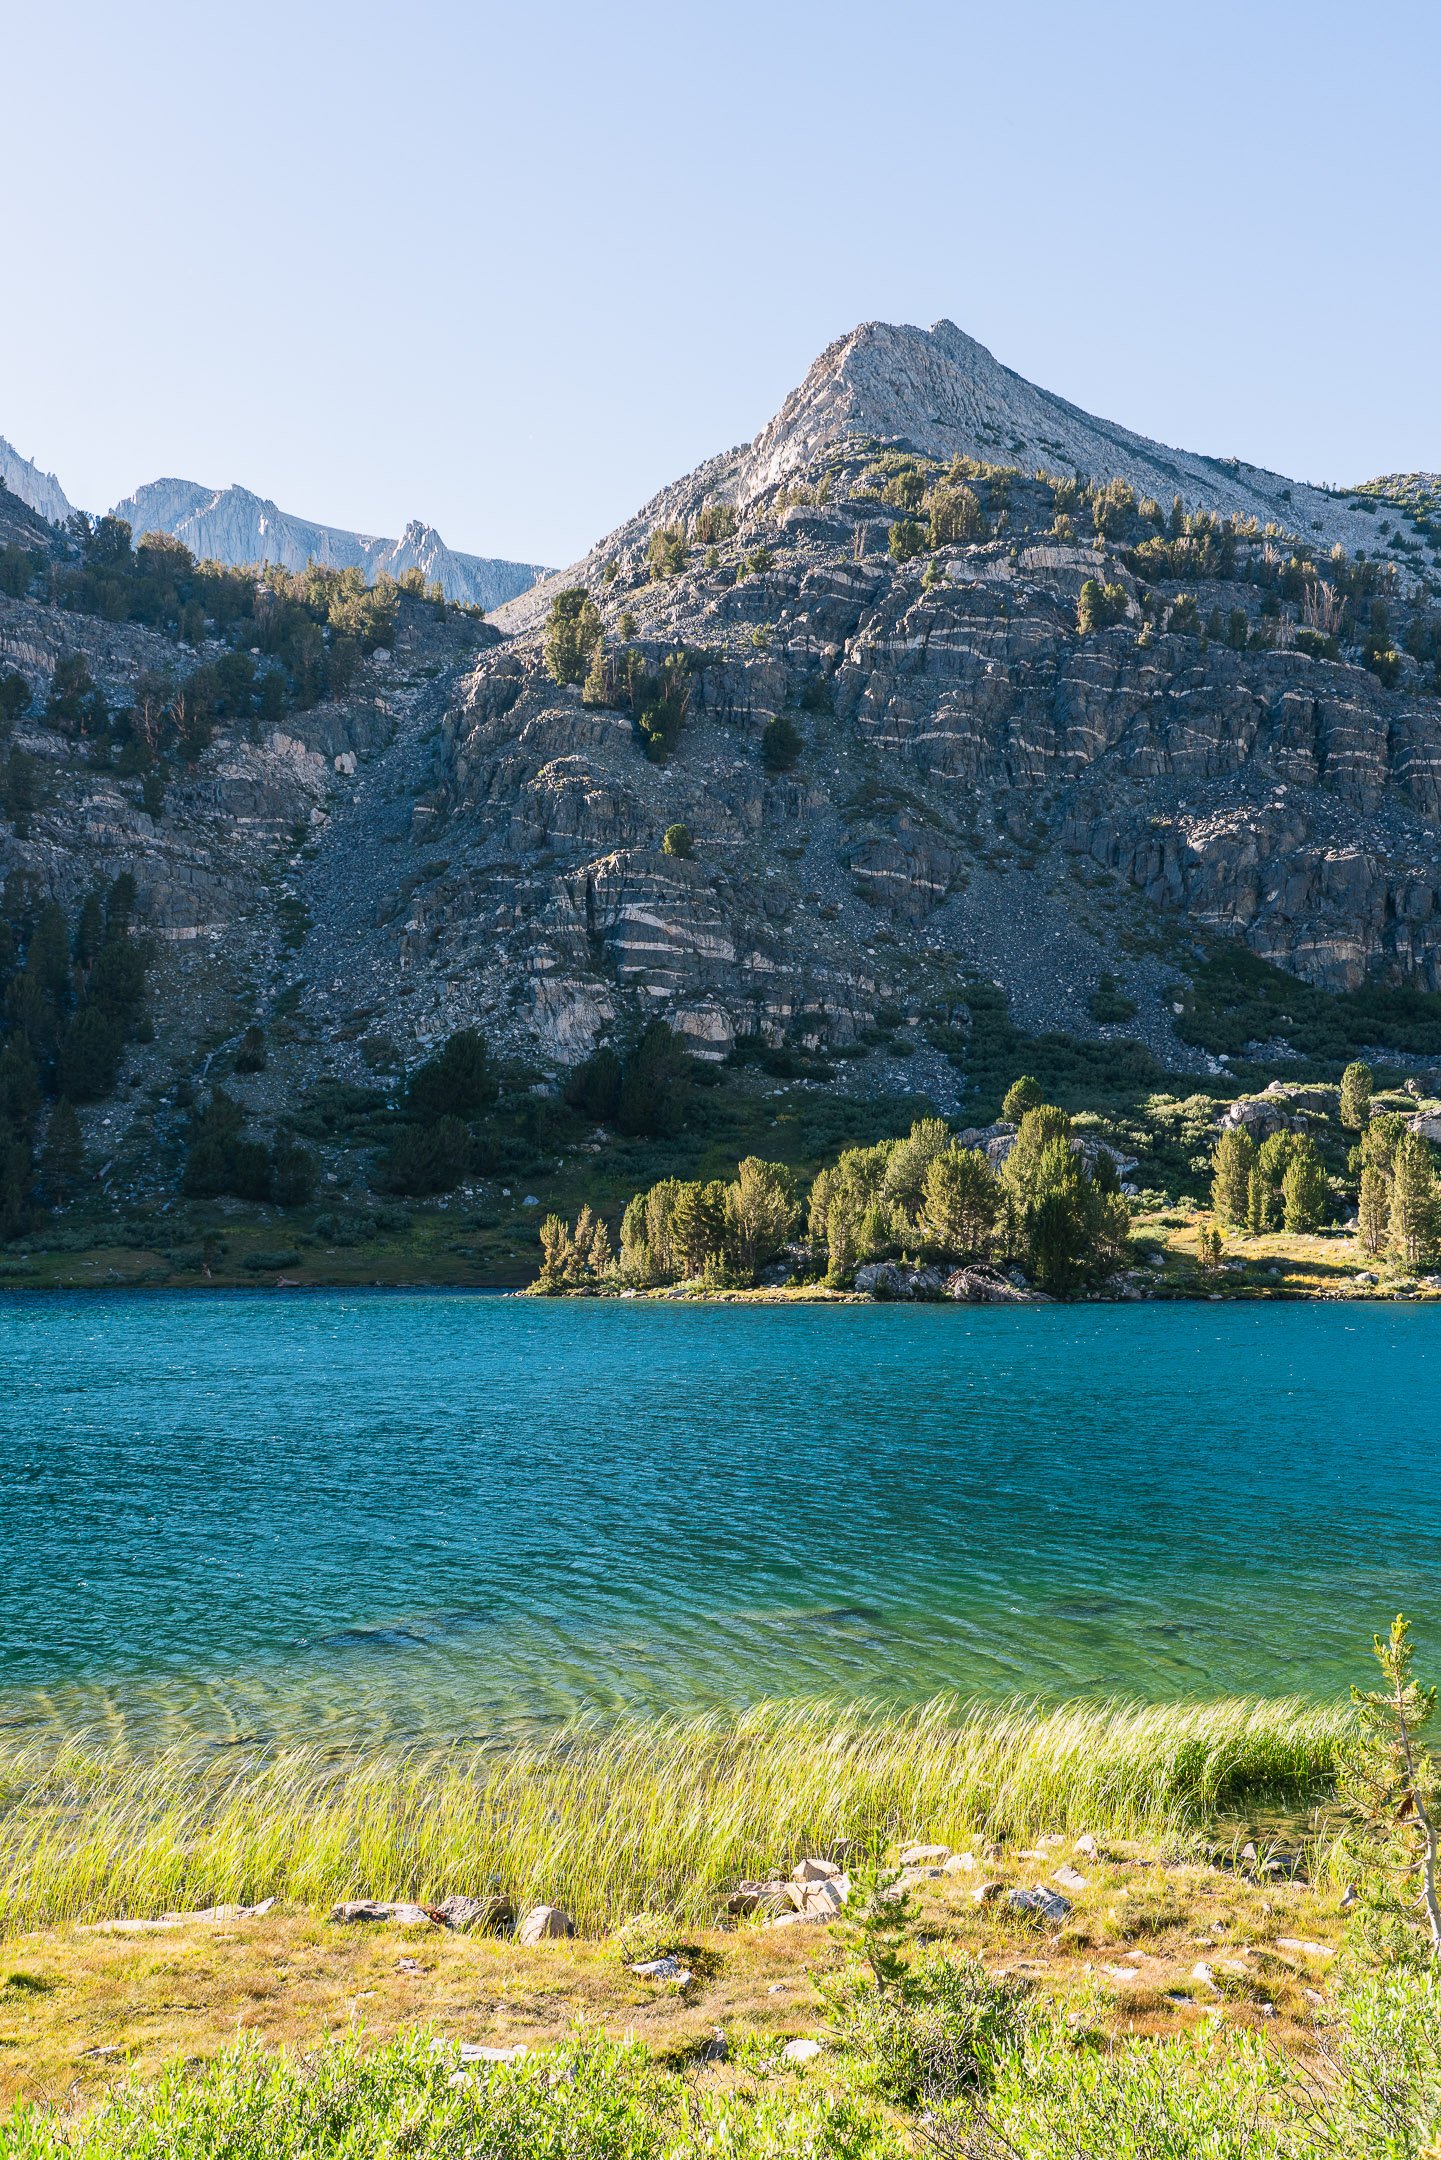
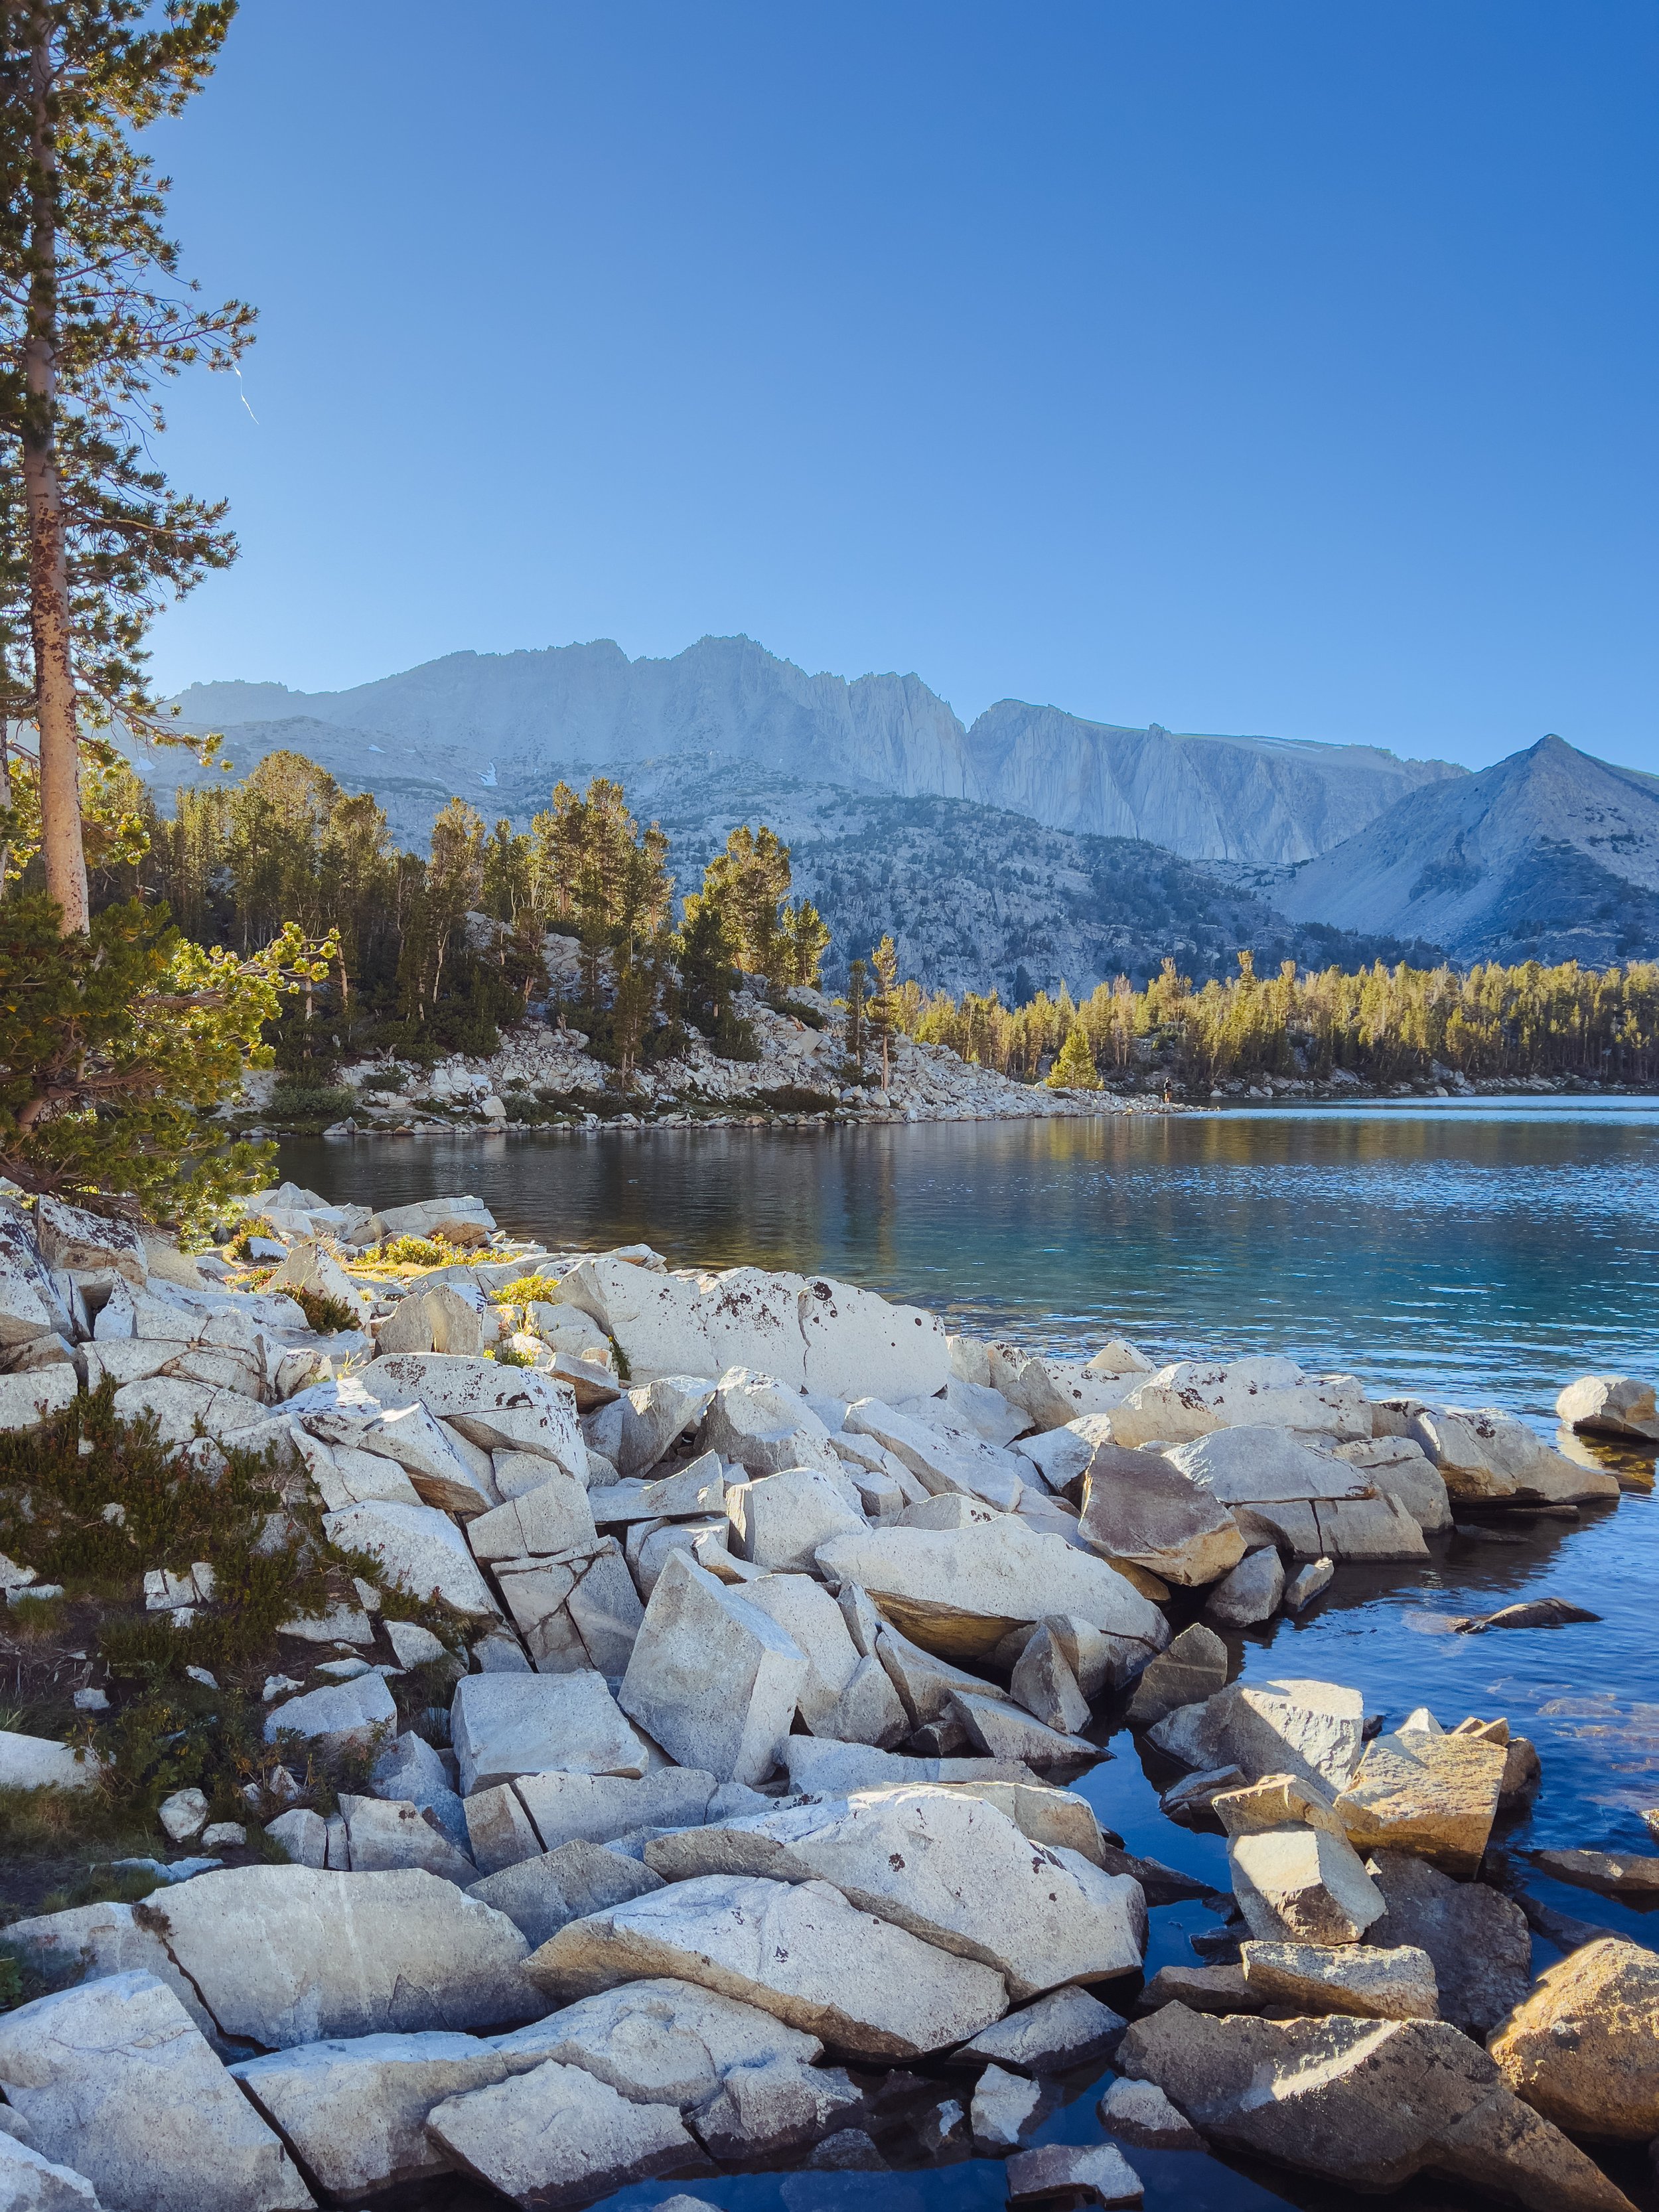
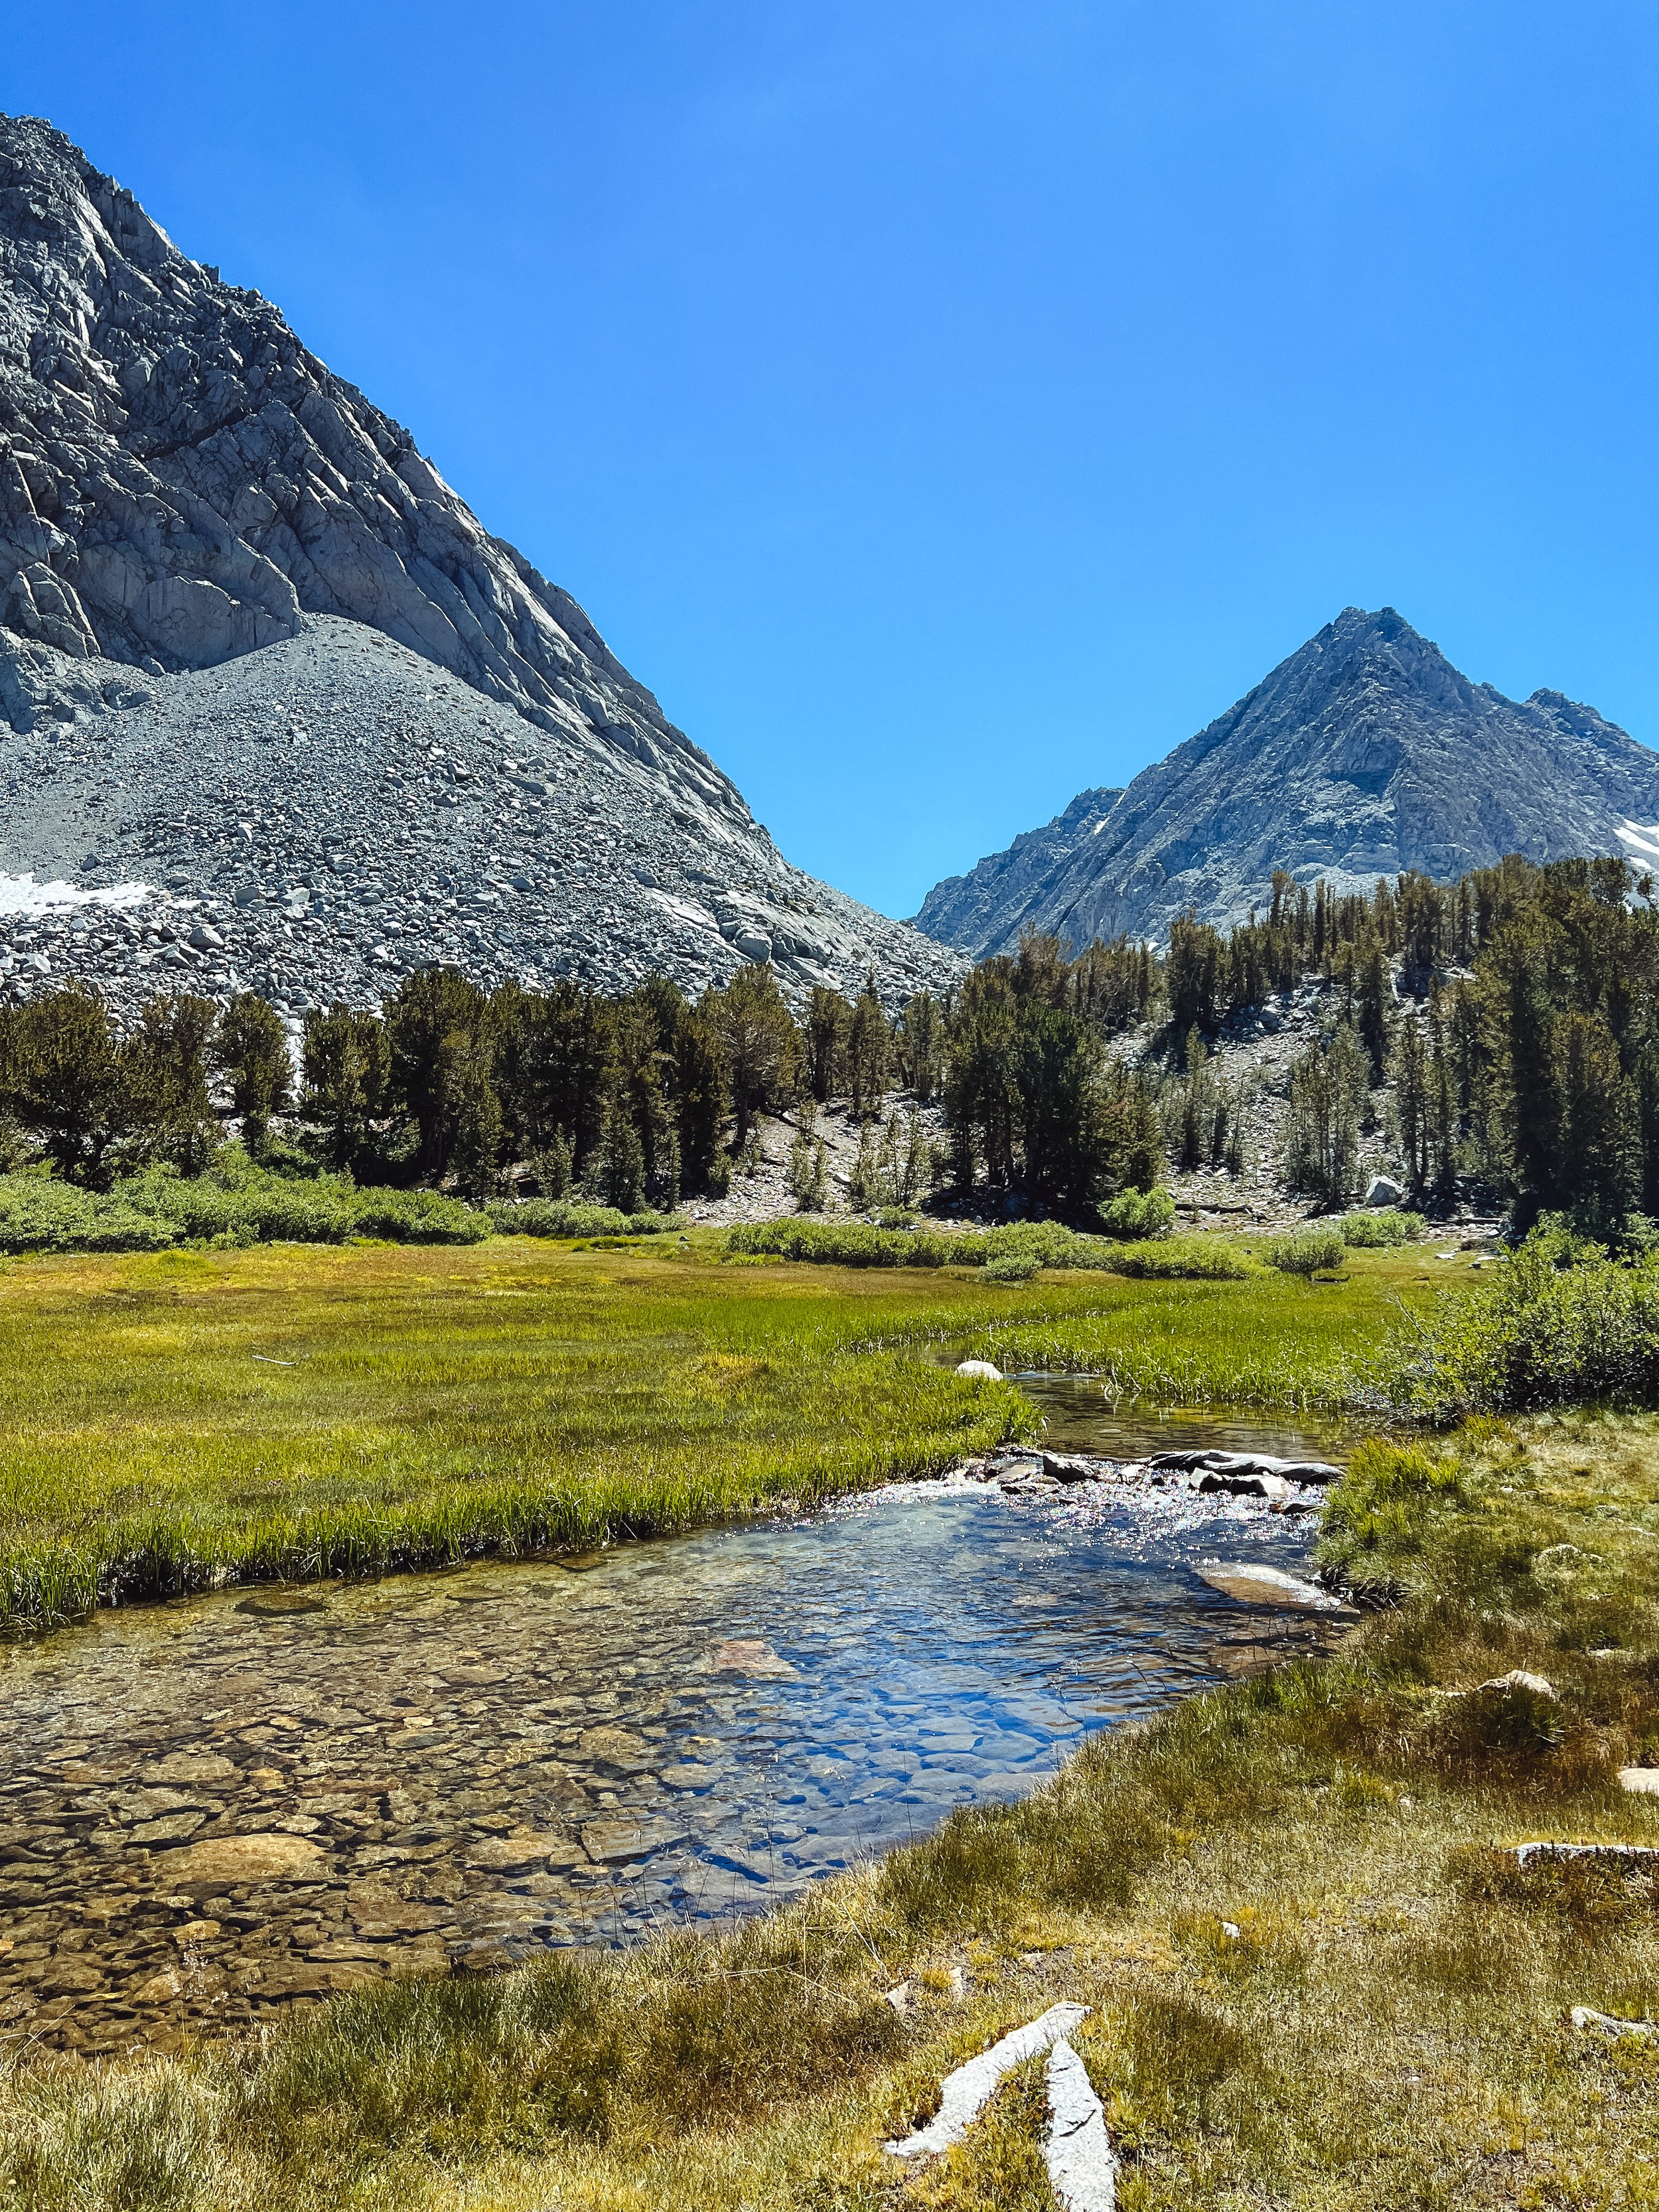
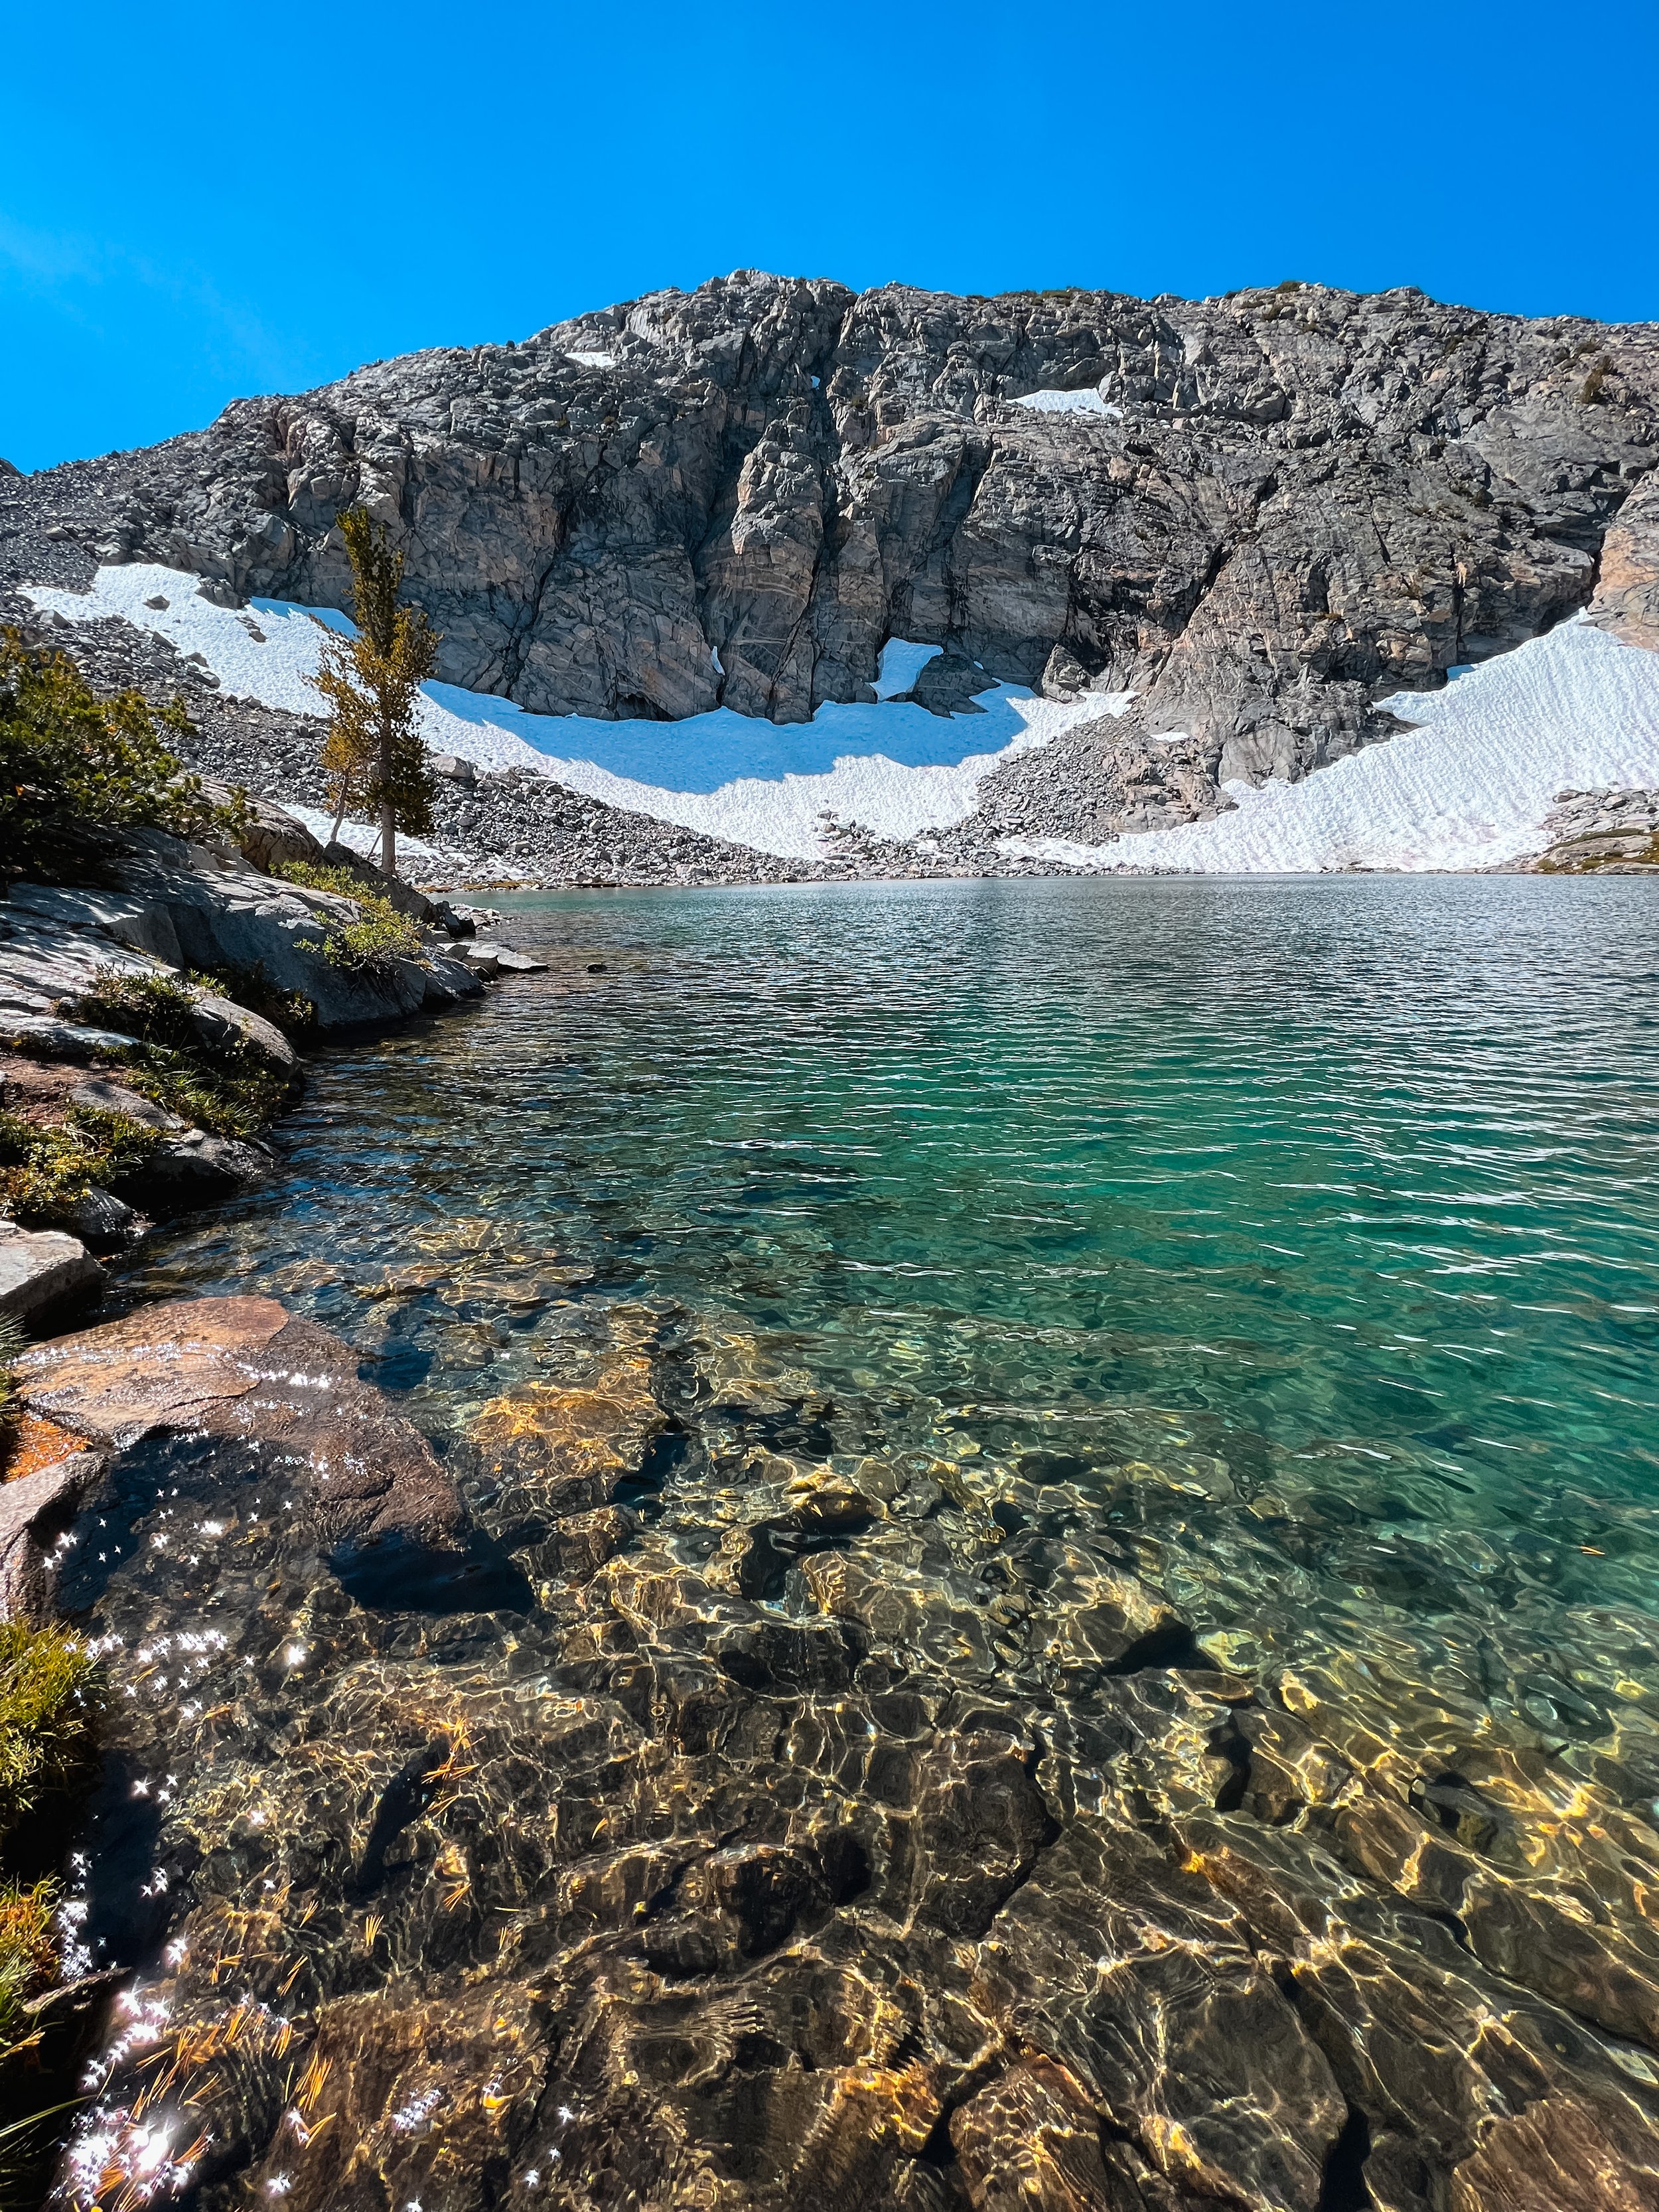
The hiking to Gem Lakes was easy peasy from the trail junction, and so pretty. The trail gets a little more narrow and crosses a few streams along the way, and you get to see some of the other Gem Lakes that make up the chain of lakes. Be aware here though, there are signs that ask you to not travel cross-country in this area due to the sensitive meadow areas. You’ll know you reached the main Gem Lake when you see the amazing clear, turquoise waters shimmering below a mountain. The trail seemingly ends right at the shore, but if you turn around, you’ll notice it goes through rocks and continues to trace the shoreline. Once I took in the initial view, I continued around and found some camping areas (more exposed than Chickenfoot Lake, and mostly on solid rock), and then settled in for a lunch break on a nice big rock overlooking the lake. I watched tons of fish swimming around in the clear waters and admired the mountain views, especially paying attention to an off-trail line that I think would be a great entry to Treasure Lakes above.
After lunch, it was time to head back to camp at Chickenfoot Lake, pack up, and hike out. Since this is an out-and-back trail, it’s the same route on the way out as it was on the way in, just in reverse.
